| -Dickie Harbour Tug by Simba Dickie | |
|
How to convert the Dickie Tug
to full proportional radio control. |
|
|
I've heard some maligning talk from
various sources about this particular 'type' of model boat... "It's not a REAL model." "You don't actually do yourself." "Doesn't help you know anything about building a model." "It's not very scale or 'out!!!" "Better to start with a scratch build." Well some of that may be true but 'horses for courses' and I feel there is a sustainable niche in the market for someone that wants to go model boating without the hassle of building a kit that may take days, weeks, months or even years to finish. It is a real model. How many semi-scale models do you know that you can buy of the self, charge the batteries and off you go?! You don't actually do yourself. Well no but I didn't build my car or telly either! Doesn't help you know anything about building a model. There's always the necessity for maintenance, even repairs and the possibility for conversion and upgrades. It's not very scale. Maybe not but who can tell 10 metres out on the water. Scale? Have a look at my first scale boat!! - ORTON (click here). Better to start with a scratch build. As above, how many of us built our own houses?! On top of that: 1.These tugs are going for around £50-60 GDP on www.eBay.co.uk, what can you build for that? 2. It comes with 40MHz 3 channel radio - not very good radio but it does work! 3. The boat comes with a novel ballasting system, it uses water! 4. Has a factory fitted drain cock for the hull. 5. How many of your boats can you fully dismantle with a screwdriver? I personally bought this boat as I had just sold a couple of boats and didn't have anything ready for sea. I purchased this boat and was able to try it out the very next day after charging the battery! |
|
| The conversion. | |
 |
As I say, the purpose of this
page is to convert the boat to full proportional radio control, the reason
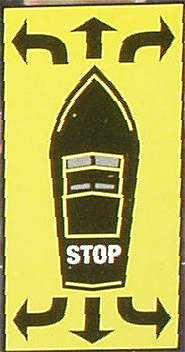
being that the supplied radio is of limited usefulness in that it's "Bang -
bang" control i.e. Stop - Full Ahead - Stop - Full Astern &
Straight(ish) - Full Port - Straight - Full Starboard. To convert the boat, you need to strip it down, completely remove the radio and rudder 'servo', install 2 channel radio, Electronic Speed Control, battery & all associated wiring. |
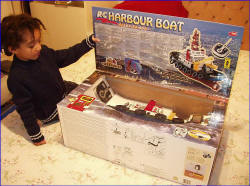 |
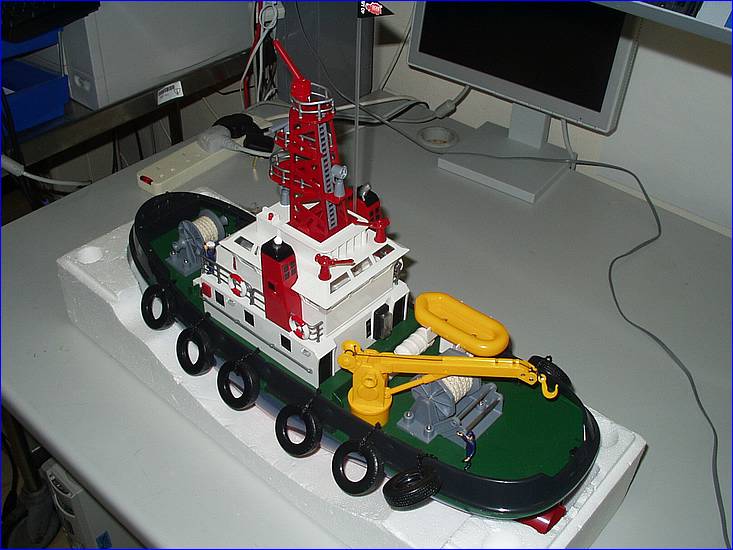
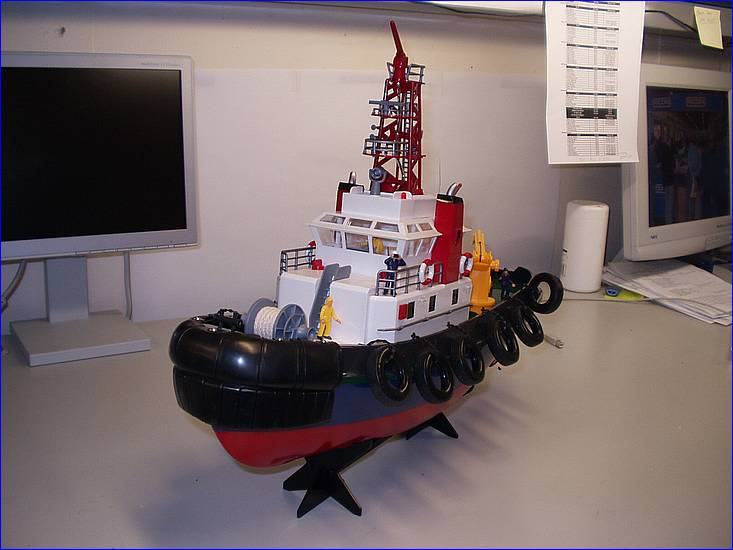
As you can see, it's quite a
big model........ on my daughter is quite small, take your pick! She measures 550 x 200 x 390. |
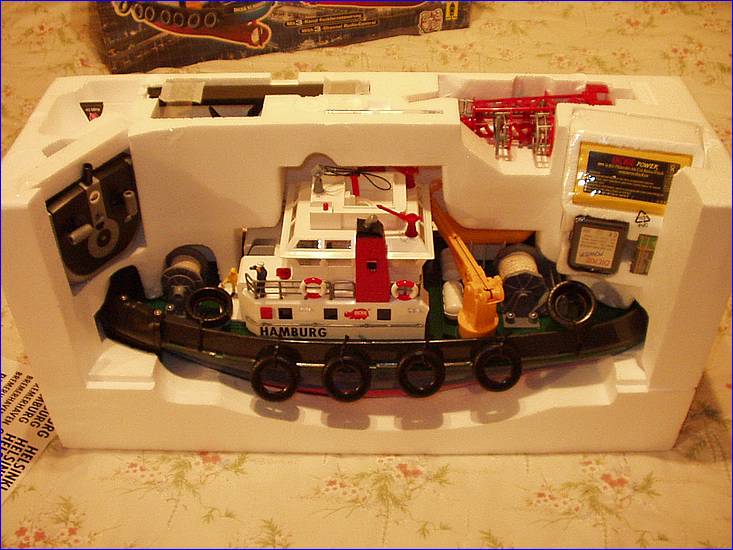 |
It's VERY well packed and everything is there including a pictorial 'Noddy' guide to get you and the boat ready for water. |
 |
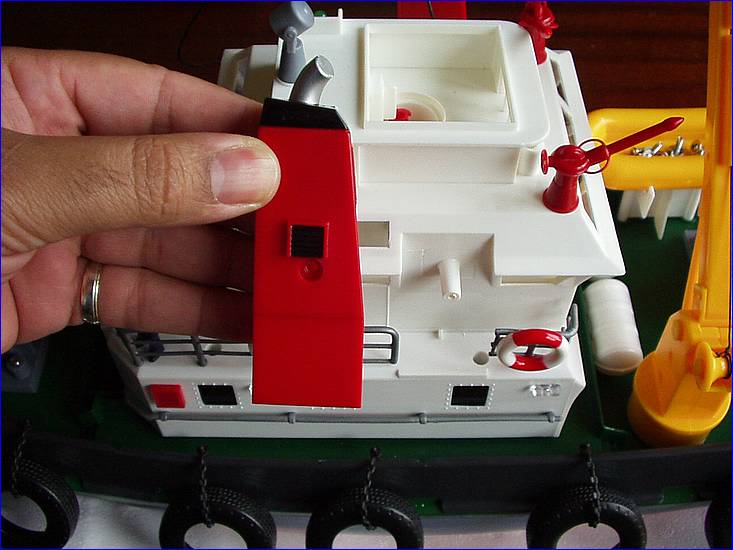
The boat has a sort of 'KORT
NOZZLE' drive, I 'sort of' because the propeller is not a tight fit inside
the nozzle so not very efficient but it is better than a normal rudder
behind the prop. "Dickie" - someone didn't do their international translation research very well did they..... or place the name label very straight either! |
 |
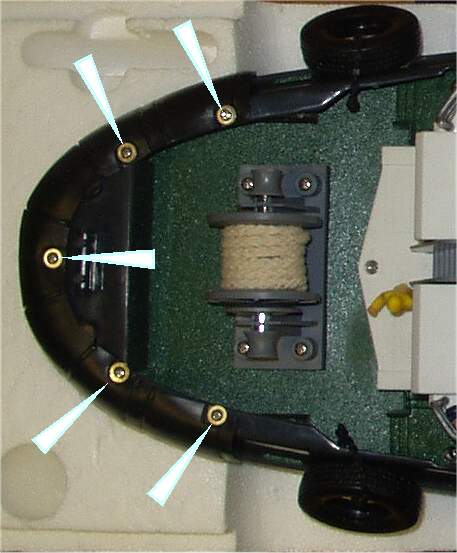
A farley unique system in the Dickie is the water ballast system. These two mesh guarded ports in the underside allow water in to fill a compartment within the hull to ballast the boat down to it's waterline - went you lift the boat out of the water, it all drains out again leaving you a nice light boat to take home - clever huh! It also doubles up as the inlet for the water squirter. |
|
|
|
|
To be far to the manufacture,
I tried the boat "as is" to see what she's like. I plugged the charger in
and left that in over night and assembled the other bits and pieces, Total assembly time - 10 minutes!!! On the water she runs very well, with a slight bias to starboard. She heels over quite considerably which is alarming at first but you soon get used to it. She shipped no water at all during the sea trials. The squirter works Ok but nothing spectacular. The squirter seems a very heavy drain on the batteries the boat noticeably slows down whilst in use!. The limitations or the radio were immediately apparent and takes a lot of forethought to get the tug to go in the direction you want it to. The motor and coupling were also quite noisy and therefore the run time was a little disappointing, less than 15 minutes. The water ballast system works well. But 'it does exactly what it says on the box', can't say fairer than that! |
|
| REWORKING the DICKIE Tug | |
|
|
Back home on the workbench -
out come the screwdriver, a Posidrive No 0 & 1 Remove the 5 screws holding down the rubber bow fender. ( Keep these screws with the fender. ) |
 |
Remove the two smoke
stacks/funnels to reveal two screws. Remove these two screws holding down the wheel house. |
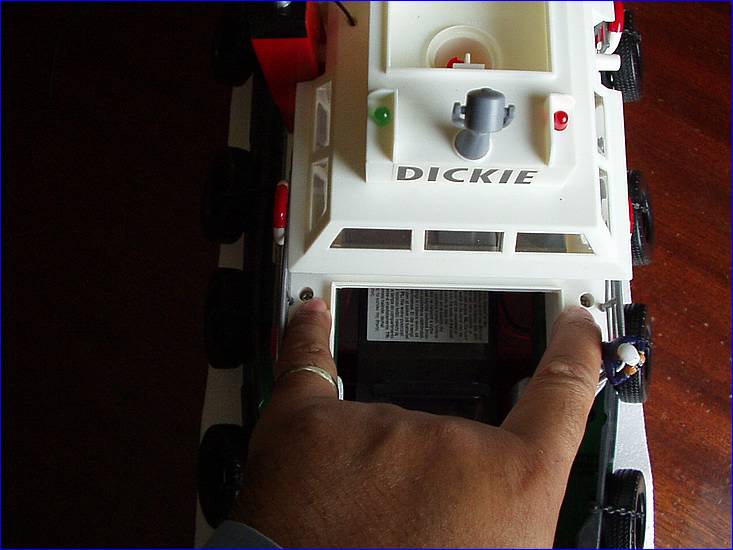 |
Two more screws holding down the wheel house are found under the battery hatch. |
 |
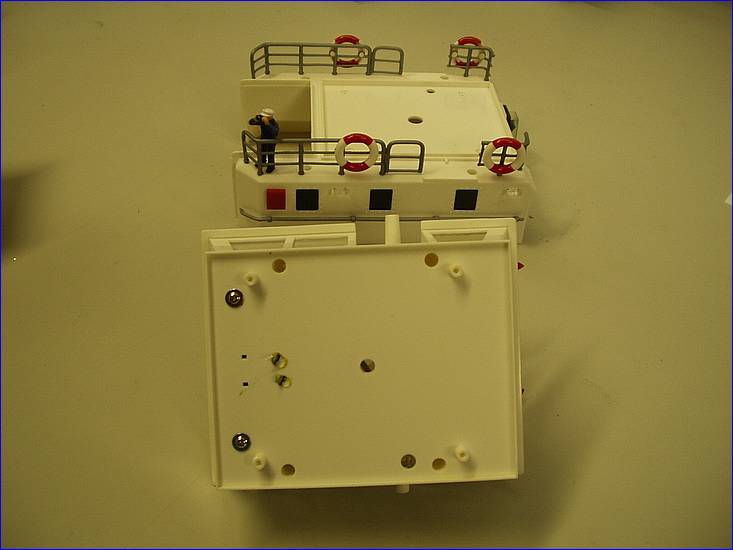
The wheelhouse should now come
adrift. That see-through margarine tub is the radio, that's all coming out! |
 |
You can be very careful here and label everything up.... but there's no need because you are going to cut ALL these wires anyway! |
 Next
remove the 10 screws holding down the deck. Next
remove the 10 screws holding down the deck.The lifeboat will have to be removed to get at one of the screws. Again keep the 2 screws with the lifeboat and the deck screws with the deck - believe me it's easier this way! |
|
 |
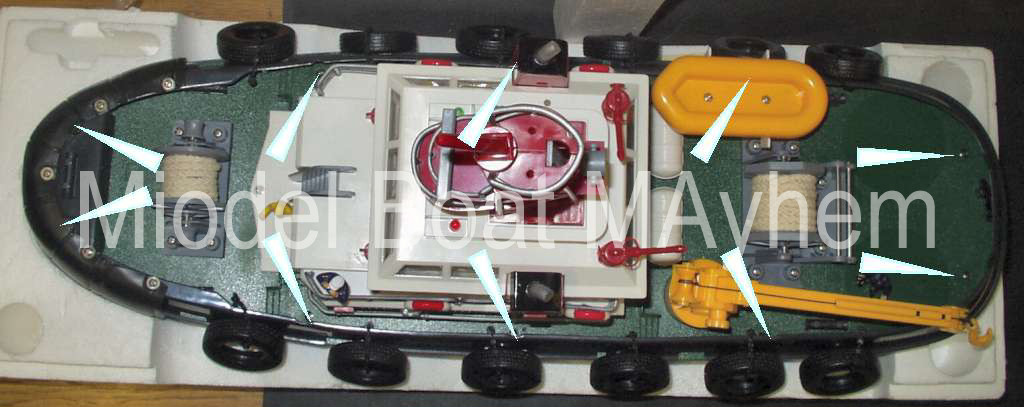
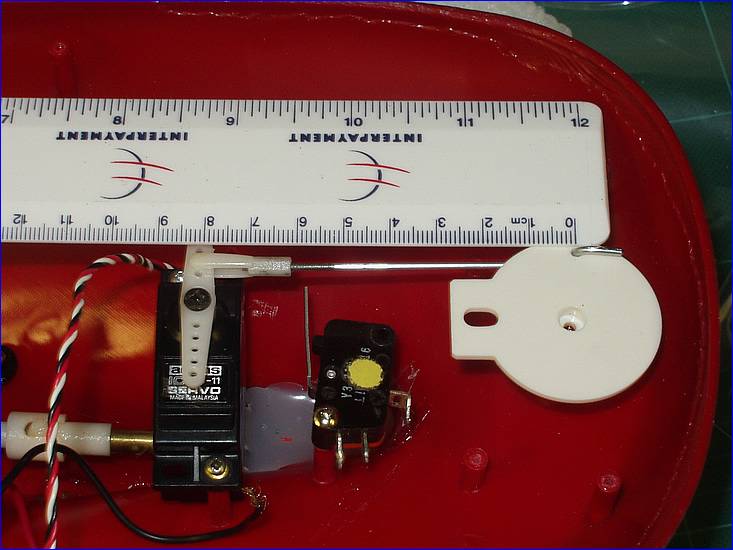
The deck can now be lifted up
to reveal the guts of the boat. That's the biggest rudder / server system I've ever seen! The squirter pump is osculating piston arrangement. |
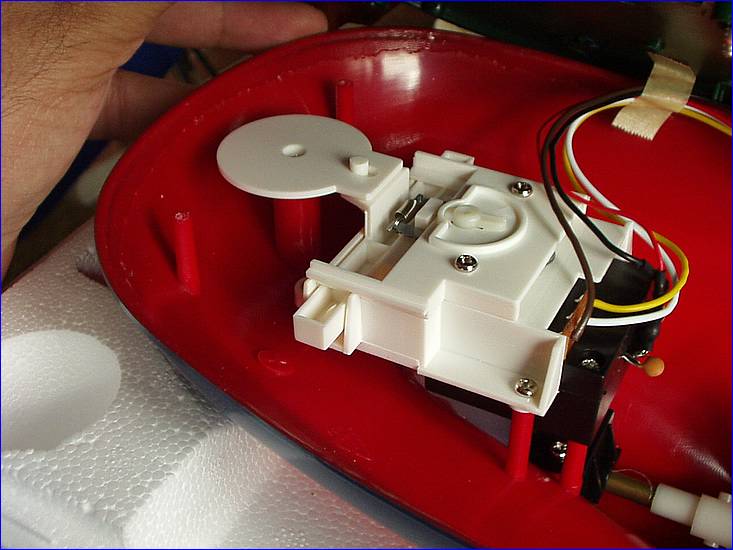 |
For though not rebuilding
the boat. Looking a little closer at the Rudder / servo arrangement, the centring can be adjusted using that little lever in the half-moon - a trial & error arrangement though! |
 |
This is the water ballast compartment and the yellow tube is the squirter pickup. The two posts are the vents for the compartment to allow it to flood - this caused me a little head scratching until I realised what was going on. (Yes they are well above sea level.) |
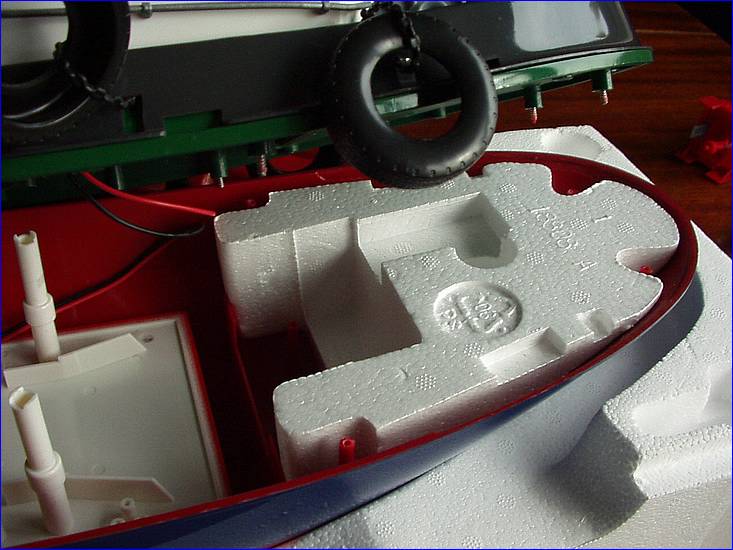 |
Another good bit of forethought was the inclusion of an emergency floatation block of polystyrene. Not sure if it's enough to keep the bow above the waves and no I not going to test it! |
 |
Right, Dutch courage now,
we're going to have to cut some things! The clear feed from the squirter is cut first to release the deck completely, followed by the drive motor wires and also the supply wires to the water pump. Leave these wire as long as possible on the motors. I tried very hard to make an arrangement to make the squirter under 2 channel radio but after a week I gave up. I tried all sort of micro switch arrangements but sacrificed the squirter for the sake of a FULL swing on the rudder. If you can think of an idea - please let us know - Email Mayhem |
 |
The free end of the pump needs to be sealed up to prevent leaks, I just forced a small screw up the end of the tube. |
 |
Next to come out is the Rudder
'servo', just keep undoing screws till it comes out! Remember to save the
disk as we'll need it for use as the tiller. |
 |
At this stage all the other radio bit can be removed and all associated wiring. Cut the wires as close to the radio as you like. |
 |
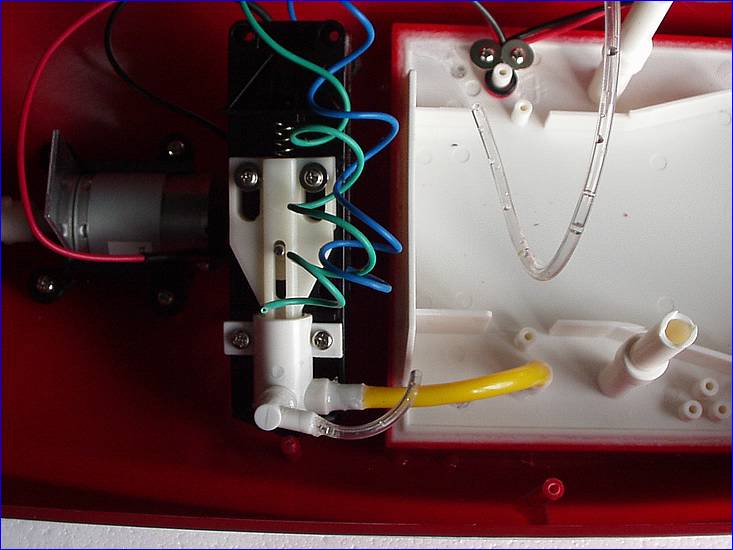
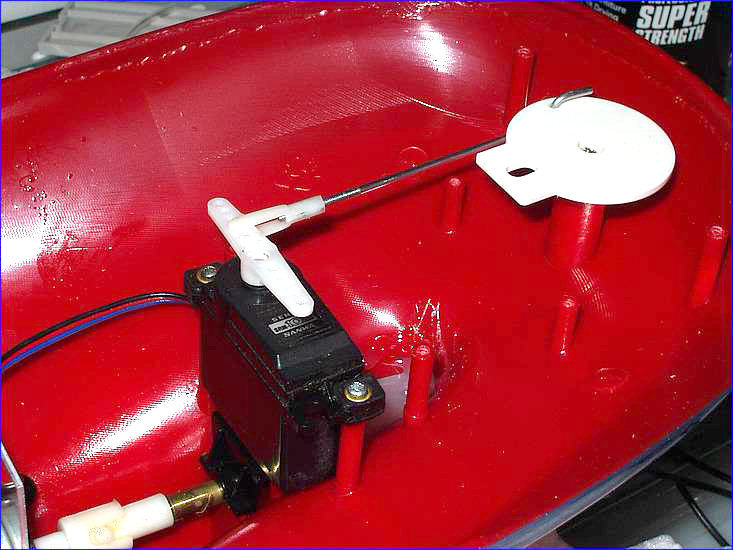
This is the first trail
fitting of the replacement servo. As luck would have it, two of the
original servo mounting posts matched exactly the new servo diagonally. You can also see I'm still experimenting with a micro switch to activate the squirter - possibly on full rudder throw plus trim but I couldn't get enough movement on the Kort nozzle without it fowling |
 |
Annoyingly the replacement servo failed after about 10 minutes testing and had to be replaced. Of course it only failed after all the deck screws had screwed down! |
 |
The kort nozzle has stops port
& starboard, these need a little easing with a file to obtain full servo
movement. In order to free up the motor and coupling, I stripped down the coupling, filed, sanded and ' adjusted' the coupling as much as possible, re-greased it left it running for several hours wired direct to the new battery. It's still not perfect but much better. The whole Prop shaft and propeller arrangement could actually do with replacing to allow experimentation with standard props but replacing this is going to be a MAJOR JOB ! |
|
|
|
|
I also chose to simplify the
navigation light wiring, reducing it from four to two wires. the drop down
resisters were rewired direct to the LED's and then combined to two and
passed down through the wheel house. |
|
 |
I was going to use a 6v Gel-cell/ lead-acid battery instead of the original battery, I could have replaced the resistors to make the LED's brighter but they worked as is and I'm not that fussy! |
 |
The replacement battery I'm
using is a 6v 4AH gel-cell. The battery plate on top of the watertight
ballast compartment need a little 'trimming' with my Dremel power drill.
The battery is stuck down with double sided tape to stop it moving around
or anything. Unfortunately, The battery is now too big to come out through the battery hatch but it's a brand new battery and shouldn't need any attention for a little while. |
 |
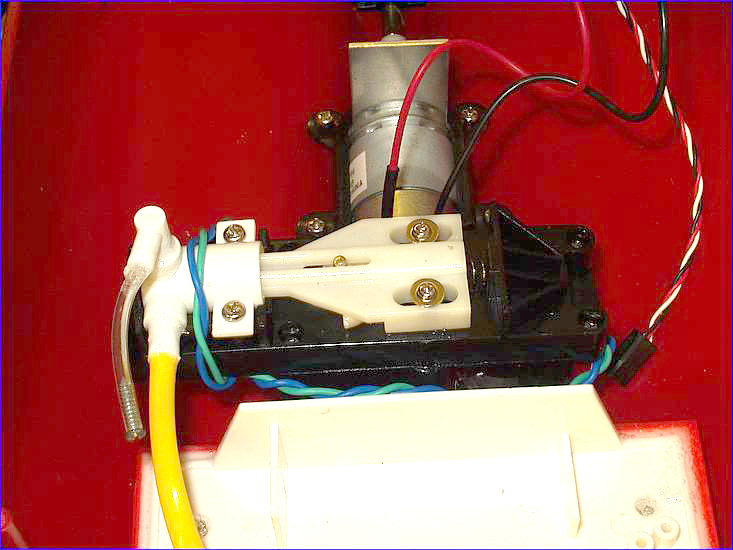
I'm using the ubiquitous Hitec SP-6/10A speed controller, cheap, cheerful & functional. |
 |
Bit of a 'birds next' during the final wiring up but I know what's going on! |
 |
Everything in place and tested
and the wheelhouse about to be screwed back in place. Not the neatest job
- I'm sure you'll be MUCH better. The aerial was fed up through the wheelhouse where the tube for the water squirter tube used to go. |
 |
Final screws going in.... after I refitted the funnels and removed them again to fit the wheel house screws! |
 |
The battery in place. Charging will be done by attaching crocodile clips from the charger. |
|
|
|
|
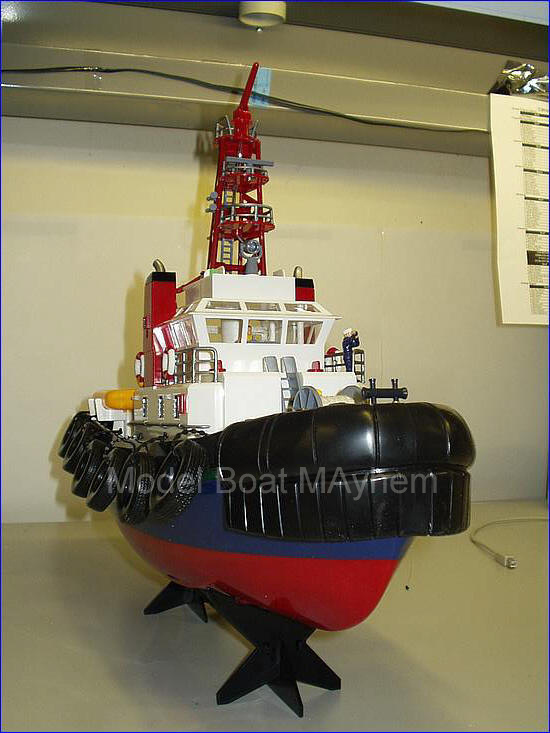
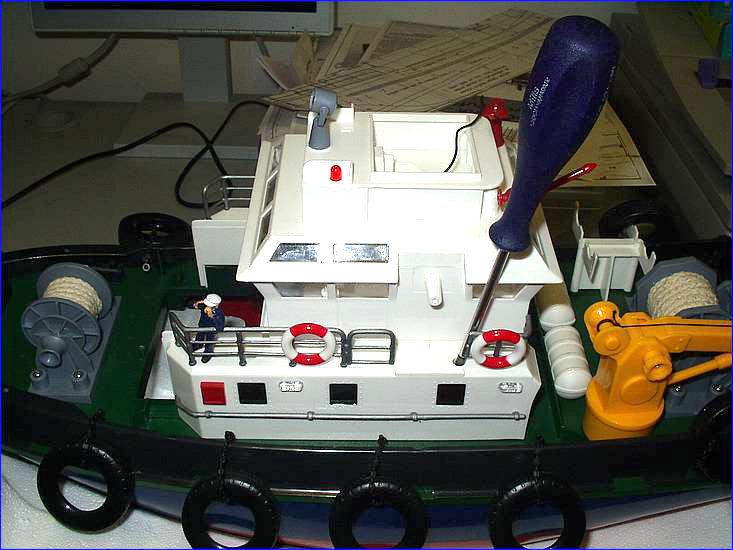
And here she is all back together
and not a mark to show for the refit! I had lots of bother finding the right screw for each hole so keep them separate as much as possible, I must have pulled the wheelhouse and deck apart about 4 time trying to sort all the screws out! I've also removed all the labels off the boat, I'll buy some of that raised/Airfix type lettering at the next show I attend.
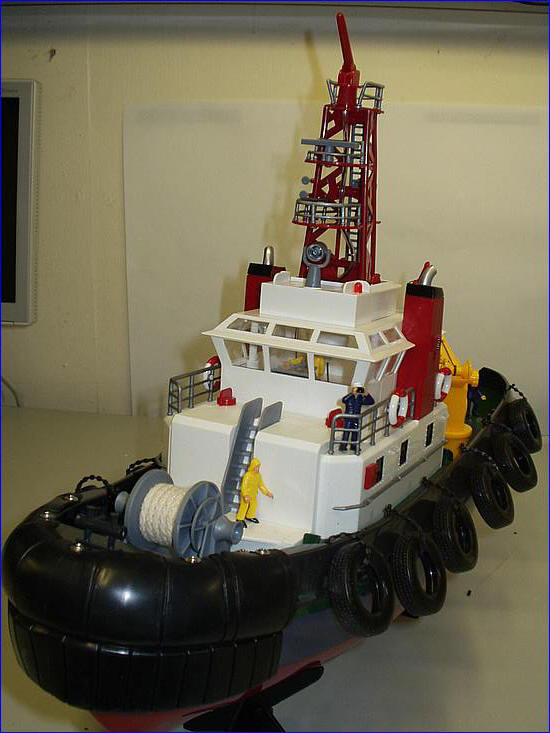
A bit a subtle panel marking
and weathering would go a long way to improving the looks of the boat if
you have the time and skills but I don't think that's what the boat is
about! |
|
|
COSTS Boat in the box - £50 -100, Replacement 2 channel radio - £40 ( actually nothing, I swapped it for something!), Speed controller - £17-20, Battery £10 Odds & sods £5 Time required to complete 2 - 6 hours, actual time taken - 4 months!!! |
|
|
"Well all of this is just my opinion, but what do I know!" |
|
|
|
|