


Found an old Volvo windshieldwiper pump, that I got from a salvage yard at least 20 years, and which has been used for glowfuel for at least 10 of them.
I tested how low it would go, and it managed to run reliable at 2S NiMh with a very accptable current draw (I can't measure it any more accurate than "maybe 600 mA") and a waterflow of about 300 ml/min, which is 3 times what I need as minimum. Initially it displayed a dissapointing amount of leakage on the shaft seal, but I simply solved that by reversing the polarity AND the in and oultlet: Now the sucion pressure is active on the shaft seal, and air will leak in instead of water leaking out. Problem solved, boat dry again.
Turned an old receiverpack of 1900 mAh into 2S2P (2,4V, 3800 mAh), and this combo has to do the temporary job of cooling water set-up. It provides me with more cooling duration than I need for now.
Tested this set-up on open water, functioned flawless for 40 minutes, and then a big rainshower spoiled all the fun.
45 grammes of gas, less than 100 ml of feedwater consumption, boat functions flawless, it is a bit of a weird visual, a steamboat with ZERO visible plumes above it, running and running and running and a feedwatertank that barely drops in level.
Fantastic!
Whatever my next steamboat will be, it WILL have a full-recovery condenser set-up... Whether engine driven or electrically driven cooling pump remains to be seen, but full recovery, that is a given! It is worth it. Not because of cost, but because of ease of use (I don't need to bring a jerrycan of water if I go to the pond...)
Can't wait until the brushless pump from China will arrive, after which everything can be installed below deck , and the original visuals of the boat can be restored.
|
41
on: Yesterday at 02:19:30 pm
|
||
| Started by 1967Brutus - Last Post by 1967Brutus | ||
|
42
on: Yesterday at 10:27:47 am
|
||
| Started by GlennA - Last Post by GlennA | ||
|
Does anyone have a copy of the instructions please?
Or a link to them Hobbyking don't have them stored TIA |
||
|
43
on: Yesterday at 10:23:46 am
|
||
| Started by GlennA - Last Post by GlennA | ||
Great It's so I can see what is under the rear deck so I can access the rudder / servo so I can service them. There is no 'hatch' so I can get to them. I can now cut the deck for access |
||

|
44
on: Yesterday at 10:17:52 am
|
||
| Started by captain bligh - Last Post by ChrisF | ||
|
Exactly right. As a tool for reference it's useless.
It's got it's place for questions and those that want to keep posting multiple pictures of their boats but that's about it. Chris |
||
|
45
The Shipyard ( Dry Dock ): Builds & Questions / Navy - Military - Battleships: / Re: HMS VICTORY 1/75 SCALE all wooden build
on: Yesterday at 07:40:15 am
|
||
| Started by wallace - Last Post by Footski | ||
|
That is coming along very nicely indeed. Keep up the good work.
|
||
|
46
on: Yesterday at 02:25:37 am
|
||
| Started by JerryTodd - Last Post by JerryTodd | ||
|
I cleaned off the old tracks from the access hatches, on which the pivot guns sit, sanded and refinished the decking.
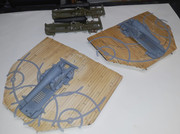 The new aft pivot and tracks on the aft access hatch  The new forward pivot and tracks on the forward access hatch 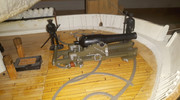 The field carriage for the boat howitzer I made for the launch had iron wheels, and I got to thinking the wooden wheeled version was probably more appropriate for 1856. Here's the replacement painted and ready  |
||
|
47
The Shipyard ( Dry Dock ): Builds & Questions / Working Vessels / Re: 1963 Refinery Line Handling Tug Busby
on: April 24, 2024, 09:59:12 pm
|
||
| Started by steve mahoney - Last Post by steve mahoney | ||
|
Thanks Joe, and thanks Mike. Everything looks better at 72 pixels per inch. I think I'll have to invest in a proper camera rather than using my phone for everything. The photo quality never seems as good.
Thanks Trucker. After 30 years I still find builds challenging slow learner, I guess. Thanks Greg, how's your build coming along? |
||
|
48
The Shipyard ( Dry Dock ): Builds & Questions / Working Vessels / Re: 1963 Refinery Line Handling Tug Busby
on: April 24, 2024, 09:45:33 pm
|
||
| Started by steve mahoney - Last Post by tassie48 | ||
|
Great work Steve looks like it's up to your normal high class standards, love the fiddle bits always a challenge to make really enjoy your builds tassie48
|
||
|
49
The Shipyard ( Dry Dock ): Builds & Questions / Navy - Military - Battleships: / Re: HMS VICTORY 1/75 SCALE all wooden build
on: April 24, 2024, 07:21:14 pm
|
||
| Started by wallace - Last Post by wallace | ||
|
I started the planking from the top of the bulwarks No 2 doing each side one each then a second one going up on the other side reason for doing one each side at a time is the bulwarks are so thin so to put them on one plank one port side the one plank on the stbd side makes it stronger.
 These photos are this weeks work hope you like. |
||
|
50
The Shipyard ( Dry Dock ): Builds & Questions / Navy - Military - Battleships: / Re: HMS VICTORY 1/75 SCALE all wooden build
on: April 24, 2024, 07:14:15 pm
|
||
| Started by wallace - Last Post by wallace | ||
|
Photos showing the start of planking etc.
|
||