CLOCKWORK BATTLESHIP
Its one thing to scratchbuild a battleship
its another to decide which Model Boat Mayhem forum to use.

I chose the Warships Navy Military forum to write about my latest project, as I could not find a forum specifically devoted to radio controlled, clockwork powered, German influenced, turn-of-the-century, toy boat replicas representing fantasy, pre-dreadnought, Danish Costal Battleships. I believe my building techniques and aesthetic goals will most appeal to the Naval modeler.
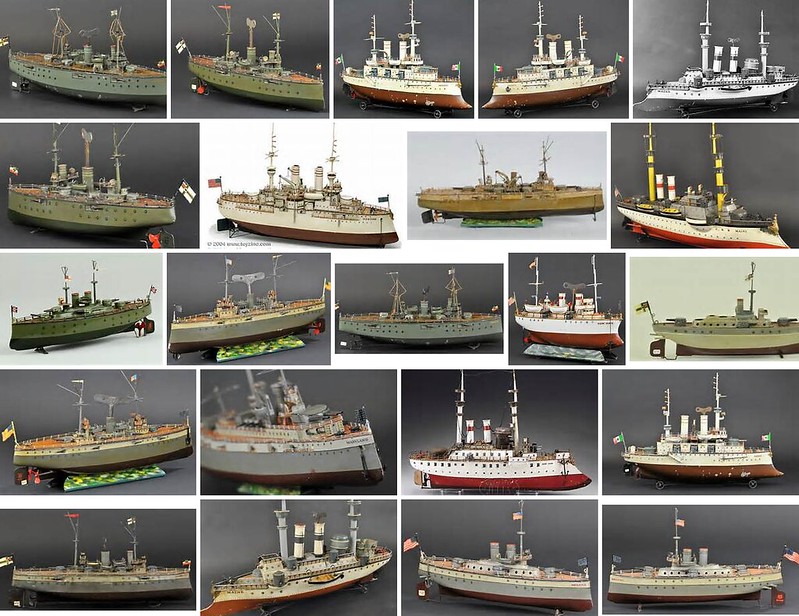
Ive always wanted to own an armada of Marklin, Bing and Fleischmann toy boats. These great toy makers, along with many others, produced their extraordinary ships, boats and submarines from before the beginning of the 20
th century right up to the post-war years of the 1950s. To own just one of the finer examples of these splendid vessels will cost you many thousands of dollars. If you wish to maintain a massive fleet of these tinplate treasures you had better be on an equal monetary footing with the late Malcolm Forbes, a noted collector.
I, of course, do not posses Malcolm Money, so if I want something along the lines of a two-foot long Marklin pre-dreadnought battleship, Im going to have to build it myself. To that end, I started looking for a hull. I didnt want to scratchbuild a hull, as it would be time consuming and I wanted to get right to the more interesting work of designing and building the clockwork motor and superstructure. After casting about on the Internet, I discovered the world of 1/144 Scale Model Warship Combat. A number of suppliers provide the hobbyist with a wide choice of fiberglass hulls that are usually the starting point of a model ship that actually shoots BB cannons with the ultimate aim of sinking your fellow armed combatants. Check out the Internet and YouTube for more about this live-fire hobby.

Even though my interest was less hostile, I was still able to find a 1/144 fiberglass hull that would suit my needs. Strikemodels.com offers a 26-inch hull of HMS Gorgon, a WWI era monitor with a start-and-stop history too involved to restate here. Google her to learn more. My interest in the hull focused on the dramatic tumblehome that was so reminiscent of the French and Russian pre-dreadnought battleships. Secondarily, the 26-inch length of the hull was just right for my needs. Keep in mind that a 1/144 hull of the Yamato will be nearly 72 inches long. I was lucky to find this small hull of this rather obscure subject.
Just a note to admit I could have done a better job of documenting the early stages of this build, and some of the photographs show work not consistent with the descriptive text. Please pardon my occasional oversight.
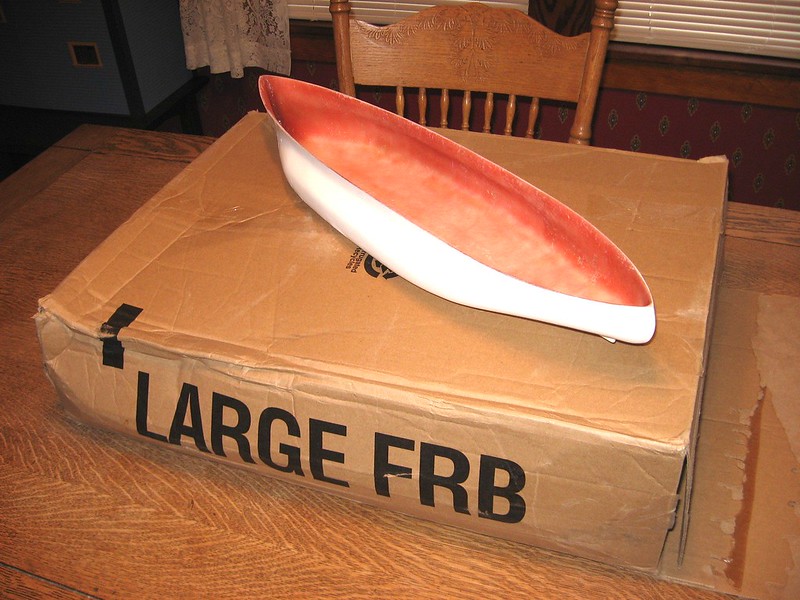
The hull arrived in the box shown, and was well laid-up and rigid. The white gel coat was more or less smooth and only needed a touch of Bondo and a light sanding to fair the hull. There was some damage to the bows when I received the boat, but a hard, finishing epoxy was all that was needed to fix the problem.
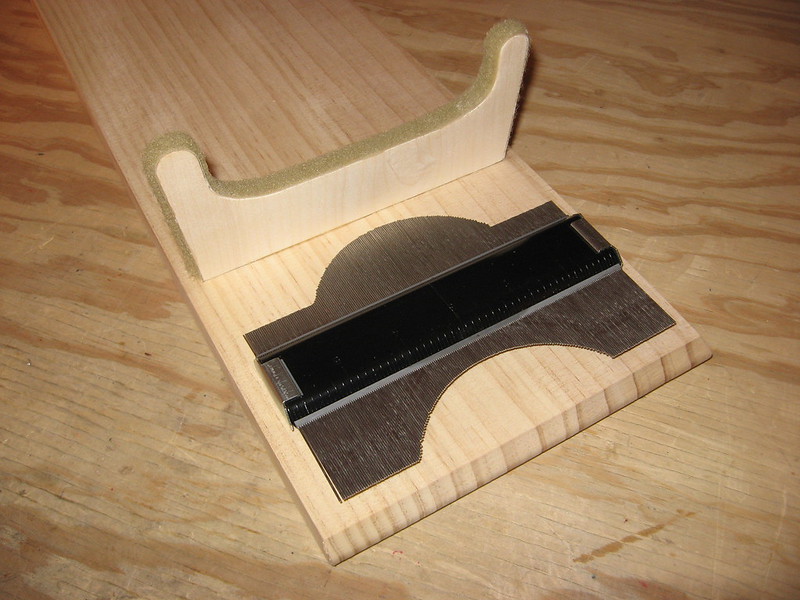
I always build a work-stand to support my boat projects as soon as possible, as it provides a secure, level cradle for the model. I use my contour gauge to determine the shape of the two uprights. Cut from 3/8 aspen, the horns of the uprights are designed to rise above the boats waterline, giving the stand a secure grip on the model.
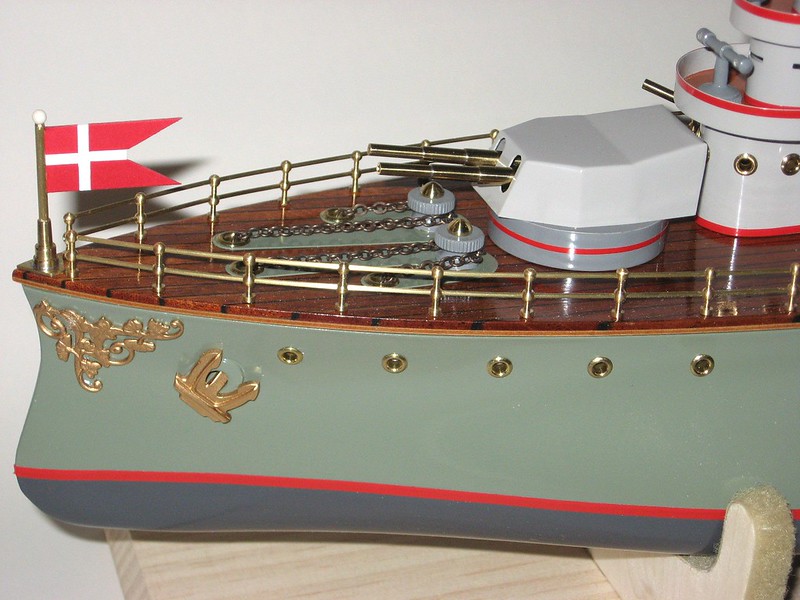
To provide some padding between the stand and model, I glue the soft, hairy half of Velcro to the uprights. I use epoxy for this, as it cures fast and helps me to quickly attach the Velcro to the complex shapes. This system works well, as the Velcro cushions the hull and prevents scratches.
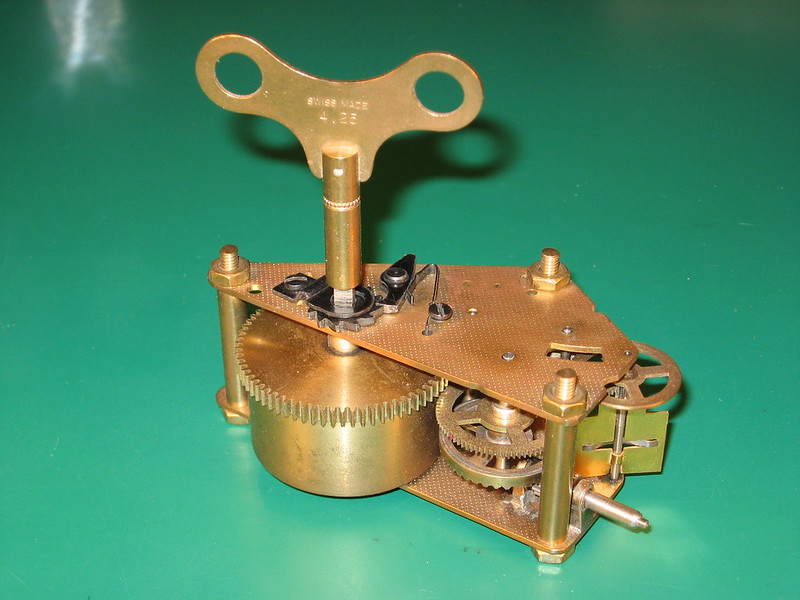
Before I could drill the hole in the stern for the propeller shaft, I needed to dry-fit my clockwork motor to the inside of the hull so I could get my shaft angles right. The clockwork came from, what else, a German clock. I purchased the old clockwork from a clock repair shop for $20. A few of the pivot holes needed filling and drilling, as they had egged-out over the years. Now with everything more or less tight
remember this clockwork will be running a much faster speeds than it was designed for, it was time to trim the plates thereby eliminating the spring and wheels of the going train, while leaving the spring, wheels and the all-important fly from the striking train. More about this later. I then made a crown gear to transmit the vertical clockwork power through a horizontal shaft. My ham-handed crown gear is not pretty, but it works. A wedge-shaped poplar base was cut to fit under the clockwork, giving the power source the proper angle to connect with the propeller shaft.
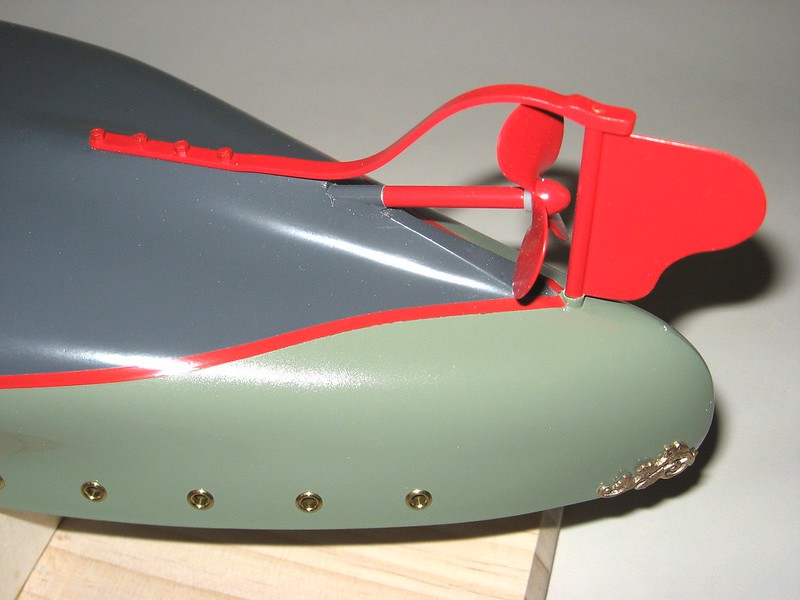
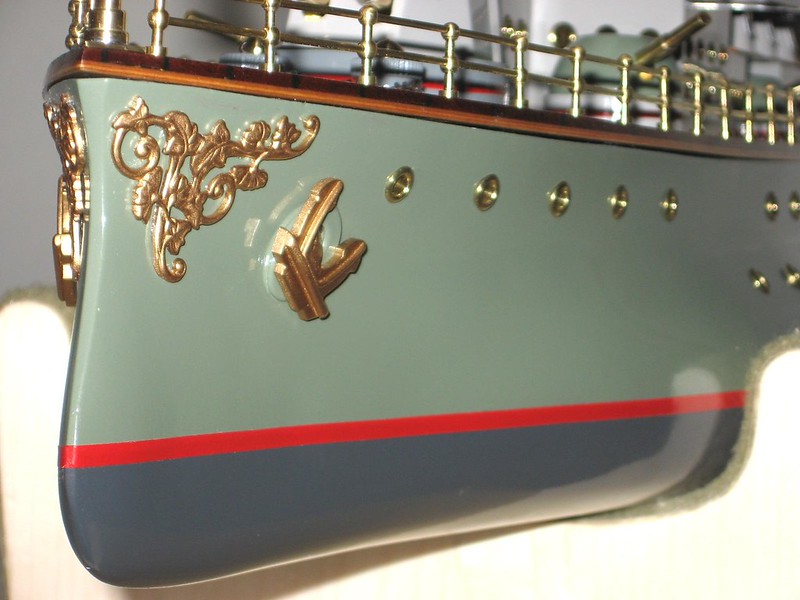
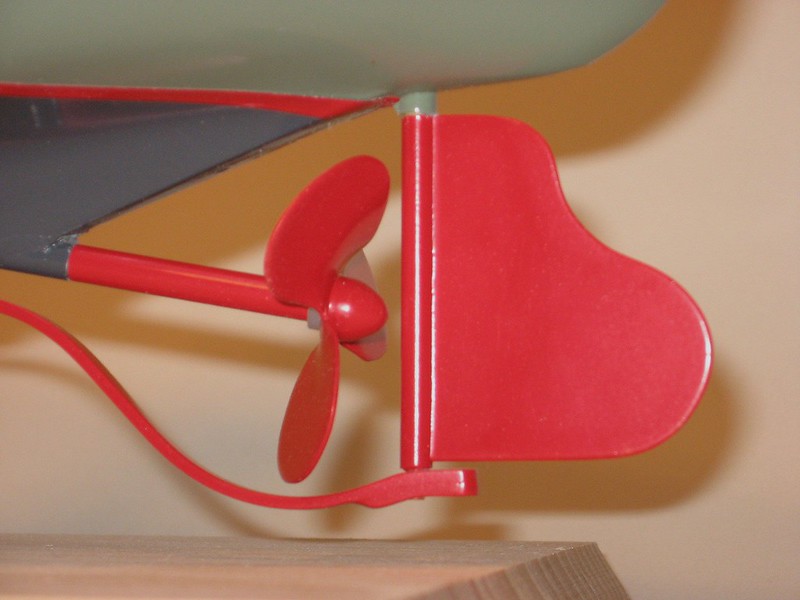
After the clockwork was temporarily set in place, I could now make an educated guess at the proper angle for the prop shaft. Unless you are building a hull from scratch and working the angle of your shaft into the hull from the inside out, drilling a shaft hole into solid material is always a crap shoot. I draw various pencil lines showing line and angle, and start by using a small drill bit and small files to get the hole going in the right direction. After some careful work, and a little luck, I got the hole just big enough to accept the brass stuffing box and shaft. After buying the right sized spring to make the universal, I turned the brass spring couplings and tapped them for the setscrews seen in the photograph. The skeg and rudder were also crafted from brass and were temporarily fitted to the stern of the boat. The shape of the rudder is a nod to the traditional shape used by the old German toy makers. At this point I had to raise my models work stand by adding ¾ blocks to the four corners, as my skeg was running aground.
 Its always tricky getting the angles and distances right for the components of the motor-shaft-propeller-rudder parts.
Once connected, all the parts should move freely, but without slop. Its best if your propeller isnt constantly crashing into your rudder as it spins.
To be continued...


 Author
Topic: Clockwork Battleship (Read 25338 times)
Author
Topic: Clockwork Battleship (Read 25338 times)