Model Boat Mayhem

Please login or register.

Login with username, password and session length.
Pages: 1 [2] 3 4 5 6   Go Down

Author Topic: Delftship tutorial  (Read 119966 times)

AlisterL

  • Full Mayhemer
  • *****
  • Offline Offline
  • Posts: 368
  • Location: Auckland, New Zealand
Re: Delftship tutorial
« Reply #25 on: August 26, 2009, 10:53:34 am »

Ian,

thank you very much for doing this - your tutorial is so much more useful than that which comes with DefltShip.

I'm starting to understand how powerful this can be - apart from the fact that it took 10 minutes to figure out that I needed to split two lines to create the new point for the chine...

I really appreciate your efforts - thanks!
Logged
Alister

AlisterL

  • Full Mayhemer
  • *****
  • Offline Offline
  • Posts: 368
  • Location: Auckland, New Zealand
Re: Delftship tutorial
« Reply #26 on: August 27, 2009, 10:57:53 am »

There is a tutorial for scanning line drawings and using them within delftship. I havent used it myself, so cannot comment on it, but its here:

http://www.google.co.uk/url?sa=t&source=web&ct=res&cd=1&url=http%3A%2F%2Fwww.boatdesign.net%2Fforums%2Fattachments%2Fdesign-software%2F33338d1248034181-step-step-design-your-boat-tutorial01.pdf&ei=MjSRSq3COsyhjAf8sMTJDg&rct=j&q=delftship+tutorial&usg=AFQjCNFixMtN16ezIqLrCdCMdBpedUmw0Q

This appears to be the tutorial that can be downloaded from the DelftShip website. I have used it previously and didn't find it particularly helpful - the only thing in it that might be useful that Ian hasn't covered is setting up the background image/line drawing, scaling it and getting control points to match the drawing.

Otherwise, for shaping a hull and learning DelftShip, Ian, your tutorial is much better.
Logged
Alister

boatmadman

  • Full Mayhemer
  • *****
  • Offline Offline
  • Posts: 2,703
  • Location: South Cumbria
Re: Delftship tutorial
« Reply #27 on: August 27, 2009, 11:55:44 am »

I am currently working through the download background image tutorial hopefully to enable me to understand it, and if possible, translate it into another tutorial to post on here.

It may be a little while coming, as I am not finding it particularly easy to get through!

Ian
Logged
if at first you dont succeed.....have a beer.....

boatmadman

  • Full Mayhemer
  • *****
  • Offline Offline
  • Posts: 2,703
  • Location: South Cumbria
Re: Delftship tutorial
« Reply #28 on: August 28, 2009, 09:01:29 pm »

Having had a play around with importing background images, I think I can now simplify the delft tutorial.

First of all, you may ask, why import a set of lines when you can use them to build from?

Two reasons spring to mind – and there may be more:
•   You have a set of lines for a hull design you wish to modify in some way
•   Your lines diagram is a photocopy and has lost some detail in enlarging. This method should give you a diagram at the scale you want with the accuracy you desire.

So, lets go:

For this demo I am going to import the lines plan from the earlier demo and hopefully we will end up with a similar hull again.

First open a new file and enter the starting details as shown.


Remove the clutter as before:


will start of working in one window only, so, maximise the plan view:


Right click on the page and background image, load to get:


Right click and select background image, origin.

 Now left click and hold down while you move the mouse and the background image will move as you move the mouse.

Move the image so that the bottom left point on the centreline coincides with the same location on the hull model


Select background image, set scale and the cursor changes to a ruler, set the point over the bow point at the centreline and click:


Logged
if at first you dont succeed.....have a beer.....

boatmadman

  • Full Mayhemer
  • *****
  • Offline Offline
  • Posts: 2,703
  • Location: South Cumbria
Re: Delftship tutorial
« Reply #29 on: August 28, 2009, 09:09:40 pm »

The pop up window is asking you to set the scale of the model using the dimensions of the imported plan.

We know from the last tutorial that the model is 29.151m long, so, enter 29.151,0 in the box.

The zero entry is the ‘y’ coordinate which in this case is zero because we are working on the centreline:


This all looks pretty confusing, so lets clean up the background a bit.

Right click and set background image, transparent colour and you get a little dropper as a cursor. Hover over the white area and  left click:


Adjust the intensity of the image with background image, blend. Do this to suit your own preferences.

Now do background image, tolerance. I set my value at 250:


Repeat all that with the profile view:


And the bodyplan view:


You will see here that the stern looks out of place, this is due to the shape of the hull at the moment and will be corrected later. 

If, when you are setting the position in this operation, you find that there is a vertical or horizontal offset, just re align with the origin tool.

Select all the curves on the model:


Click edit, curve new. Turn off the control net and you should have something like this:


The next instalment will, I think, deal with moving the model about so it looks the same as the imported image.

Logged
if at first you dont succeed.....have a beer.....

AlanP

  • Guest
Re: Delftship tutorial
« Reply #30 on: August 28, 2009, 10:18:37 pm »

Bu**er, you go away for a short holiday and the teacher starts without you  >>:-(
Logged

boatmadman

  • Full Mayhemer
  • *****
  • Offline Offline
  • Posts: 2,703
  • Location: South Cumbria
Re: Delftship tutorial
« Reply #31 on: August 29, 2009, 06:18:39 am »

Never mind Alan, just get your homework in by Monday, with a little bribe and all will be well :} :}
Logged
if at first you dont succeed.....have a beer.....

boatmadman

  • Full Mayhemer
  • *****
  • Offline Offline
  • Posts: 2,703
  • Location: South Cumbria
Re: Delftship tutorial
« Reply #32 on: August 29, 2009, 03:44:14 pm »

Right, lets see if we can match up the deck line first. On the profile view, select the deck line:


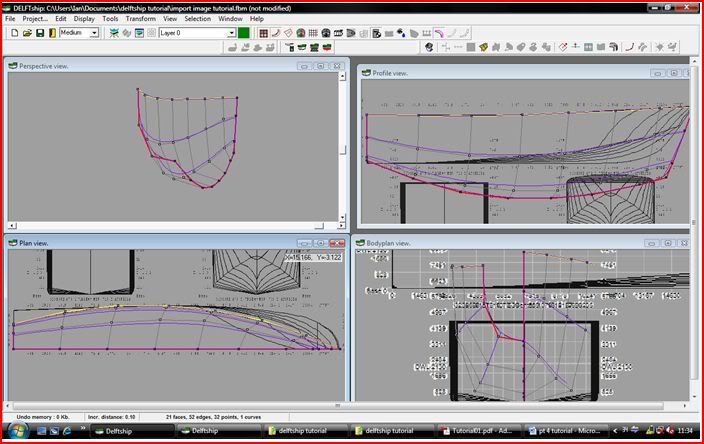
Then expand the plan view:


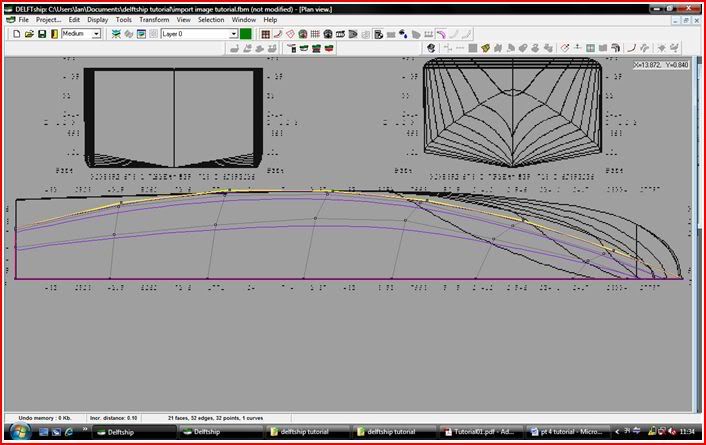
Now start moving the deck line points. Start at the stern and work forward.

Two ways of doing this:

1.   Select a point by left click and drag to where you want it.

2.   Select a point and move it with your cursor keys.

Drag and drop is quicker but you run the risk of moving the point in other planes as well as the one you are working in. I.e. In this case we are working in the x/y plane, using drag and drop can sometimes cause the point to move in the z plane as well. Don’t ask me why ‘cos I ain’t got a clue!

If you find the incremental distance of a cursor key is too big, on the bottom left of the screen you will see a label – incre.  Distance: xx. Click on that and in the window select a smaller value.

Here we can see that I have aligned the deck line to the background:


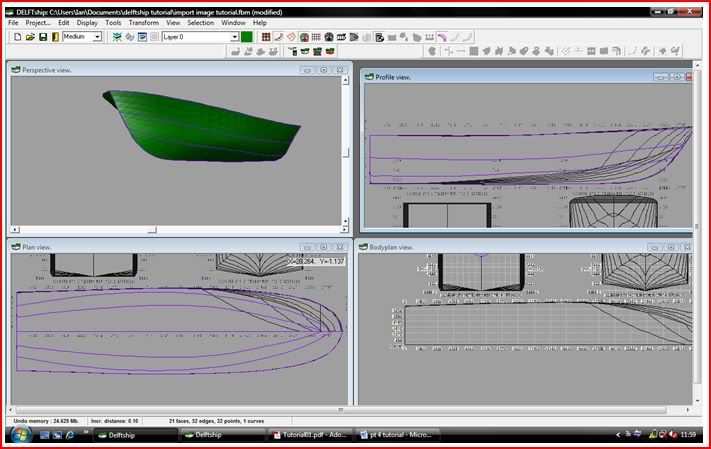
Moving on to do the same with the keel and bow, we get this weird catamaran thing:


This is because we have moved the control net for the keel, but not yet for the sides, we will do this next.

Using profile view, select each point in turn on the side of the net and move in the x and z direction until the lines look something like this: (note, you can only move one point at a time, this is where it can get a little tedious, especially if you have hundreds of points!)


One thing to note at this point. In the body plan view, delft outputs the lines diagram with a bow on view and a stern on view, but when working with the program, these are combined, with aft view on left and bow on right.

So, at this point, align the control points for the stern in the body plan view.

Bear in mind this is an iterative process and you may well find yourself moving a point more than once.

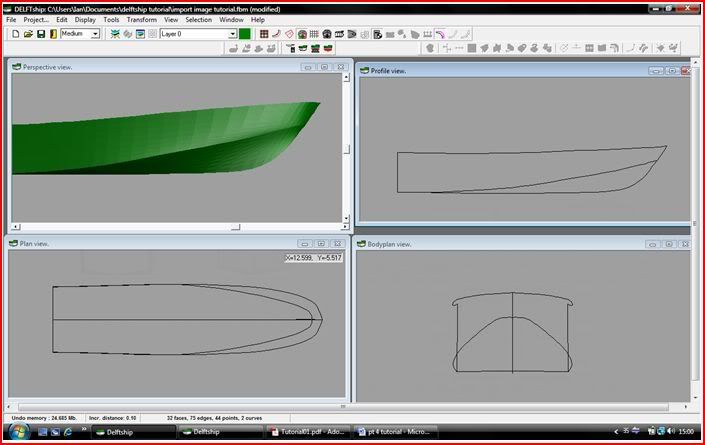
Anyway, in time, you will end up with something like the original plan, hopefully identical! Mine isn’t in this tutorial, as I want only to show how to do it, not achieve a perfect copy.


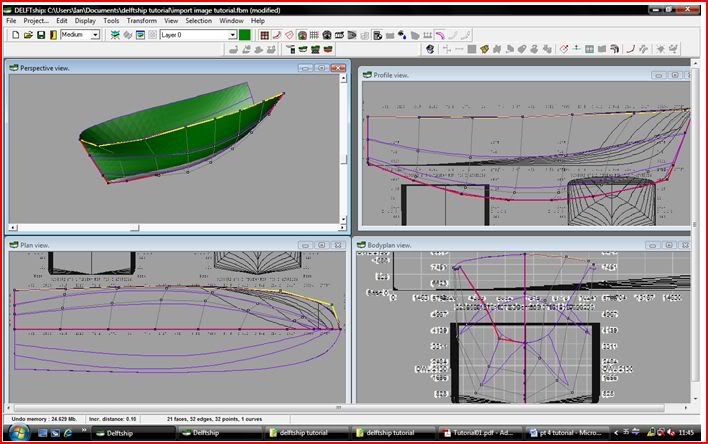
Then you can fade out the background image using the blend tool:


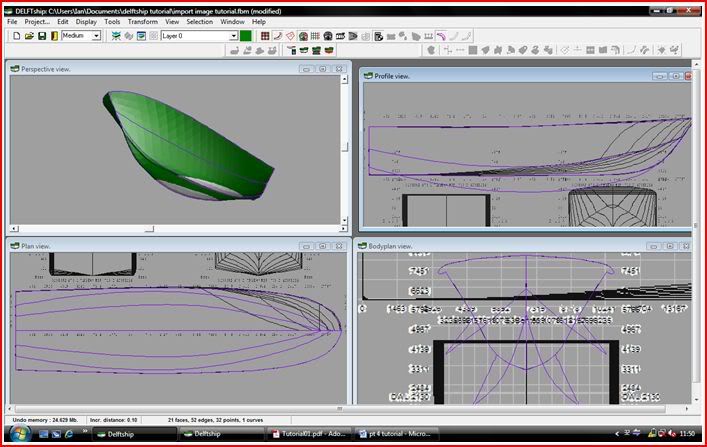
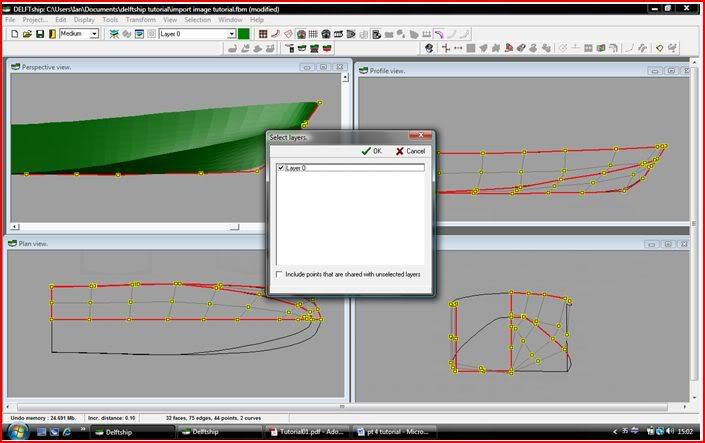
Now, we have developed a 29m boat! Too big for the workbench? Thought so,  lets scale it down a bit.

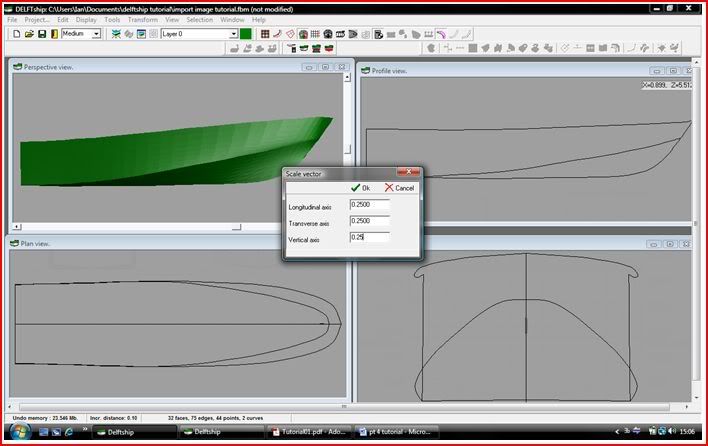
Go to transform, scale to get:


When you do other models working with layers, decide whether you want a global scale and tick all the boxes, or be selective for specific layers, in this case with one layer just make sure it is ticked and click ok:

Decide what scale you want, lets say ¼ scale here, and enter as shown:


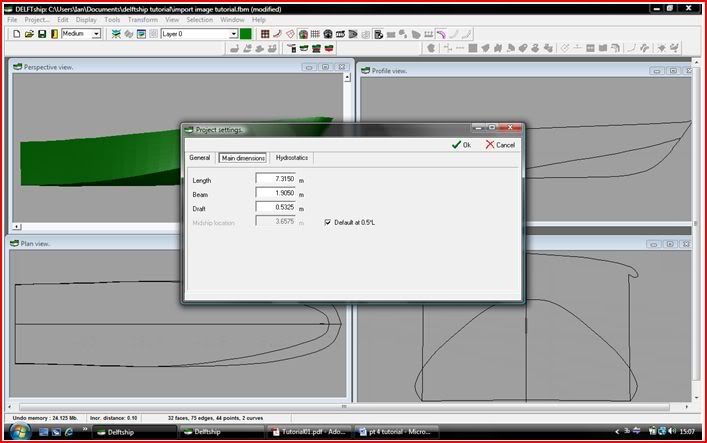
Click ok and you have a quarter scale model. Go to project, dimensions and you will see the new sizes.


Well, I hope this has been helpfull. If there are any questions, I will try to answer, but, remember, I am self taught on this and ther is still loads I dont really understand.

Ian

Logged
if at first you dont succeed.....have a beer.....

andyn

  • Guest
Re: Delftship tutorial
« Reply #33 on: September 01, 2009, 05:33:31 pm »

Could delftship be used to design the three point hydro 'Spirit of Australia'?
Logged

andyn

  • Guest
Re: Delftship tutorial
« Reply #34 on: September 01, 2009, 06:16:50 pm »

This is my first attempt, a wingboat :-))

Logged

boatmadman

  • Full Mayhemer
  • *****
  • Offline Offline
  • Posts: 2,703
  • Location: South Cumbria
Re: Delftship tutorial
« Reply #35 on: September 01, 2009, 08:17:56 pm »

Nice one Andy, re the 3 point hydro, I think it should be possible, might be quite difficult though.

It would be nice to see some of you others submitting your homework :-))

Ian
Logged
if at first you dont succeed.....have a beer.....

nick_75au

  • Guest
Re: Delftship tutorial
« Reply #36 on: September 01, 2009, 11:06:06 pm »

Heres My X bow

Nick
Logged

Greggy1964

  • Guest
Re: Delftship tutorial
« Reply #37 on: September 11, 2009, 12:00:18 am »

Great program

here's my efforts so far
Logged

boatmadman

  • Full Mayhemer
  • *****
  • Offline Offline
  • Posts: 2,703
  • Location: South Cumbria
Re: Delftship tutorial
« Reply #38 on: September 11, 2009, 12:04:43 am »

Nice one Greggy :-))
Logged
if at first you dont succeed.....have a beer.....

Greggy1964

  • Guest
Re: Delftship tutorial
« Reply #39 on: September 11, 2009, 12:51:46 am »

I had the original version of freeship that allowed plank development but I lost it when my hard drive crashed  {:-{ <:( <:( <:(

>>:-( >>:-( >>:-( >>:-(
Logged

Lt. Raen

  • Guest
Re: Delftship tutorial
« Reply #40 on: December 20, 2009, 04:34:01 am »

Great tutorial and awesome program and free to boot :D

Here is my attempt at a springer hull  %)

Logged

kno3

  • Guest
Re: Delftship tutorial
« Reply #41 on: March 01, 2010, 12:17:58 am »

Hi everyone!

First, thanks for this great tutorial. It has helped me understand how Delftship/Freeship works. There is one thing that's not clear to me yet: how can one print out sections of the hull at points where you want your ribs placed?
Logged

boatmadman

  • Full Mayhemer
  • *****
  • Offline Offline
  • Posts: 2,703
  • Location: South Cumbria
Re: Delftship tutorial
« Reply #42 on: March 01, 2010, 08:30:03 am »

Kno3

I dont think you can print at sections like you ask, I wanted to do the same and couldnt find out how. It may be possible on the pro (paid for) version.

Ian
Logged
if at first you dont succeed.....have a beer.....

kno3

  • Guest
Re: Delftship tutorial
« Reply #43 on: March 01, 2010, 09:16:27 pm »

Thanks! Anyone tried with the pro version?
Or how do you proceed to cut ribs after the Freeship drawing?
Logged

DavieTait

  • Full Mayhemer
  • *****
  • Offline Offline
  • Posts: 1,149
  • Location: Fraserburgh
Re: Delftship tutorial
« Reply #44 on: March 01, 2010, 09:31:42 pm »

One way to do it would be to have the lines on screen and press the "Print Screen SysRq" key , then open up a photo editing program ( or paint if thats all you have ) , start a new image at your screen size ( usually 1024x768 ) then right click "Select All" , the Right Click and "Paste". In Photoshop you then have to hold down Ctrl and the E key before saving not sure about paint.

You can then print the lines out and use them that way I guess
Logged
Davie Tait,
Scotland

dan

  • Guest
Re: Delftship tutorial
« Reply #45 on: March 03, 2010, 04:30:16 pm »

just followed your instructions Ian, and found them extreamly clear, and extreamly helpful. i downloaded this software months ago and have never been able to use it ... until now. thanks very much  :-))  :-))  :-))
Logged

boatmadman

  • Full Mayhemer
  • *****
  • Offline Offline
  • Posts: 2,703
  • Location: South Cumbria
Re: Delftship tutorial
« Reply #46 on: March 03, 2010, 09:38:44 pm »

I am pleased the tutorial has been a help to you and others.

Ian
Logged
if at first you dont succeed.....have a beer.....

kno3

  • Guest
Re: Delftship tutorial
« Reply #47 on: March 03, 2010, 10:06:26 pm »

I had the original version of freeship that allowed plank development but I lost it when my hard drive crashed  {:-{ <:( <:( <:(

>>:-( >>:-( >>:-( >>:-(

Is it possible to do this plank development with Freeship plus?
Logged

The Antipodean

  • Guest
Re: Delftship tutorial
« Reply #48 on: March 04, 2010, 03:00:12 am »

Oh the humanity!!!

I read the tutorial and decided to give it a try, addictive isn't it?

I have an interest in launch tugs and this program is wonderful, mind you it would have just been eating up disk space without this tutorial, thanks for the hard work.
Logged

Greggy1964

  • Guest
Re: Delftship tutorial
« Reply #49 on: March 12, 2010, 03:11:51 pm »

Hi kno3,

Yes it is possible to do surface generation with FreeShip, the images in my post above shows the plotted 3D model and the image in my post lower down shows that plank developments for the same hull form.

Your options are;

1 Pay the £100 price tag for DelftShip or

2 Find the original FreeShip program in the net.

Try here

http://freeship-plus.pisem.su/downloadsE.html

Or if I can work out how to transmit files from my hard drive over the ether I have them.

There is also an active Yahoo Groups webpage with tons on hints and tips plus users efforts in the files and photos section.

http://groups.yahoo.com/group/Freeship_HTandT_Group/

If your having fun with FreeShip/Delftship it might be a good idea to sign up :)


Logged
Pages: 1 [2] 3 4 5 6   Go Up
 

Page created in 0.103 seconds with 21 queries.