Model Boat Mayhem

Please login or register.

Login with username, password and session length.
Pages: 1 2 3 4 5 6 7 [8] 9 10   Go Down

Author Topic: 3/4" to the foot model of Lowestoft Sailing Trawler Master Hand LT1203  (Read 103478 times)

dreadnought72

  • Full Mayhemer
  • *****
  • Offline Offline
  • Posts: 1,892
  • Wood butcher with ten thumbs
  • Location: Airdrie, Scotland
Re: 3/4" to the foot model of Lowestoft Sailing Trawler Master Hand LT1203
« Reply #175 on: March 02, 2011, 07:55:21 pm »


It is 3" long and 3/4" wide  :o

It is  :-)) I have the exact same one, bought frae a wee tool shop near the Barras:-)

Bought, I might add, partly for modelling work, but mainly because it looked so cute. I was going to use it for the bow and stern block carving on Racundra - but opted for the oh-so-much quicker angle grinder/sander.  %%

Thanks for the info re: times and caulking. Sorry to interrupt your build while you wrote your reply.

Andy
Logged
Enjoying every minute sailing W9465 Mertensia

Greggy1964

  • Guest
Re: 3/4" to the foot model of Lowestoft Sailing Trawler Master Hand LT1203
« Reply #176 on: March 02, 2011, 08:45:34 pm »

Hi Andy,

I've used your angle grinder approach in the past  :-))

Its a case of do whats necessary to get the desired result :D

And I'm happy to answer questions about my methods, that's why I'm here  :-) so it's no problem.

Although I've built quite a few models in the past, I approach each new build by deciding how I want to present the finished ship and I build to please my own hot buttons.

If my model hits other folks' hot buttons too thats great!

Then I work out methods as I go along so the effects I want to create are realised and I solve each conundrum that presents itself.

That's the fun of scratch building for me but I also base my methods on research into how the big boys building big boats and ships go about it, and adapt things to my requirements.  :-))

The detailed build here is trying to give an inside view of how I tackle all of this  ok2

The little block plane has a huge cute factor don't it?  {-) {-)
Logged

kiwi

  • Guest
Re: 3/4" to the foot model of Lowestoft Sailing Trawler Master Hand LT1203
« Reply #177 on: March 03, 2011, 06:45:49 am »

Hi Greg,

[That's the fun of scratch building for me but I also base my methods on research into how the big boys building big boats and ships go about it, and adapt things to my requirements.  Thumbs up
[/font]


That's what I try and do as well when I'm researching the boats I have been drawing.
Maybe that's why your build holds so much fascination for me. You explain simply and briefly, and this coupled with your excellent photos say's it all.
Keep up the excellent work.

cheers
kiwi
ps that wee plane sure is cute
Logged

Greggy1964

  • Guest
Re: 3/4" to the foot model of Lowestoft Sailing Trawler Master Hand LT1203
« Reply #178 on: March 03, 2011, 05:11:50 pm »

Thanks Kiwi  :-))

Yours and other folks' comments are greatly appreciated.

The starboard guard board plank is completed and ready for gluing to the keel.
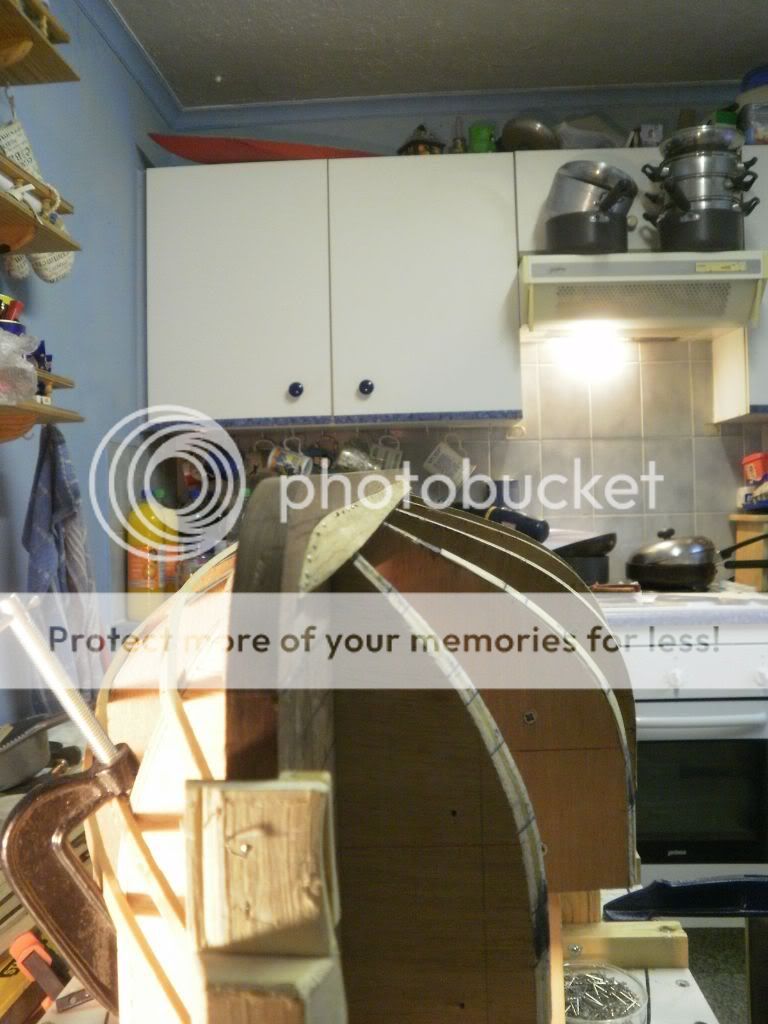


As with the port side I've pinned it in place (no glue at this stage) to make sure a correct fit and I'm pleased to say that apart from a tiny bit of fettling at the bow it's an exact copy of its sister  :-)) I cut the rabbet a tad shallower on this side and I've modified the plank rather than mess about with the rabbet at this stage of the build.



I cut the starboard plank whilst it was clamped side by side with the already complete port side in my A.C.M.E. plank clamp and planed the blank down until its edges matched those of the port side ensuring an exact pair. I will do this step with all plank pairs.  O0


Here is the join between the forward and aft planks

Which has the caulking seam cut in the aft end but is filled with sawdust at the mo and I'm too lazy to clear it for the photo shoot! {-)


Here is the tail end of the plank . . . .



And a close-up-and-dirty shot of the nib end of the plank. The little square pad is made from scrap 1mm birch ply with a pin hole drilled at its centre and is useful for holding down delicate plank ends such as here while the glue dries. I start by cutting 5mm strips in the plywood and drilling the strips at 5mm intervals.

When I need a pad I snip it off the end of one of the strips - saves chasing round looking for tiny squares all the time as my kitchen floor has grey mottled tiles and when something is dropped - its a nightmare trying to find it! >>:-(

As before, while the plank is pinned in place, I've pre drilled for all fixing holes to save time during the messy job of gluing the plank in place  :-))

At that point the pad will be split away and the pin driven home. :-))

During a trip to the cheapy shop I bought myself some cheapo pincers . . . .
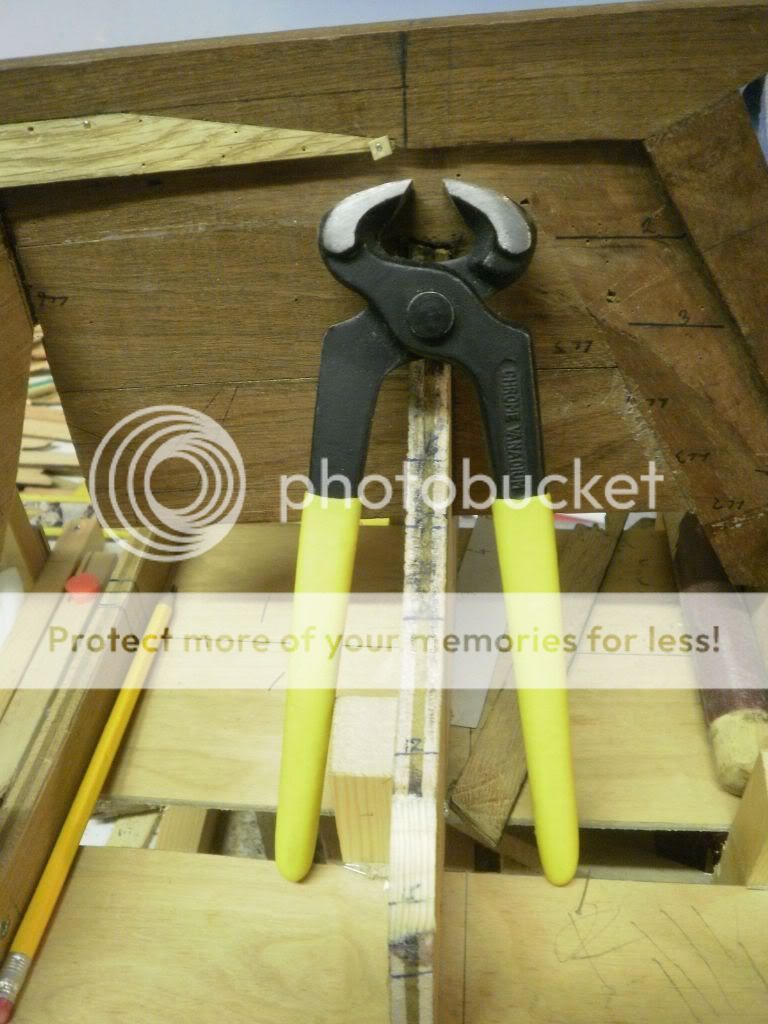


I set to with my bench grinder and ground down the tops of the jaws . . .



So that the jaw faces come to a sharp edge . . . that huge black line on the keel is actually a fine pencil line!  :o the wonders of modern cameras eh?  {-) O0


With these modified pincers I can get behind the heads of pins nailed flush to a plank surface to remove them without damaging the plank O0 :-))

Next I will cut and fit the 2nd plank pairs, these are the same width as the guard boards (15mm) and this width is carried right to the bow.

At the stern the plank widens out to 31mm as it sweeps up the stern post, this and the next 5 planks are cut this way to eat up the space at the stern post.

See post 144, the plank battens give you an idea of what we're looking at here. :-)

I will be using the same procedure for making all planks as described for making the guard boards with minor variations which I will of course document ;)

A little note here . . . . I am finding fitting these planks to the hull very easy . . . the guard boards have taken up the sharp twists at the bow and stern with no sign of splitting or cracking and I haven't needed to steam them either.

The planks are straight with no edge set . . . it remains to be seen wether this will be the case around the bilge area but we'll see . . . all part of the fun! {-)

I must say I love working with this oak, it's hard and takes a sharp edge without crumbling, I would recommend it for planking.

So if you come across an unloved oak top table  - grab it! O0 and convert it to planking.

But no making Grandma's treasured and polished table in the living room  disappear :police: - not allowed  <*<

 {-)
Logged

Hammer

  • Guest
Re: 3/4" to the foot model of Lowestoft Sailing Trawler Master Hand LT1203
« Reply #179 on: March 04, 2011, 07:04:22 pm »

Greggy. I did try to send you a news letter by EMAIL ? I don't think you got it. However I have just been lucky. I was invited to visit the yard where the Brixham trawler Pilgrim is being rebuilt. Well it is more like a replica as not one piece of timber has not been replaced. Naturally I took my camera. Here is the construction at the horn timbers, which cased you so much head scratching. At the bottom the horns fix to the fashon frames long knees at the quarters cerry a cross beams under which the horns are fixed. I have more photos if you want them. Hammer
Logged

Greggy1964

  • Guest
Re: 3/4" to the foot model of Lowestoft Sailing Trawler Master Hand LT1203
« Reply #180 on: March 04, 2011, 08:09:22 pm »

Hammer!

 >>:-( I hate you  - I hate you - I hate you!  >>:-(

 {-) {-) {-)

I'm not insanely jealous of course!

 ;)

Pilgrim is now a very old lady and she's made of wood which don't last forever, I guess it's a case of Grandads Axe isn't it?

During her fishing days the owner would not think twice about replacing rotten timber so its OK as far as I'm concerned.

Whats important is that she still exists for future generations to enjoy where as so many are forever the property of Davey Jones' locker or recycled into some pubs seating furniture or something!

I'd be very pleased if you were to post as many photos as you are able here so that others following the build may see and enjoy them  :-)) or you can email me them and I'll add them through my Photobucket page.  O0

I was lucky enough to be invited aboard the William McCann a few years ago when she sailed into Bridlington Harbour, I had a real good poke around taking lots of photos but the 35mm film was lost during processing  >>:-( >:-o The Excelsior Trust now own her and she has been renamed The Lord Nelson H1394 which was the name given to her when she was launched back in 1884 and is one of the oldest still in existence. She was one of the largest north sea boats and operated out of Hull.

http://www.excelsiortrust.co.uk/modules/news/article.php?storyid=120

She is currently awaiting restoration funds and is laid up at their headquarters.


Well we've hit a milestone  :} That guard boards are finally in place for good, my system of pinning them on first and pre drilling for nail holes works, but I have to ensure the plank goes in exactly the same spot when they are re positioned and glued in place.


I do this by nailing the butt joint end on its frame first as the nail holes are easy to find  :-)) and I simply work along the plank to its other end. I make pencil marks (top right in the photo above) on the plank and immediately adjacent on the keel as proof I'm on the right track.

I'll do the same on adjacent planks as I go for the same reason :-))


This system is a tad long winded but the massive bonus is that I can start work on the next pair of planks immediately and don't have to wait till the last laid planks are dry :-))

Which when I get my routine nailed down pat will hopefully speed up the planking process :-))

The keel and guardboard combo are now immensely strong and stiff!

I'm well please - to coin one of my teenage daughters phrases  :}
Logged

Greggy1964

  • Guest
Re: 3/4" to the foot model of Lowestoft Sailing Trawler Master Hand LT1203
« Reply #181 on: March 04, 2011, 11:14:51 pm »

Well plank 2 is provisionally pinned and clamped to the port side of the keel . . . . .

Well tha back half anyway, the butt joint with the yet to be made forward part is at frame No. 6 . .


 <*<  but she didn't arf put up a bloomin fight! <*<


 {-)  :o {-) O0

As you can see by all the little clamps that are holding her to the guard board plank!  :o and the larger ones are managing the  <*<  edge set <*<

Time to make that steam box me thinks :-))

What I've done is edge set a straight plank 2 against the guard board, the top edge is taken from plank width on the mating plank position on the other side of the keel and a batten sprung around the points.

I then cut the top edge roughly outside of the marks on my bandsaw, I'll clean this edge up later.

The original plan was to cut planks to their true shape using cardboard patterns but this would be a tremendous waste of material . . . .

And I have limited stock, and further research of ship building practices shows that the original ship would have been planked using straight cut planks.

So that grand plan now is to steam plank blanks and clamp them in place until they cool and then shape the top edge using the plank widths taken from the opposite side of the keel at the frames.

This exercise proves that this particular hull shape will allow this as the 2nd plank is bent on cold, but steaming them will take all the pressures out of the timber and I won't get quite such a fight out of her! {-) :o


Just look at all that iron holding down the tail end?? :o

 :-)

But I'm as happy as a pig in doobly what's it! {-) O0
Logged

derekwarner

  • Full Mayhemer
  • *****
  • Offline Offline
  • Posts: 9,457
  • Location: Wollongong Australia
Re: 3/4" to the foot model of Lowestoft Sailing Trawler Master Hand LT1203
« Reply #182 on: March 04, 2011, 11:53:07 pm »

OK.....& Greg says ..... "this exercise proves that this particular hull shape will allow this as the 2nd plank is bent on cold, but steaming them will take all the pressures out of the timber"

 ....this interesting......  :} ...but as silly as it sounds....both wood & steel end up with inbuilt stresses.....the wood from natural growth & steel from its fabrication >>:-(

When we steam timber we are elevating the natural moisture level in the timber....making it more fluid & allowing it to deform without fracture O0

Some may ask.....timber more fluid???? ........is this person NUTZ? or  %%...well please remember glass is technically a fluid  :P  ........

Carry on Greg  :-))...many are watching....Derek  {-)
Logged
Derek Warner

Honorary Secretary [Retired]
Illawarra Live Steamers Co-op
Australia
www.ils.org.au

Greggy1964

  • Guest
Re: 3/4" to the foot model of Lowestoft Sailing Trawler Master Hand LT1203
« Reply #183 on: March 05, 2011, 12:16:46 am »

Thanks Derek  :-)

With my steam box built I hope to do a short video to prove how pliable - if a little hot oak planks become.

{Note to self} put up signs everywhere to remind oneself not to swear when burning pinkies during filming! {-)

The building board and my substantial frame supports can easily take the strain imposed by the cold bent planks but why make life hard? :o

I'm all for making life as straight forward as possible  :-)

And I read somewhere that given enough time the glass in my house windows would flow out of the frames and form a puddle on the floor.

I keep checkin my windows every morning but I guess I need a H G Wells type time machine to see the effect {:-{

Logged

Greggy1964

  • Guest
Re: 3/4" to the foot model of Lowestoft Sailing Trawler Master Hand LT1203
« Reply #184 on: March 05, 2011, 12:57:42 am »

I was just about to slope off to bed with me hot chocolate and I decided  . . . .

Just for a giggle like . . .  %)

Take off all the clamps from plank No.2 just to see what would happen . . . .

In all honesty I expected the plank to go 'pioyyynngg!' flinging former pin nails to the four winds! :o


Here's a flash shot for dramatic effect!

Get ready!  . . . . . .    'PIOYYNNGG!'   :o

But No!  :o


The plank stayed there ! Meek as a lamb!

It is held in place by 16mm long by 0.65mm diameter pins, 3 in each frame and 17 around the periphery of the plank at the deadwoods.


The dark line between the two planks is actually the stained surface of the former table top the planks have been cut from :-))

That plank has been held in place about 4 hours - it's 12:45 AM Saturday morning here, room temperature a dry aired 70 degrees (we have warm air central heating which makes the place very dry and I don't do cold! {-))

It's totally flummoxed me! Remember the plank has not been steamed and I had to fight it intially to lay on the frames.

I've steamed planks before and they have kept their new shape all be it with a small amount of spring back  hmmm (scratches noggin)

Care to explain that one Derek?

But now the clamps are off you can start to get a glimpse of why I fell in love with the lines of this ship  ;)


Logged

derekwarner

  • Full Mayhemer
  • *****
  • Offline Offline
  • Posts: 9,457
  • Location: Wollongong Australia
Re: 3/4" to the foot model of Lowestoft Sailing Trawler Master Hand LT1203
« Reply #185 on: March 05, 2011, 01:31:33 am »

Greg says......"I've steamed planks before and they have kept their new shape all be it with a small amount of spring back  hmmm (scratches noggin).....Care to explain that one Derek?"

 :embarrassed: ...I can only refer to the following Wikipeoiedia reference thingie {-) {-) {-)...

Woodworking. When wood is used as a construction material, whether as a structural support in a building or in woodworking objects, it will absorb or desorb moisture until it is in equilibrium with its surroundings. Equilibration (usually drying) causes unequal shrinkage in the wood, and can cause damage to the wood if equilibration occurs too rapidly. The equilibration must be controlled to prevent damage to the wood.

It also appears that oak maintains approx 12% moisture in a semi perfect environment  <:( .....Derek

Logged
Derek Warner

Honorary Secretary [Retired]
Illawarra Live Steamers Co-op
Australia
www.ils.org.au

Hammer

  • Guest
Re: 3/4" to the foot model of Lowestoft Sailing Trawler Master Hand LT1203
« Reply #186 on: March 05, 2011, 04:57:57 pm »

Green Greggy!!! ;D I'm only sorry I didn't get to Pilgrim sooner. <:( Here is the boat yard.

The planks garboard & next 2 oak then pine up to the turn of the bilge 1/2"thicker oak the 6 pine & the top three oak.  The large pellets are covering bolts holding the deck beam shelf. Small pellets cover spikes.


The beams on the shelf . 9" of camber.

I will post more later .  :} Hammer
Logged

Greggy1964

  • Guest
Re: 3/4" to the foot model of Lowestoft Sailing Trawler Master Hand LT1203
« Reply #187 on: March 05, 2011, 07:50:41 pm »

Thanks Hammer  :-))

Much appreciated   O0

I'm on with steaming experiments, the forward end of the 2nd plank goes from 22 degrees from the horizontal at frame 6 to vertical at the stem in the space of 14" which is quite a twist! :o

I've been experimenting with jamming the switch closed on my upright kettle full of water and draping a cloth over the top so as steam only pours from the spout.

When the kettle is boiling I've been holding the short plank over the spout and bathing it in super hot steam until it's pliable and then forcing it in place over the frames while it cools a little and takes a set . . . .

Then back to the kettle for more steaming . . .


Back to the hull again and more bending.


And I keep doing this until I'm am happy  O0


Over a few trips back and forward what happens is the plank takes more of a twist and set because the plank gets very hot while steamed, but dries and cools very quickly on the frames so you end up with a snaky plank!

It has taken edge set as well as curve as you can clearly see . . . there is a little spring back but the plank is far more amenable when the time comes to fix it permanently in place  :-))


This is close-up-and-dirty shot and is only a practice of the forward part of plank #2 but you will notice I've placed the nails much further inboard at the hood ends as the nails on the guard board tended to split when I counter sank them.

Not to worry I have a neat little trick with a drop of superglue . . . it makes an excellent filler paste when mixed with fine oak sawdust which fills the tiniest crack and sands very well but you have to be quick!  :o

I now have in my possession Mums wallpaper steamer which I'm going to adapt using a short length of PVC pipe to make a plank steamer doobly  O0

So on with plank No.2 for real  :-)


Here are two countersunk plank nails on the port guard board at frame 10 that have had the superglue/oak sawdust filler treatment real close, I think they look very neat  :-))
Logged

Hammer

  • Guest
Re: 3/4" to the foot model of Lowestoft Sailing Trawler Master Hand LT1203
« Reply #188 on: March 06, 2011, 10:43:23 am »

Photos of the rudder & stern. The rudder box is square unlike the Master Hand, the stock round sheathed in copper. Just behined can be seen the knee which supports the horn timbers.

Experimenting wiht the size of photos.  >>:-( Hammer
Logged

Hammer

  • Guest
Re: 3/4" to the foot model of Lowestoft Sailing Trawler Master Hand LT1203
« Reply #189 on: March 06, 2011, 10:46:51 am »

Still small I guess you will have to click to enlarge.

Is this better %%
Logged

Hammer

  • Guest
Re: 3/4" to the foot model of Lowestoft Sailing Trawler Master Hand LT1203
« Reply #190 on: March 06, 2011, 10:58:09 am »

No!! The joint between the keel & rudder post, strengthened with a metal plate.

The sweep of the stern. the small hole for the propshaft. Two engines to be fitted.

The bitts

The knights head post side for roller starboard for bowsprit.

view over the deck. And thats all. Hammer
Logged

Hammer

  • Guest
Re: 3/4" to the foot model of Lowestoft Sailing Trawler Master Hand LT1203
« Reply #191 on: March 06, 2011, 11:01:47 am »

Missed the deck view. <:(

That is the last.
Logged

Greggy1964

  • Guest
Re: 3/4" to the foot model of Lowestoft Sailing Trawler Master Hand LT1203
« Reply #192 on: March 06, 2011, 12:09:07 pm »

Fantastic photos Hammer!

I'm sorely jealous of your opportunity >>:-(

But I'm very grateful for your interest and efforts :-))

Great photo's of the planking at the stern post . . . . .

Her owners must really treasure this ship is they are spending a huge pile of coin on her.

They have my greatest respect for saving such vessel that is part of our history and heritage.

All the others that still exist should be given the same treatment.

I'm as happy to share the photos as part of my build if you're happy to post them  O0

It's interesting to note how Pilgrim's planks sweep at the top of the stern post in going from vertical to horizontal.


E.J.M. is his Sailing Trawler book thus, i.e. following the line of the rest of the planks lower down


Trying to lay this out on Master Hands hull makes for a difficult transition.

Pilgrims way makes it easier for me to plank that area.

The difficulty is that I would be straying away from the plans slightly and I wasn't there when E.J.M. surveyed the ship and sadly she is no longer in existence <:(

But on the whole I like the way the planks run in your photos so I'm going to make a small change to the rabbet at the top of my stern post  O0

Greg
Logged

Greggy1964

  • Guest
Re: 3/4" to the foot model of Lowestoft Sailing Trawler Master Hand LT1203
« Reply #193 on: March 06, 2011, 01:12:29 pm »

New rabbet line at the top of the stern


The planking will now make a nice sweep from vertical to horizontal instead of the sharp turn as in photo #2 in my last post . . . .

And it will be much easier to plank, plus it will look much prettier to my eye . . .

I like easier and prettier O0

It just means I'm going to need to build up the fashion frame and the heels of the horn timbers either side of the keel to support the planks in this area.

But I'm scratch building so I'm allowed!  {-)
Logged

Hammer

  • Guest
Re: 3/4" to the foot model of Lowestoft Sailing Trawler Master Hand LT1203
« Reply #194 on: March 06, 2011, 03:38:24 pm »

Only to happy to help Greg.  The lottery is helping the rebuild. Hammer
Logged

Greggy1964

  • Guest
Re: 3/4" to the foot model of Lowestoft Sailing Trawler Master Hand LT1203
« Reply #195 on: March 06, 2011, 08:56:02 pm »

Here's another classic case of 'when the devil doo-doo's in yer custard!'   :o

The 2nd planks were cut from my oak table special . . . .

The table was only 21mm thick and my 2nd plank needed to be 31mm wide minimum with the 3rd, 4th and 5th planks needing to be 26mm, 24mm and 22mm wide . . .  >>:-(

So I cut out a piece 32mm x 21mm, turned it through 90 degrees and ran through my circular saw which left me with three planks 32 x 4.5mm . . .

I cut a 26 x 21mm, a 24 x 21mm and a 22 x 21mm board and did the same . . .

All well and dandy you might say . . .

Well yes but I got cross grain in all of these planks and no matter how sharp or how fine I set the plane blade . . . .

These planks turned up the grain and ripped it out!  >>:-(

So for these planks I've had to take a slightly different tack.

I've made myself a sort of wooden surform with glass paper stuck to the bottom . . .


I use it in the same way I use the plane . . . . .


And I get nice smooth 4.2mm planks no matter how knotty the wood!  :-))

And as a byproduct . . . . 


Superglue and the sawdust make an excellent filler for my countersunk plank nail holes {-) :-))
Logged

Greggy1964

  • Guest
Re: 3/4" to the foot model of Lowestoft Sailing Trawler Master Hand LT1203
« Reply #196 on: March 06, 2011, 10:43:20 pm »

Yep steaming planks works!  :-))

In fact it works very well  O0

My steaming apparatus consists of an old wall paper stripper/steamer reservoir and sat on top of the exit nozzle is a 2" thin walled steel pipe.

The two are joined by a garden hose connector that just happened to be a snug fit in my steel pipe ( after a little gentle persuasion thanks to my big hammer!  {-) ) to which is connected a short length of garden hose that is jubilee clipped to said exit nozzle.


After 15 minutes of bathing in this little baby, a 32mm wide by 4.2mm thick plank  . . . . . .


Comes out doing a very good impression if a limp noodle . . . . . .  :o {-)


Whip it out of the pipe . . .  clamps at the ready . . .

And clap it in place . . . . .

You gotta be quick mind cos it cools rapidly . . .

Another 15 minutes later the plank sets rock hard again but this time . . . .


In the shape I want it!  O0 :D

There is no way on gods green earth would that plank take that shape bending it on cold . . . . .

The only down side is that the super heated steam raises the grain on the plank but we have an allowance of a whole 0.2mm to smooth this out later :-))

On the whole I'm happy  O0
Logged

boater12

  • Guest
Re: 3/4" to the foot model of Lowestoft Sailing Trawler Master Hand LT1203
« Reply #197 on: March 06, 2011, 11:03:36 pm »

I am no model boat builder, just thinking about it and probably will start a kit this summer, but I have to give it to you Greggy, I look forward to every post you make, your learning curves and how you get around problems. If it was me I would never have come up with such an idea to bend wood with relatively 'household / garge' items, things we have on shelves that we never use unless for the purpose intended.

I wish you all the very best with you build, and look forward to learning more from you learning yourself.

Just a small / slight / tiny question ...... when will we see the finished model  {-)

Keep up the great work and workmanship  :-))

Jim.
Logged

Greggy1964

  • Guest
Re: 3/4" to the foot model of Lowestoft Sailing Trawler Master Hand LT1203
« Reply #198 on: March 06, 2011, 11:31:45 pm »

Hello Jim,

Thank you but I have a confession to make . . . .   O0

I've been building scratch built models spread over a period of 30 odd years . . .  :o

But I'm trying to present Master Hand's build in such a way so as not to intimidate anyone embarking on a scratch build for the first time.

I'm trying to write in such a style that hopefully amuses my reader so that he thinks hell yes! If he can do it so can I!  {-)

I am under no illusion about the fact that I'm teaching the old dogs of model boat building how to suck eggs  {-)

They say you can't teach an old dog new tricks . . . .  %)

That said though, I do look at all and every item I see and think . . .

Hmmm . . .

How could that be useful in model boat building? {-)

I'm sure by now everyone has realised that I build on a paupers budget and my workshop is my kitchen . . . .

Or is it my kitchen is my workshop?  :o

So everything I see that others have junked I find a use for!

I would be lovely to have a purpose built workshop with benches all around the walls stacked with the latest modellers gagetry . . .

*sigh!*

One day maybe!  :-))

But again this shows what can be done with few simple tools hopefully  O0

Master Hand sailing? . . . .

When? . . . .

All good things come to he who waits! O0

I enjoy the build as much as enjoy sailing the finished product . . . .

I'm in no great rush  ;)
Logged

Greggy1964

  • Guest
Re: 3/4" to the foot model of Lowestoft Sailing Trawler Master Hand LT1203
« Reply #199 on: March 07, 2011, 12:44:30 pm »

The steam box/pipe works great but I've discovered a slight technicality . . . .

You see when I get an idea for a solution to a problem, I tend to jump for the first one that presents itself . . . .  O0

Like for instance the plastic hose connector that just happened to fit my steel pipe so that I could connect said pipe to my steam box  :}

Only . . . . .

While steaming the plank in my earlier post I noticed that the hose pipe at the base of the steel pipe had wilted somewhat and steam was escaping in a hot jet from a split :o

This is what's left of the hose connector after one session . . . . .


All the shiny newness has worn right off it!  <:( . . . . . .  >>:-(

Hmmmm let's see  . . . . 21 planks per side, erm 2 parts per plank less guard boards and 2 half parts of plank #2 completed already - hmmm (reaches for electronic abacus  {-) )

78 steaming sessions to go . . .

Erm nope! I don't think it's gonna make it!  {-) >>:-(

Plan B! :-))

I went back to what I'd pulled of the skip that day and I have the long hose and hand thingy that you clap to the wall to steam off wall paper!

Doh! {:-{

Why not use a small length of the pipe with it's proper connector to the steam box?  O0  The hose is reinforced rubber!  :-))

Right! Cut a wooden plug using me bandsaw 1" thick with the grain running lengthwise down the steel pipe.  


Abuse my bench grinder to grind it round and put a chamfer on it . . .


And ram in end of steel pipe  <*<


Offer rubber pipe connector up to plug and see what brain comes up with - make cuppa in meantime . . .  :-))


OK got it! - Drill hole in plug

Lubricate pipe with washing up liquid and shove home . . .


Drill three holes equidistant around the circumference of steel pipe in way of plug . . . . . the wall thickness of rubber pipe is 5mm, plus steel wall & plug to hole thickness equals 16mm total. Insert 3 screws long enough to bite into wall of rubber pipe . . .


Job done! :-))

Now I have a steam box to last the distance on this job and any other builds in the future!  :-)) :-)

One more modification I'm going make is to lag the steel pipe . . . I noticed it got very - very hot in the 15 minutes steaming my last plank which means heat is being lost to the air plus there is a scald risk :o

That lost energy might as well be going onto steaming the plank which in turn will take less energy and time to cook and save me electricity into the bargain - I like it!  :-)) O0

I don't think normal pipe insulation will work because of the heat . . . I have some old bath towels in the loft . . . more money saved! I do like it when the old grey matter is firing on all cylinders!  {-)  %)

Simba's really is camera shy - really!  {-)

Honest! ok2
Logged
Pages: 1 2 3 4 5 6 7 [8] 9 10   Go Up
 

Page created in 0.096 seconds with 21 queries.