Model Boat Mayhem

Please login or register.

Login with username, password and session length.
Pages: [1]   Go Down

Author Topic: 63ft ASR Build Log  (Read 4969 times)

Coastal

  • Full Mayhemer
  • *****
  • Offline Offline
  • Posts: 58
  • Possibly the craziest girl to have ever lived !
  • Location: Isle Of Wight
63ft ASR Build Log
« on: March 09, 2013, 01:05:59 am »

Hopefully this will work as I cannot find anyway to link a PDF fle successfully.... ! :/ So I have converted every page to JPEG as large as can hope its not unreadable... !


Regards
Coastal
 
Logged
Take care everyday to spread a little joy into someone elses life ! xx

Coastal

  • Full Mayhemer
  • *****
  • Offline Offline
  • Posts: 58
  • Possibly the craziest girl to have ever lived !
  • Location: Isle Of Wight
Re: 63ft ASR Build Log
« Reply #1 on: March 09, 2013, 01:30:51 am »

Just a quick update, today I produced the two climbing nets that are fitted to the side of the craft, once again I went with the plans and a couple of old pictures I found..


Logged
Take care everyday to spread a little joy into someone elses life ! xx

KeithW

  • Shipmate
  • *
  • Offline Offline
  • Posts: 14
  • Model Boat Mayhem is Great!
  • Location: Newport
Re: 63ft ASR Build Log
« Reply #2 on: March 09, 2013, 01:39:58 am »

That's no a build log, that's a book. Lol.
Logged

Coastal

  • Full Mayhemer
  • *****
  • Offline Offline
  • Posts: 58
  • Possibly the craziest girl to have ever lived !
  • Location: Isle Of Wight
Re: 63ft ASR Build Log
« Reply #3 on: March 09, 2013, 01:41:56 am »

Thats my Intention... You know what im like OCD wise.... you've lived with me 8 years ! xx
Logged
Take care everyday to spread a little joy into someone elses life ! xx

Perkasaman2

  • Full Mayhemer
  • *****
  • Offline Offline
  • Posts: 943
  • Model Boat Mayhem is Great!
  • Location: North East
Re: 63ft ASR Build Log
« Reply #4 on: March 09, 2013, 10:22:18 am »

One mouse click on each jpeg page of the log enlarges them nicely for viewing. A real page turner of a book. This log is impressive and so is your work with the Deans whaleback. You have an eye for fine detail and skills to match. This is probably the first Mr + Mrs build double on Mayhem.  :-))
Logged

Coastal

  • Full Mayhemer
  • *****
  • Offline Offline
  • Posts: 58
  • Possibly the craziest girl to have ever lived !
  • Location: Isle Of Wight
Re: 63ft ASR Build Log
« Reply #5 on: March 11, 2013, 02:19:44 am »

So today, between packing and stuff..... I made the Windscreen.... ( little top screen ) and also the start of the Carley Float...
Plastic Stripping cut to size.

The windscreen made minus glass, this slots in behind the pane fitting.

Glued onto the roof ready.

Then onto the carley float, Ive already cleaned and neatened the ring the interior was my next thing to do, so I built to match a 1943 Carley float..
The real thing.

The start of the middle section till completion of it..


The inner net that held it all together, just cut from the building form, and ready to carefully lift after painting and gluing, I stain the net with three different brown oil paints from the Railmatch Series using only the seperated coloured oil, then damp it off with some toilet paper before overlaying it with thinners then damping it again. I then leave to dry for about 10 mins then drip a drop of superglue onto each connection ( NB - you must glue after painting or the paint will not cover the glued areas ) I then leae to dry again for 15 mins before cutting the whole net free and laying it out on paper overnight to dry completly.. The net is then mouldable to what ever shape you require... !


Logged
Take care everyday to spread a little joy into someone elses life ! xx

Coastal

  • Full Mayhemer
  • *****
  • Offline Offline
  • Posts: 58
  • Possibly the craziest girl to have ever lived !
  • Location: Isle Of Wight
Re: 63ft ASR Build Log
« Reply #6 on: March 27, 2013, 11:53:49 pm »

Now that we have moved and got settled again I have continued work on the ASR ! Firstly I discovered they had a small set of rear windows.. after looking through a variety of photographs and drawings I found them showing in most pictures so these had to be added.


First I drilled out the spaces and started to pare it out with a sharp blade then working it in carefully with files till it was straight and correct.


This was then framed and finished with very thin strips of plastikard and then filled with plasto filler.


I then sanded it into the roof line when it had dried.


The next step was to start on some of the metal work. First was to do the aerial loop at the back of the craft.
This was bent up from one and a half mm brass and then the loop for the top made from 1mm. I then soldered the loop to the
top of the frame then added brass tube to each leg base and added a disc to act as the foot that is fixed to the deck. This I drilled three small holes in to
add the "bolts". Once this was fixed in place i added the support struts, drilling them into the deck and gluing them before soldering them to the standing frame.


Also added the fuel filler cap into the deck, burnt in with a heat tube then detailed and finished.


And added the small outlets above each exhaust as well as can be seen in most pictures of the rear of the craft. I dont know what they are.


This is how far I had got then.


Logged
Take care everyday to spread a little joy into someone elses life ! xx

Coastal

  • Full Mayhemer
  • *****
  • Offline Offline
  • Posts: 58
  • Possibly the craziest girl to have ever lived !
  • Location: Isle Of Wight
Re: 63ft ASR Build Log
« Reply #7 on: March 28, 2013, 12:01:33 am »

I then decided to build the Searchlight, this i wanted to get accurate, so I found the details I needed and built it from scratch.


First cut a perspex ring and a perspex disc of the same diameter.


Then I cut a piece of poly tube that was tougher and more heat resistant than Plastikard. This was added together with the perspex to form the basis of the light.


I then formed and soldered up the stand for the lamp and fitted it into the sides of the light.


It was then fitted out with a miniature ultrabright LED to look like the ones in the pictures I have. I also wired the LED before I went in as well.


Finished light in basic filler undercoat before sanding and finishing.


Finished light in basic filler undercoat before sanding and finishing running on 2.4 volts. !


This filling undercoat will be sanded back prior to painting and repainted in a fine undercoat and top coat.
Logged
Take care everyday to spread a little joy into someone elses life ! xx

Martin (Admin)

  • Administrator
  • Full Mayhemer
  • *****
  • Offline Offline
  • Posts: 23,361
  • Location: Peterborough, UK
    • Model Boat Mayhem
Re: 63ft ASR Build Log
« Reply #8 on: March 28, 2013, 01:37:51 pm »


Amazing!  :o
Logged
"This is my firm opinion, but what do I know?!" -  Visit the Mayhem FaceBook Groups!  &  Giant Models

george

  • Full Mayhemer
  • *****
  • Offline Offline
  • Posts: 222
  • Location: Hamilton, Ontario, Canada
Re: 63ft ASR Build Log
« Reply #9 on: March 29, 2013, 02:54:14 am »

Hello Coastal
 It`s been a little while since I saw your work, you have been busy! How is your hand now? Look forward to more of your build.
George from Canada
 
Logged

vnkiwi

  • Full Mayhemer
  • *****
  • Offline Offline
  • Posts: 1,593
  • Location: SE Asia
Re: 63ft ASR Build Log
« Reply #10 on: March 29, 2013, 04:04:13 am »

nicely done, will borrow some of your ideas for my builds, if you don't mind
cheers
vnkiwi
Logged
If it ain't broke. Don't fix it !

Coastal

  • Full Mayhemer
  • *****
  • Offline Offline
  • Posts: 58
  • Possibly the craziest girl to have ever lived !
  • Location: Isle Of Wight
Re: 63ft ASR Build Log
« Reply #11 on: April 03, 2013, 11:57:36 am »

Hiya Everyone,

The next update on my Whaleback for you all. I now decided to start on the masts and the hell job of the turret mechanisms. Firstly I built the main mast, this took a lot of time and I decided to do it in an older style ( later ones from photographs seem to have had a simplified mast, and on a lot of pictures of 130 it shows the full extended mast. Even though I couldn't find  any real close ups of the mast base I was aware that it could be removed, so I added a lock handle and bolts to the mast base. I used many small loops and eyes as I want to use a mostly brass wire superstructure  ( to carry radio signal as well ) and on the far ends of the main rigging i will use an elastic connection to allow it to be easily clipped and unclipped from the front and rear masts. This I have decided on as I did not want to lose any rigging just to make taking the top of easier.

Firstly I cut, shaped and glued together two sections of lime dowel. ( its much more bendy and takes a lot more punishment ) Then I fitted the cross rings from aluminium tube cutting it back where needed until it fitted perfectly round the wood.


Then I started to wrap and detail the entire mast using Brass wire and Aluminium Sheaths to add the detail. I then drilled all the tiny holes and started to add copper and brass sections to allow me something to link rigging connections into.


Then the guessed locking clip was added.


I then built the front mast, although later I removed the metal down supports as I think they look to thick and these will be replaced with tensioned wire instead, the front mast also has a piece of wire drilled about  cm up inside it to eliminate easy breakage


The rear mast was built in much the same way but is made from metal as this is the most likely one to get caught. The two tiny little eyes either side of it are for its tensioning wires, and the two eyes further out are spares but seem to be on many crafts rears as are the four little riveted bars ( rivets done by blunt round end being pushed into plastic then plastic cut and turned over showing rivet heads ).


Next I started to build the little platform for the Searchlight, this was made out of three layers of plastic laminated together, the top thinner layer being rivetted as shown in pictures ( same method as above ). I then widened out a section of alum tube and placed this into the drilled hole in the centre, The whole structure was heavily built up with thick plastic strip before being glued down to the roof in the correct place, Then its legs were added. I drilled two close holes in the roof and ran the cables through it as on the real craft. the spotlight is a snug fit and can be removed now for changing light bulbs ( LED ) and for painting and finishing. ( NB - Little brass eyes everywhere are for rigging fittings ... )


I then fitted the Side navigation lights, these are an annoying shape for a start and would only just fit an LED and stay in scale, so I fitted the LED to the cab first,


Then I created a template from wood to heat mould the light forms over, The heat forming is very basic and inolves a lighter and some .040 plastikard, heat one side in circular motions and ram it over the former ( on a long pole ) fast.


I then trimmed these down filed the light gaps and fitted them to a ready cut out black frame, ( cut out inner hole glue light over it then leave to dry and trim round).


These were then lightly glued ( removable ) over the LED and had canopy 560 glue pumped round the front of the LED, When it had dried it left a full coloured working sealed light. The camera seems to have reflected off the glue but you get the general idea !


Next I made the Lifebelts, once again the originals were way off scale and I couldn't find what i needed on the interweb so I brought two from battle crafts and altered them ...


Wrapped with thin string, and then sealed with superglue and lightly sanded when dry. The holder is made from brass sheet, cut shaped and bent to fit. there is a pin in the rear of the lifebelt base to pin glue it to the side when it has all been painted.


Logged
Take care everyday to spread a little joy into someone elses life ! xx

Coastal

  • Full Mayhemer
  • *****
  • Offline Offline
  • Posts: 58
  • Possibly the craziest girl to have ever lived !
  • Location: Isle Of Wight
Re: 63ft ASR Build Log
« Reply #12 on: April 03, 2013, 12:19:56 pm »

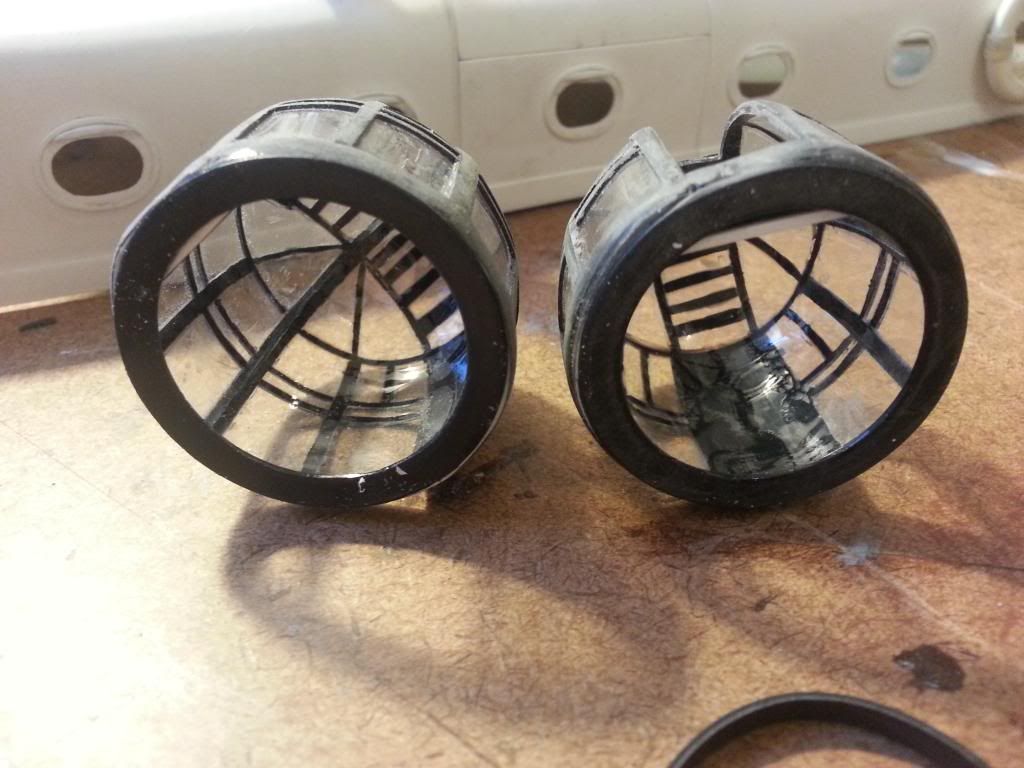
And then the turret builds.... These were hard, the mechanisms even more difficult, I don't want to turrets to get damaged in event of a jam so they will be belt driven with wide belts, The first issue was finding a tube.. There were none the size I wanted ... lucky i was just about to throw two old paint pots away when i realized there massive potential.  They were immediately cleaned out completely and added to the build board.  I first cut two black discs these would come into play later on in the build and tested the pots for what glue would stick to them... superglue in this case !


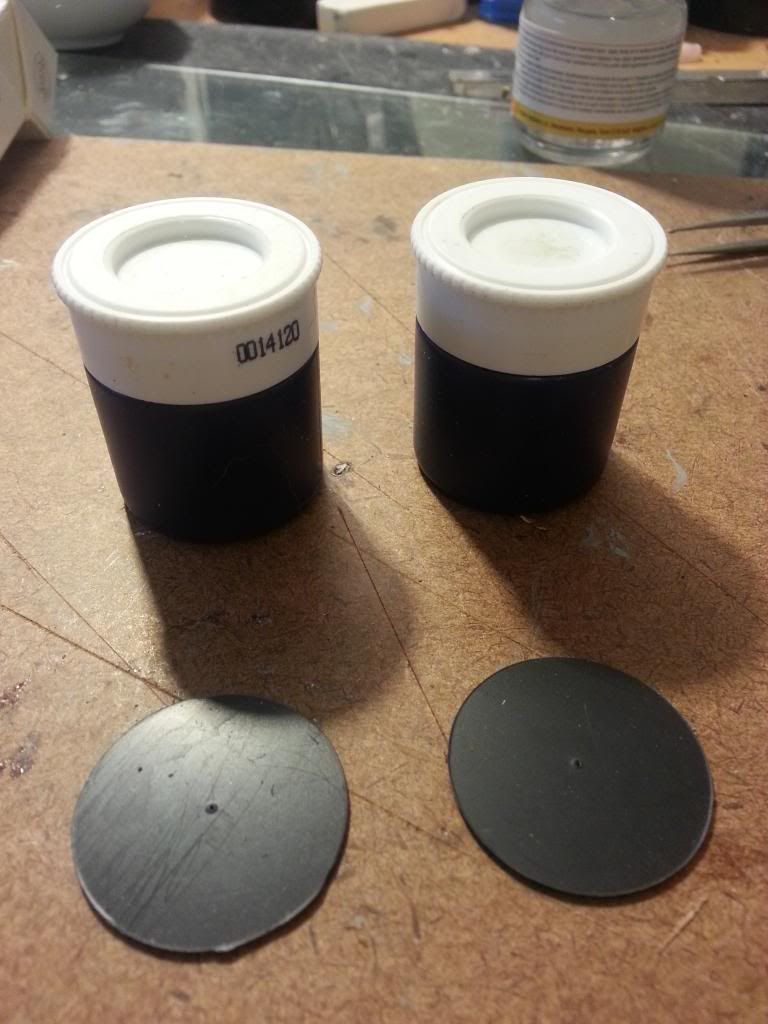
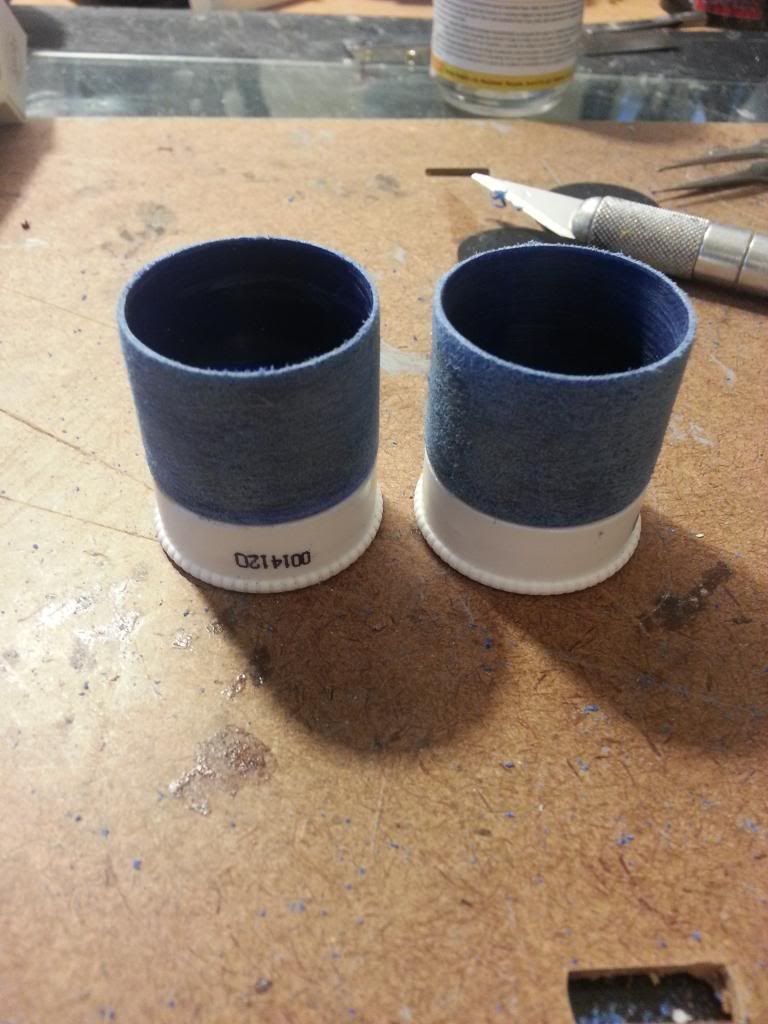
Then I chopped the tops of and sanded them roughly... to give me grip when i needed to remove them... The lids are the spindle points and due to the tight fit they have they allow me to unscrew the turrets from the system... and remove them.... !


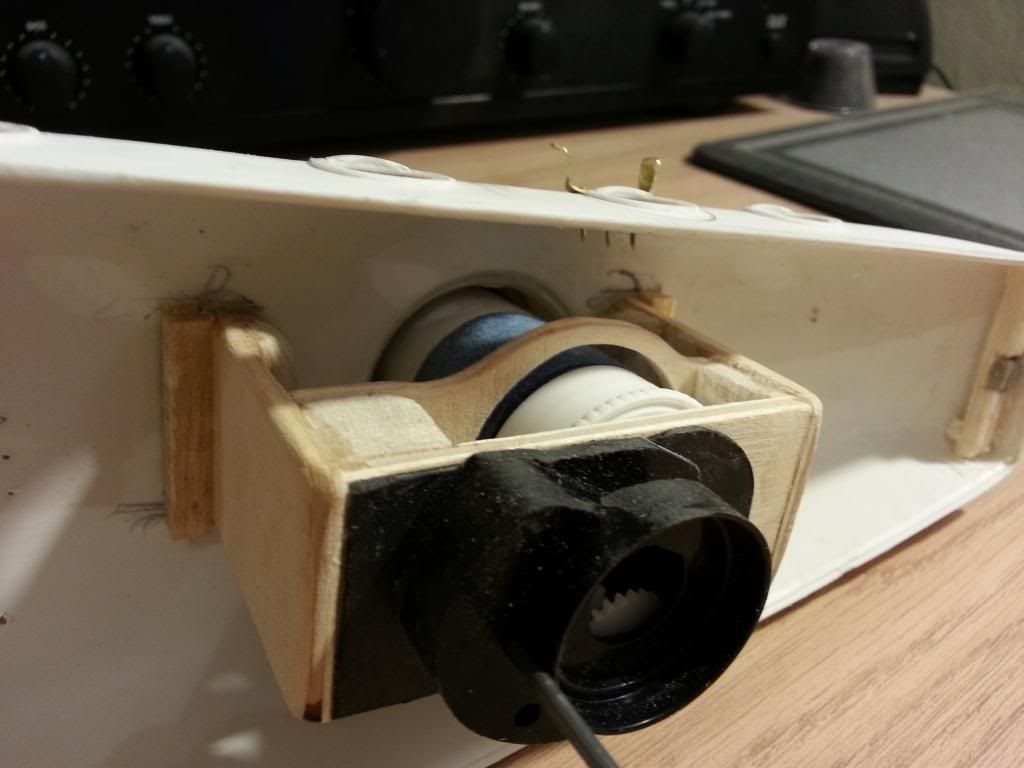
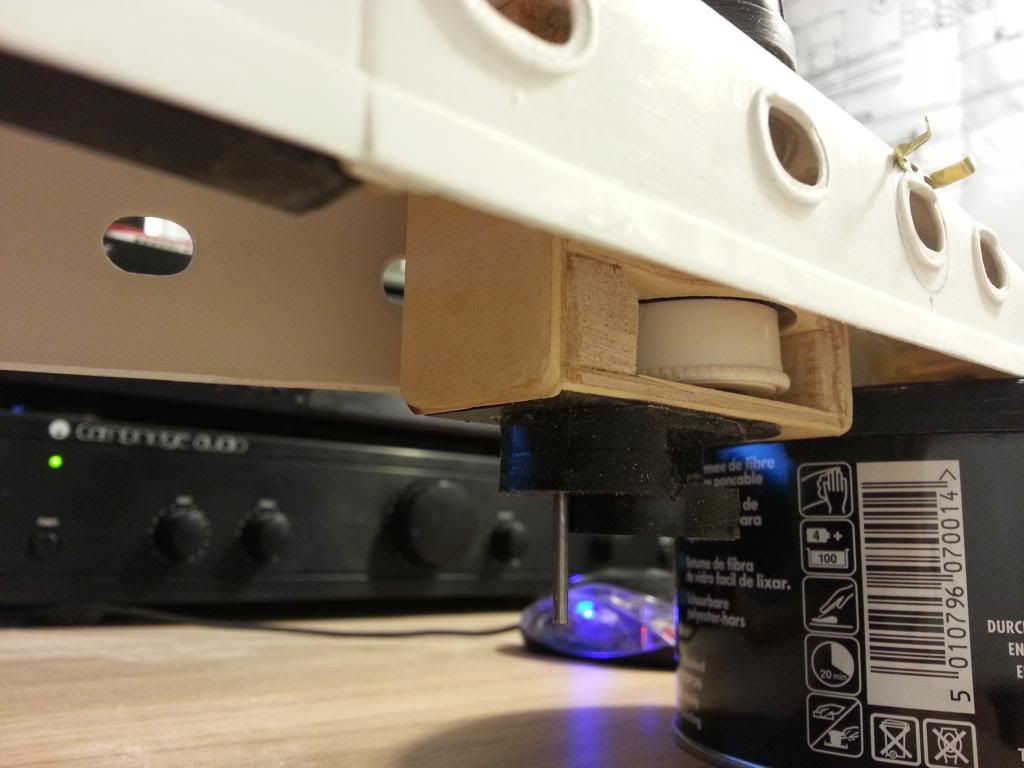
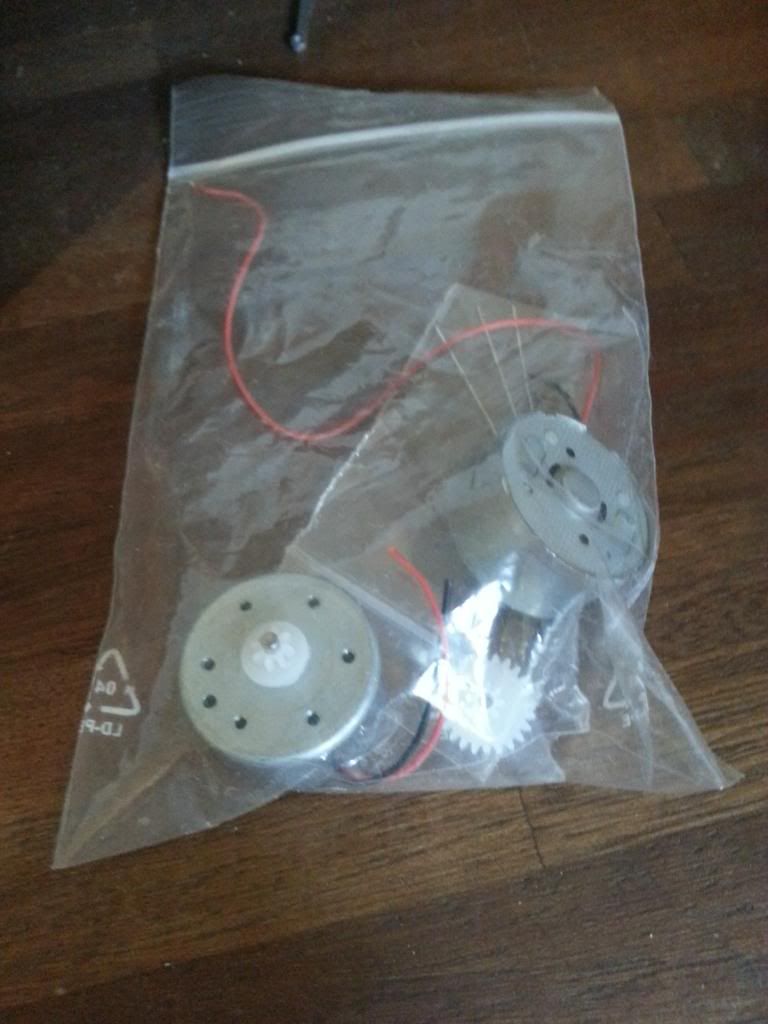
Next thing was to take the slow gearboxes I had bought from components place in wales ... ( cant remember the name )  and add these the the base of the frame made from 3mm plywood for strength. I fitted brass collets into all the places shafts ran and fixed the spindle for the turret base. next i added a short tube in the middle of the paint pot lid ( if you look in the light in the inside you can see the direct center ) and made sure it would stay in place by gluing a block around it.


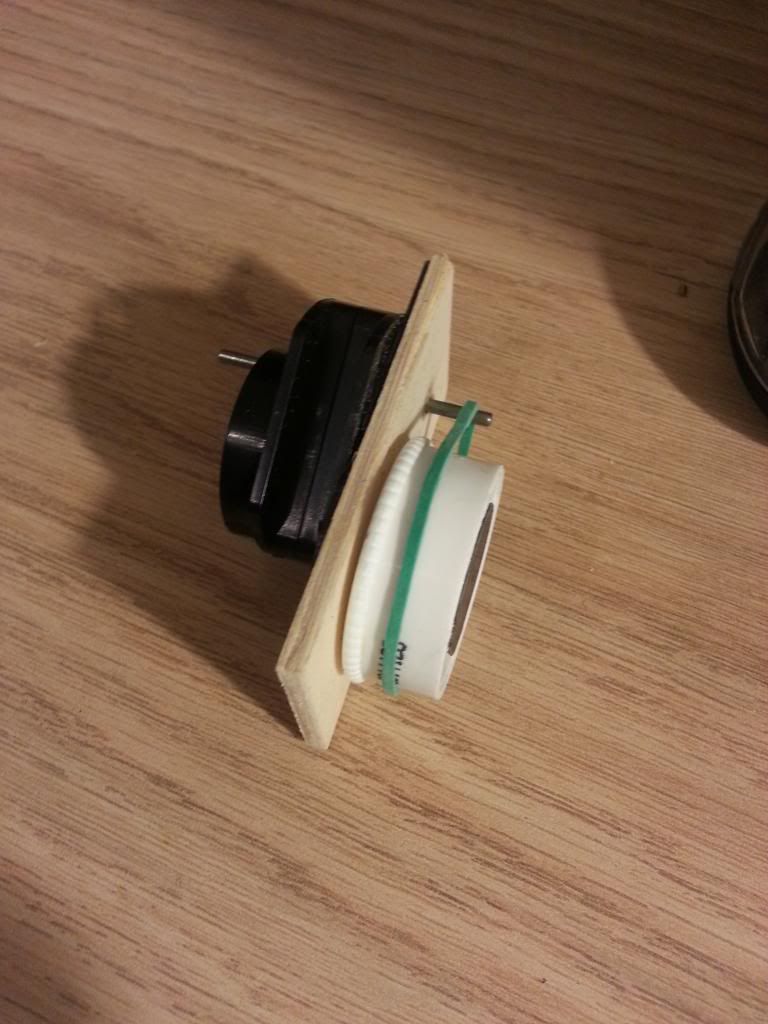
I then measured and added a second section to balance out everything, once again colleting for the shaft from the gearbox.


Finally the sides were measured repeatedly till i was happy with the sizes then added before the unit was fixed up in place.


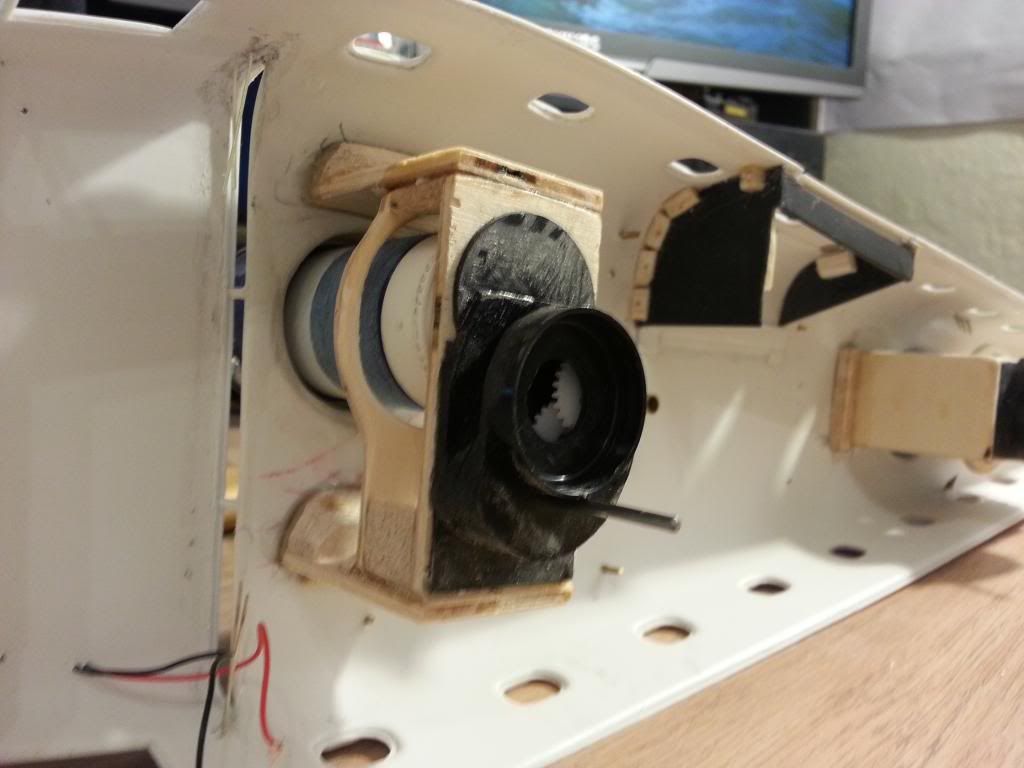
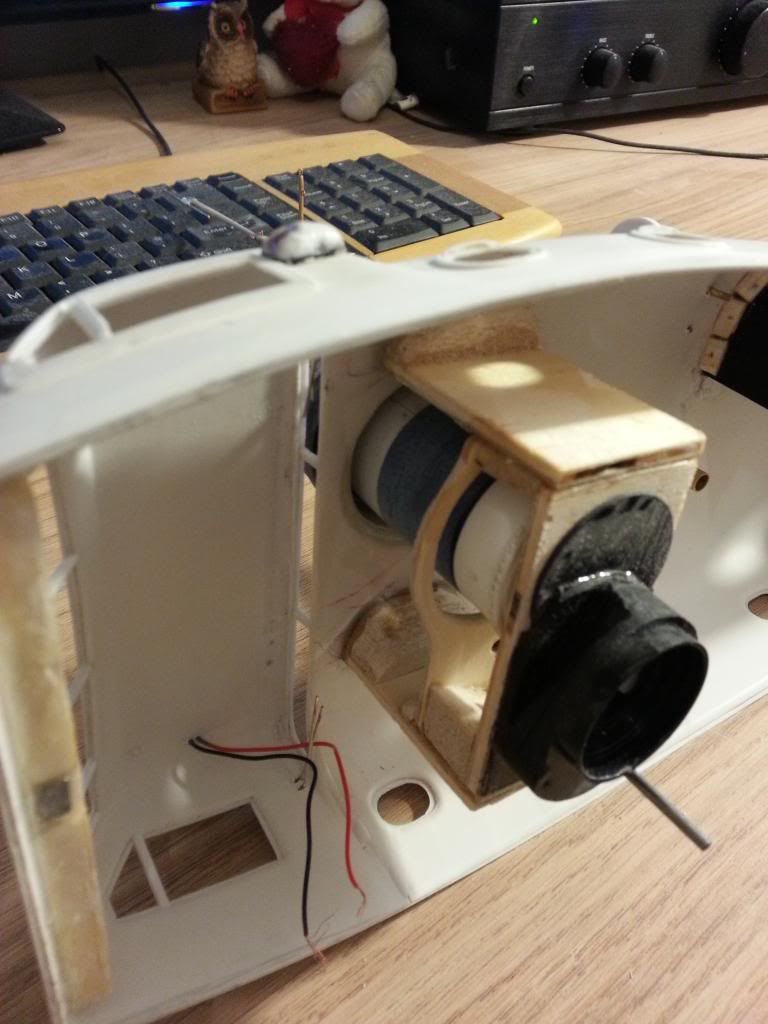
By holding the outer edge of the lids you can unscrew the turret and remove it from the craft, and the lid will also act as the belt wheel..


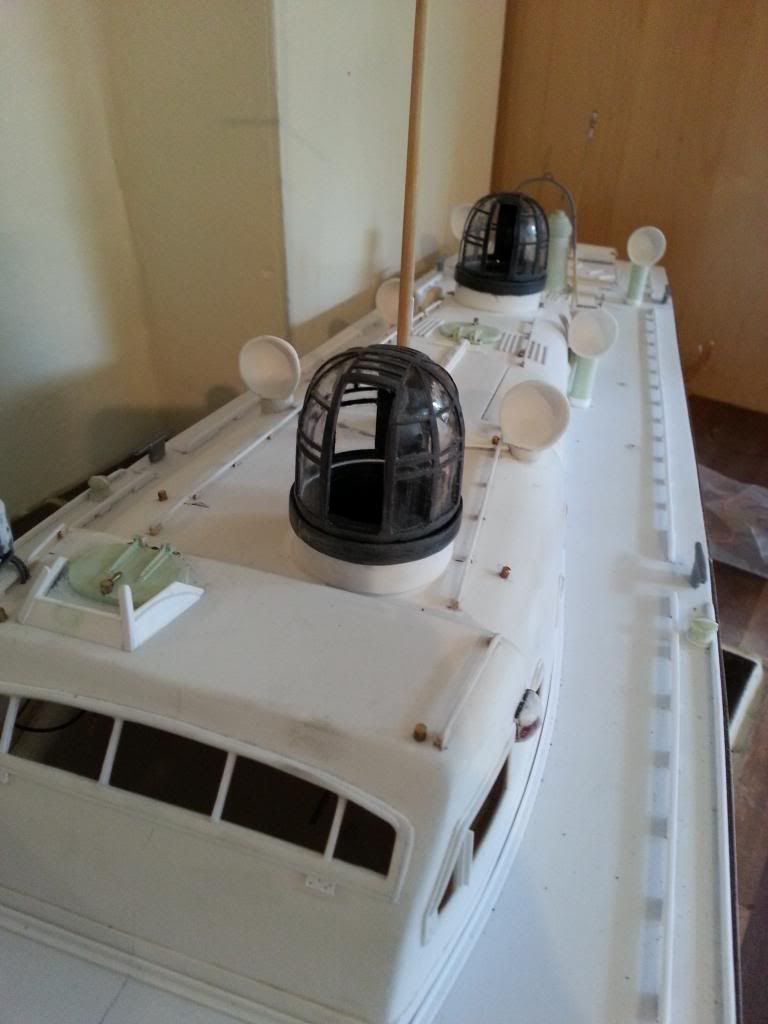
A couple of black edging strips were added to the top of the turret and now the turrets turn smoothly and easily from the drives, after painting I am expecting a small bit of sanding and cleaning will be needed , I will be using a Plastic friendly model grease on all the joints to allow for freer movement.


The bases of the turrets also got beefed up as well..


The motors waiting to be fitted in place...


And finally both turrets sitting in place .... need detailing now but are pretty much ready to have guns and outer saftey ring added.


Logged
Take care everyday to spread a little joy into someone elses life ! xx

eddiesolo

  • Full Mayhemer
  • *****
  • Offline Offline
  • Posts: 1,253
  • Shiver me timbers...I've spilt me glue!
  • Location: West Yorkshire UK
Re: 63ft ASR Build Log
« Reply #13 on: April 03, 2013, 12:37:06 pm »

Some great ideas here, the paint cans are a superb 'improv' design that works a treat. Looking really good.
Si:)
Logged
My models are not nice, clean and ship-shape. They be mucky, grubby, rusty and smelly.
Pages: [1]   Go Up
 

Page created in 0.104 seconds with 21 queries.