How do chaps.
Months ago I mentioned that I was building a model of HMS Rupert, the Turretted steam Ram and seeing Bob's topic on Polyphemus and the recent upgrading of my hosting account spurred me to get the ball rolling on a topic concerning my project; giving something to the forum to demonstrate that it isn't all about asking questions:O)
I make models for a living though not large models of ships and so this is a learning curve for me in shaping such a large form, and electrics are an arcane science akin to alchemy in creating blue sparks and funny smokes!
So, The model will be in 1:96th scale approx and based on a fibreglass hull created from a plug made by me and sent to Deans for moulding and casting assuming they accept it.
I obtained some images from the web and an old two view drawing from a Jane's book which I subsequently found may not be 100% accurate, but images of the builders model show the drawings are not way off course so I have accepted them as my basis.
I do a lot of my work by measuring smaller scale plans or photos and using a scale formula to get the final dimentions I want. This avoids innacuracies creeping in due to the enlargement process of copiers and allows me to compensate for discrepencies in scale between different views on the same plan! Beleive me, I have found some shockers.
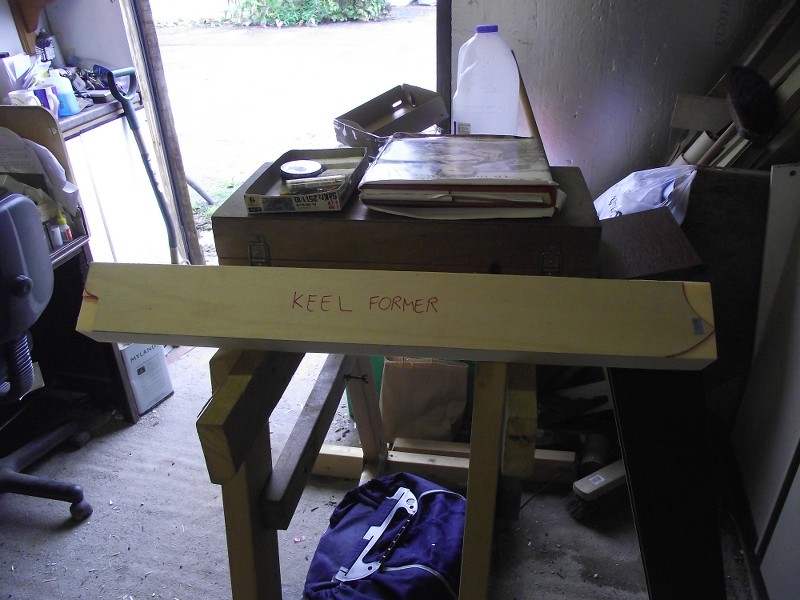
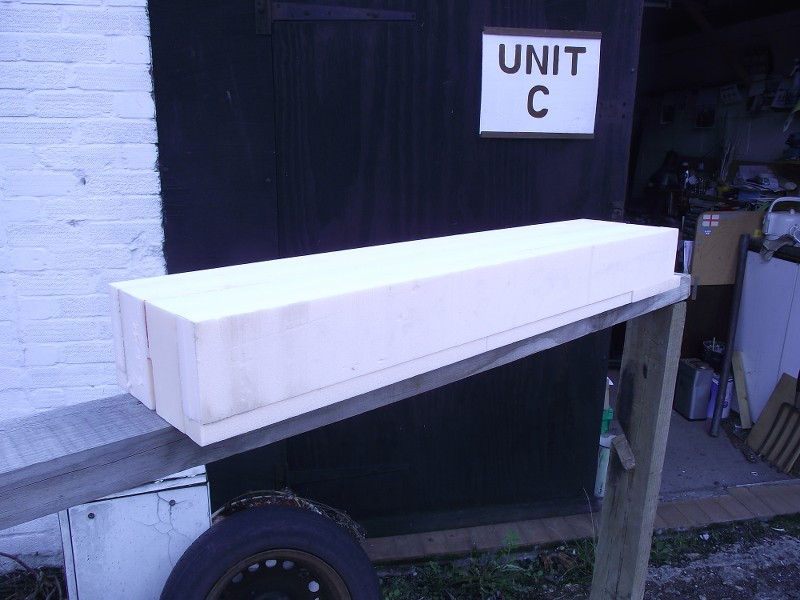
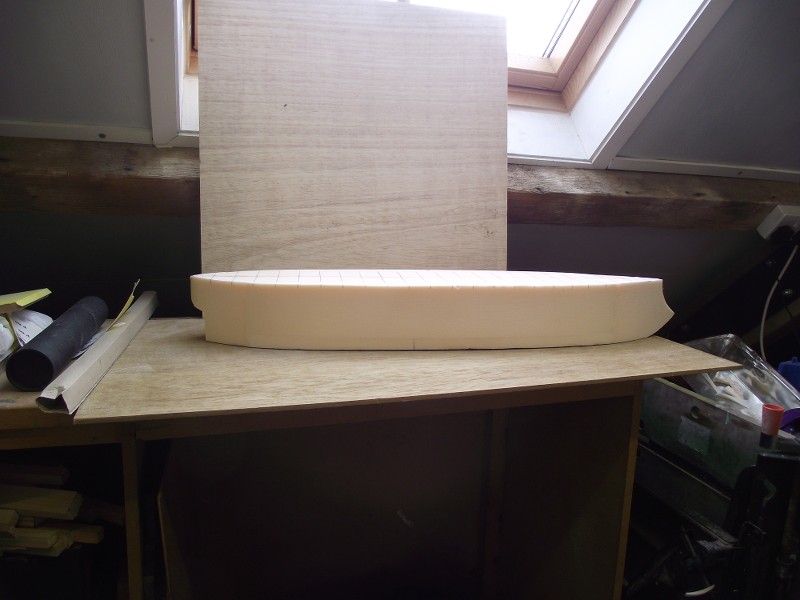
Therefore, I marked out the side view of the hull onto a piece of 1/16th ply giving me a central spine onto which I then fixed blocks of pink insulation foam
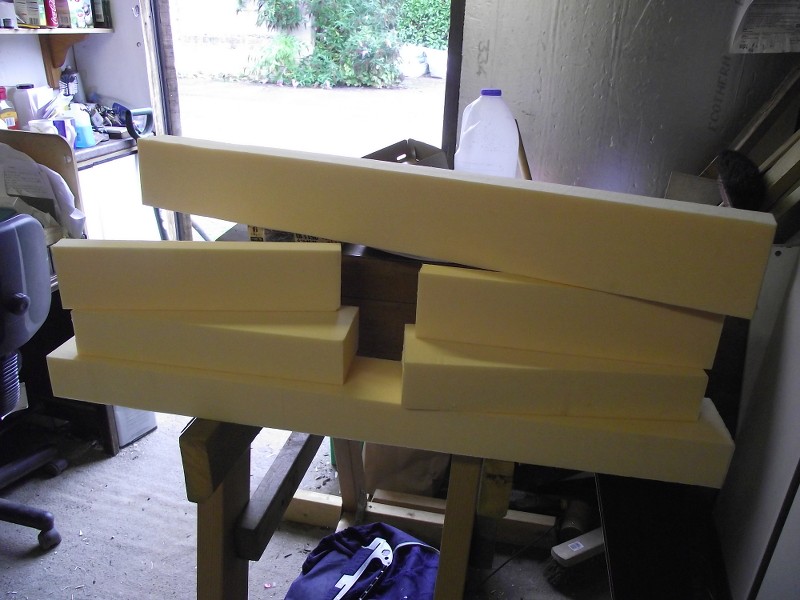
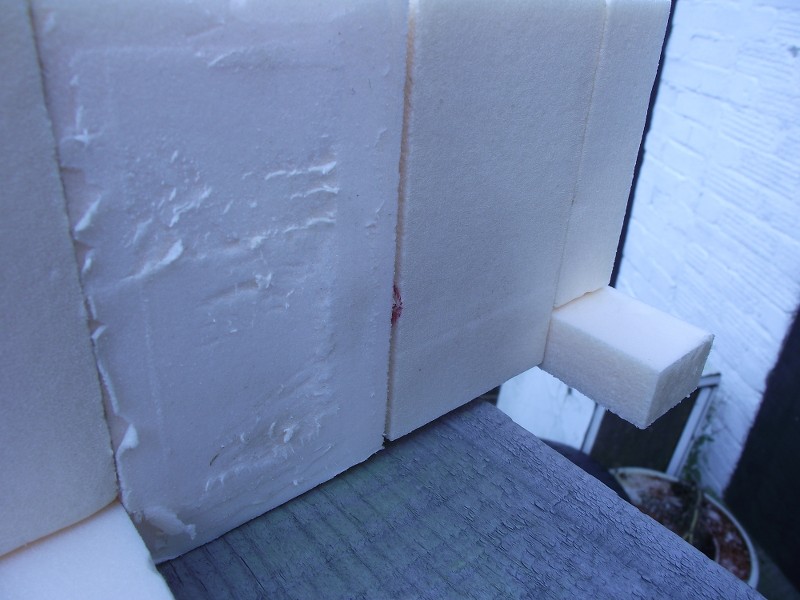
The inner blocks had sections removed to accomodate the deadwood cut from pieces of hardbpard to the shape predicted based upon the builder's model. PVA wood glue was used throughout for the plug as cellulose and styrene based adhesives readily attack the foam as can some CA glues.
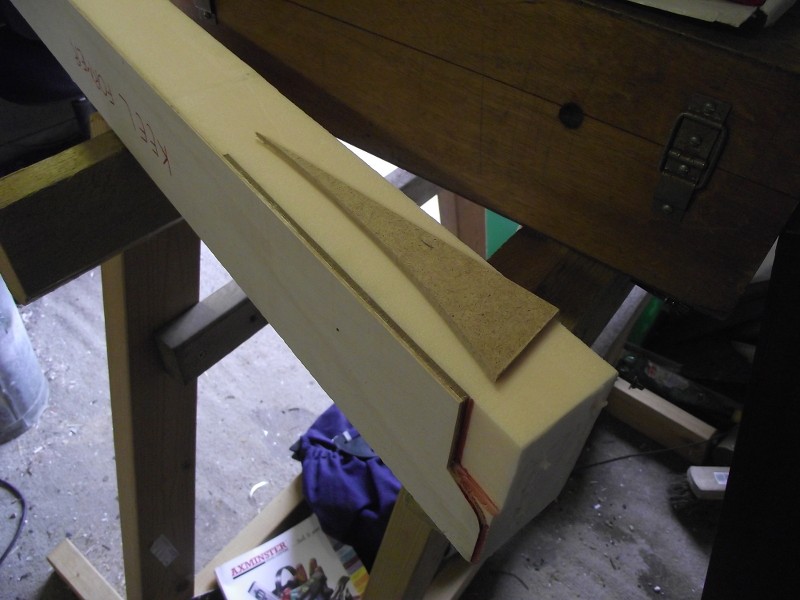
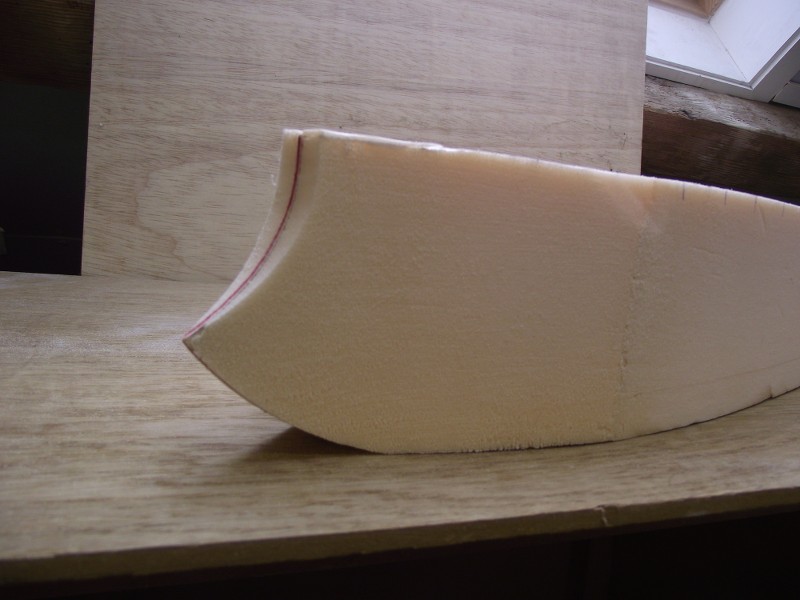
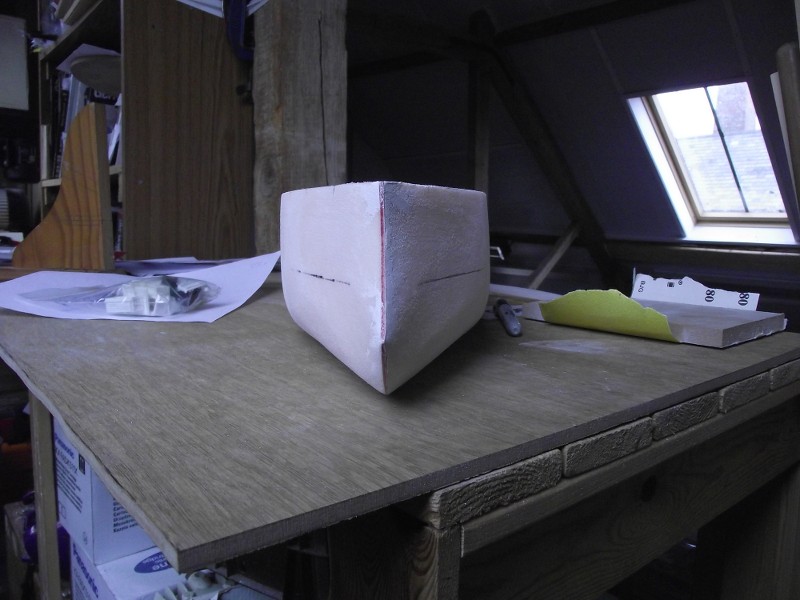
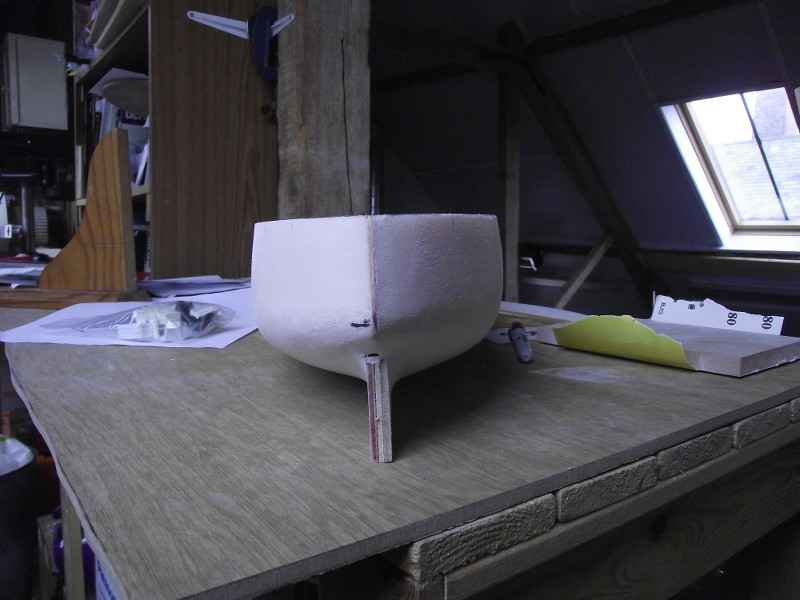
This stern view shows the deadwood. It is thicker than it should be but I considered strength was more important in this area.
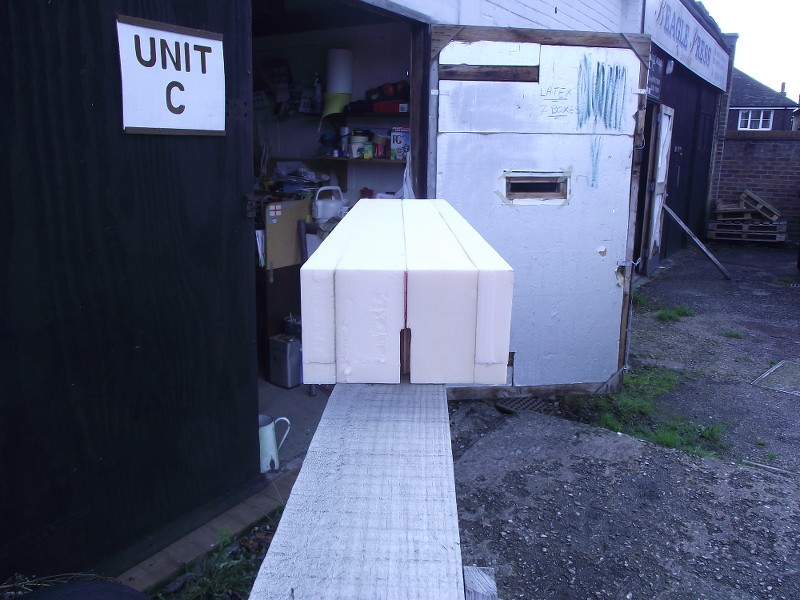
My bandsaw was too small to accomodate the depth of the hull blocks in one go, so I had to fabricate it from several pieces of foam.
I do not want to get too 'Granny's holiday photos' here, but I thought it would be worth showing this image of the ram snug in its cocoon of foam.
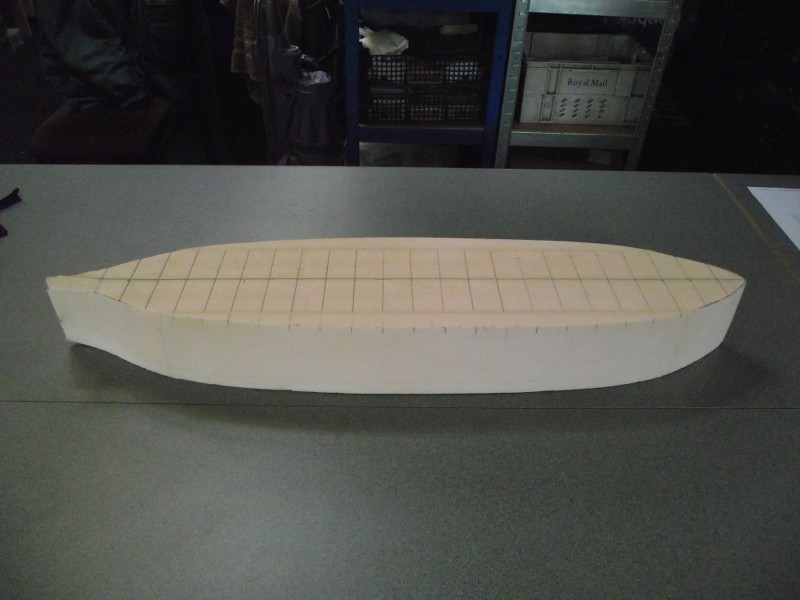
Once the adhesive had fully cured (something to consider when using PVA is the fact that it takes longer to dry within a non absorbant material like styrene foam so give it a week or two before attacking it with your arsenal of tools) the plan of the hull could be cut. I had marked the plan view of the drawings with a series of lines equidistant dow the length of the hull from which I took the widths of the hull at these points. This I then scaled up and marked onto the block. The points were then carefully joined by a line drawn using a method similar to the one Bob K mentioned by using flexible strip.
I used a sharp carving knife to do the surgery taking care not to calve chunks off at the bow as this area would be more difficult to reestablish with foam, though that did not stop me from dinking the form and having to repair and re carve one or two areas:O( This stage also saw a move from Sussex to Somerset so there was a short hiatus at this point while I sorted my space out.
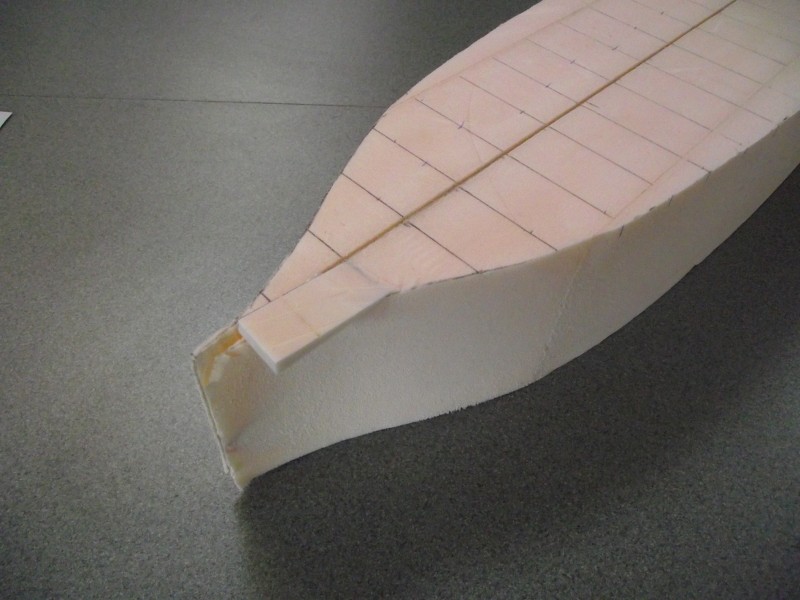
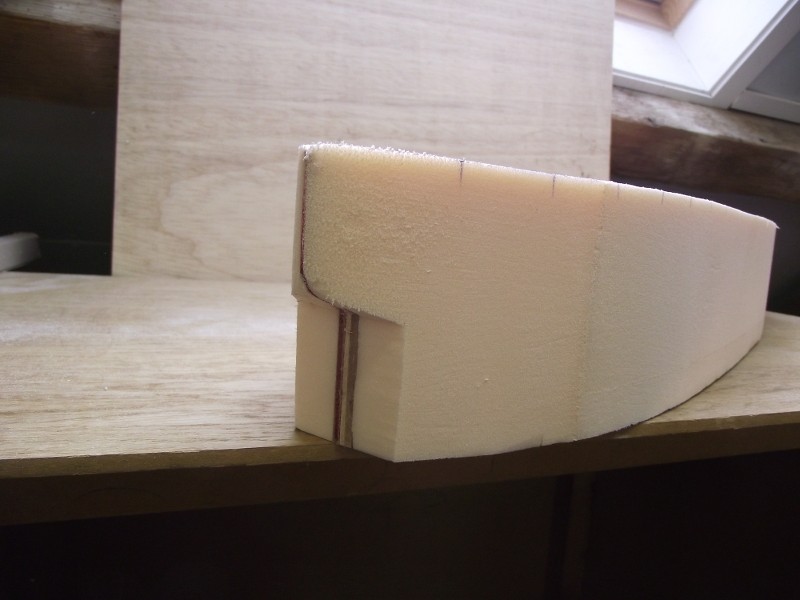
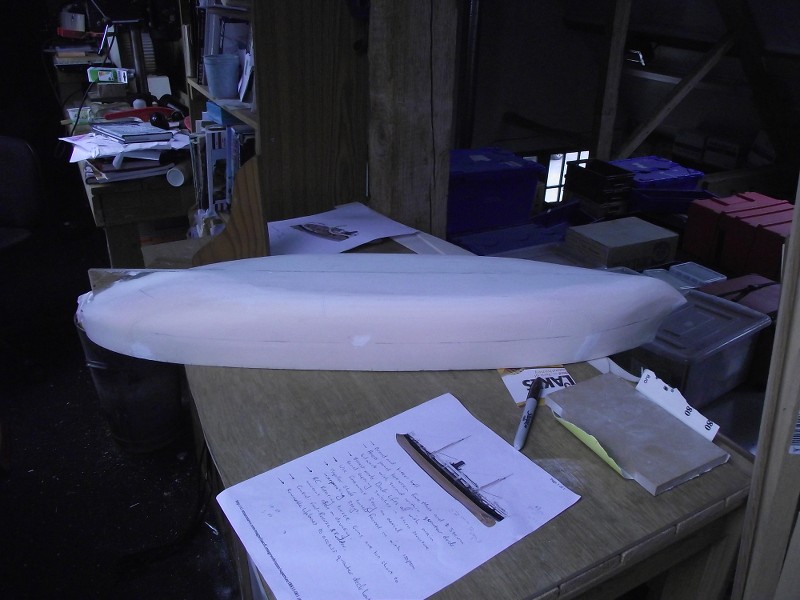
The stern has yet to have the run of the hull carved but it gives you an idea of the shape I was after.
The shape was refined with coarse abrasive.
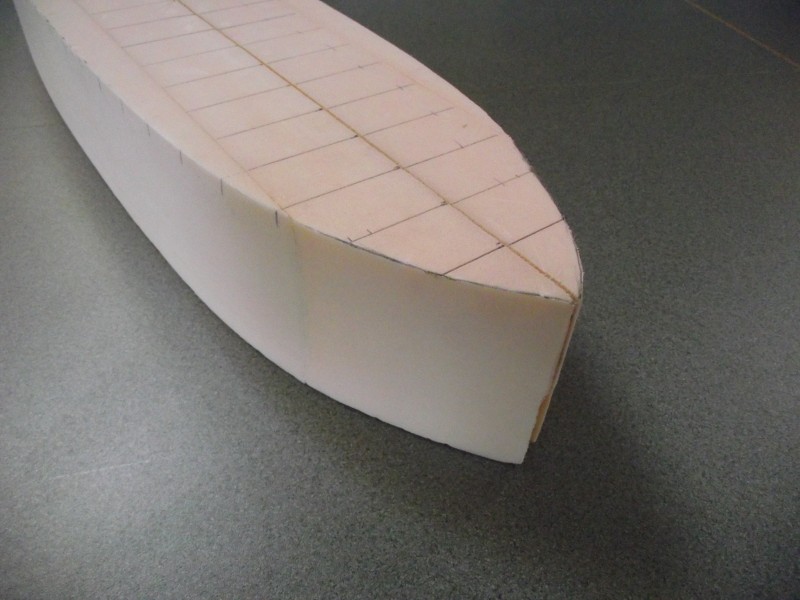
The plan view showing the bow and stern plus the datum lines. The top and bottom have been sanded flat which explains the missing ends to the datum lines. These were reinstated so that I could mark the top of the hull so that I could form the tumblehome.
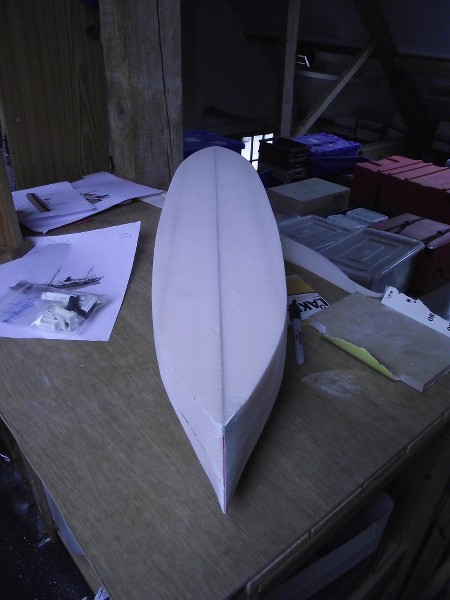
Here you can see the Ram bow in all its glory. it is still a bit chunky as the hull has yet to be fully shaped and you can see why it is critical that you do not get too 'Sweeny todd' with your cutting implements:O)
The Stern, again chunky.
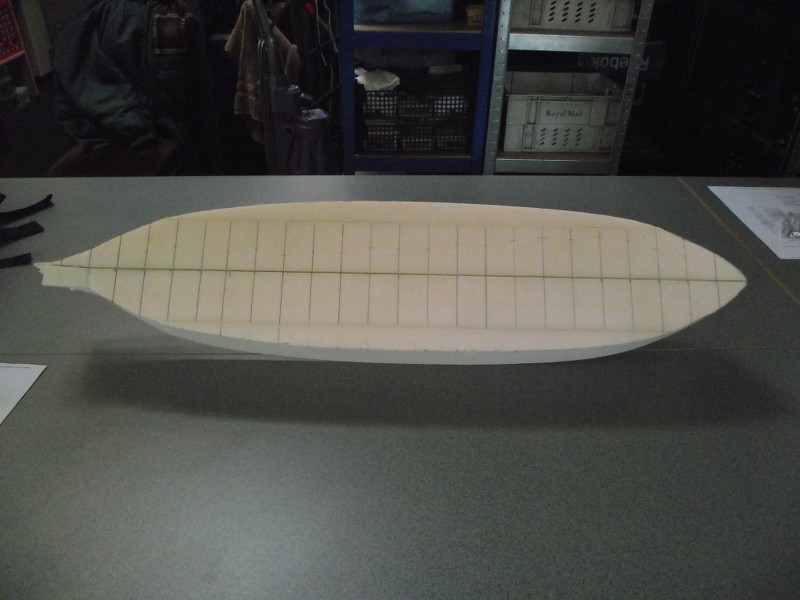
The plug is definitly becoming recognisable as a ship.
Here I have carved the hull further shaping the plug curves and all.
The bow needs a little more work. I do not have the hull lines, so I had to be a bit sculptural and thus I am not 100% sure about the way the bow fares into the bilges.

Upper view showing the shape nearly completed. I will add the bulwarks to the stern as a block including the cutouts for the 64pounder RMLs.
Views of the bow and stern. A little asymetry has crept in and so as part of seting up the position of the propshafts, I am thinking of cutting into the plug at several points perpendicular to the keel and then inserting thick card. I will then draw around these pieces to get the profile of the hull then cut the shapes out and compare one with the other so I can get the hull symetric. I just haver to be careful I do not and up with a wiggly hull as it meanders from bow to stern, each segment being symetrical but not aligned to its neighbouring sections!
I await propshafts. I have two 8inch shafts on order from a friend who had a model shop in Bognor before closing down so I am raiding his stock!
More soon.....


 Author
Topic: HMS Rupert (Read 16445 times)
Author
Topic: HMS Rupert (Read 16445 times)