First of all, thanks to all of the replies and advice posted in this thread so far. While I might not be able to respond individually to all of it, rest assured it is all being taken on board. Who knows, it might help other people browsing the thread in the future too (hello future people!).
I will be following this with great interest Jack. Very well engineered, good instructions, but I became a bit stuck on mine a couple of years ago so would appreciate lots of photos and info, especially on assembling the three hull mouldings. ie epoxying the bayonet-ring section to the long hull section.
I have seen one sailing, very quick and agile.
I've also seen one sailing and I've had the pleasure of sailing it as well. They are very fast- especially as you get to periscope depth and the rounded bow becomes more efficient (whereas of course a pointed bow works best running at the surface and less well underwater). This brushless version should be able to easily beat 10kph submerged. Of course I bought the brushless version for a longer running time so I'll be using the bare minimum of available throttle (most of the time- surfaced the extra power might come in handy and the underwater rocketship could be fun after a bit of practice).
As to the bayonet lock ring, this version of the kit comes with it pre-installed and lubricated. I also believe it's been pressure tested. I have taken some photos if it helps, but as U-33 already suggested it is probably best to ask other people with more experience. As Subculture said, this IS an assembly job. While I don't have much experience with traditional kits either, I do have a couple that I inherited and are waiting for my skills to develop and this submarine arrived much further along, with all of the watertight bulkheads already installed it seems. Which I'm grateful for- I wasn't relishing the prospect of installing watertight bulkheads. That being said, I don't want to give the wrong impression. This is not an Almost Ready To Run boat by any stretch of the imagination. A great deal of wiring is required and some amounts of construction.
Below are pictures of both the bow and stern O-ring mounts in situ which at least shows the way they're orientated on this model (whether you could have them another way I don't know).

Stern locking ring

Stern ring alignment

Bow locking ring

External shot of the locking ring.
On to today, I started work on the kit this evening after recovering (slightly) from the most vicious cold I've had in years. It was all pretty basic stuff, assembling the battery compartment, fitting said compartment to the piston tank and putting the pressure switch in place with associated brass and tubing. The two tubes with nothing attached yet are used as handy routing for power cables from the batteries at the bow to the electrical systems in the stern. The first potential flaw I've seen with the kit is where the tube to the ballast tank is routed, cutting access to the battery compartment in half which could make completely removing the batteries for recharging potentially problematic, but I'll have to cross that hurdle when I get to it. So far I'm impressed by how well everything goes together- the only hiccup was the routing holes for cable runs were out of alignment by about half a millimetre and needed some filing.

Battery compartment assembled and attached to the piston tank. The unit at the opposite end to the piston is the pressure switch.
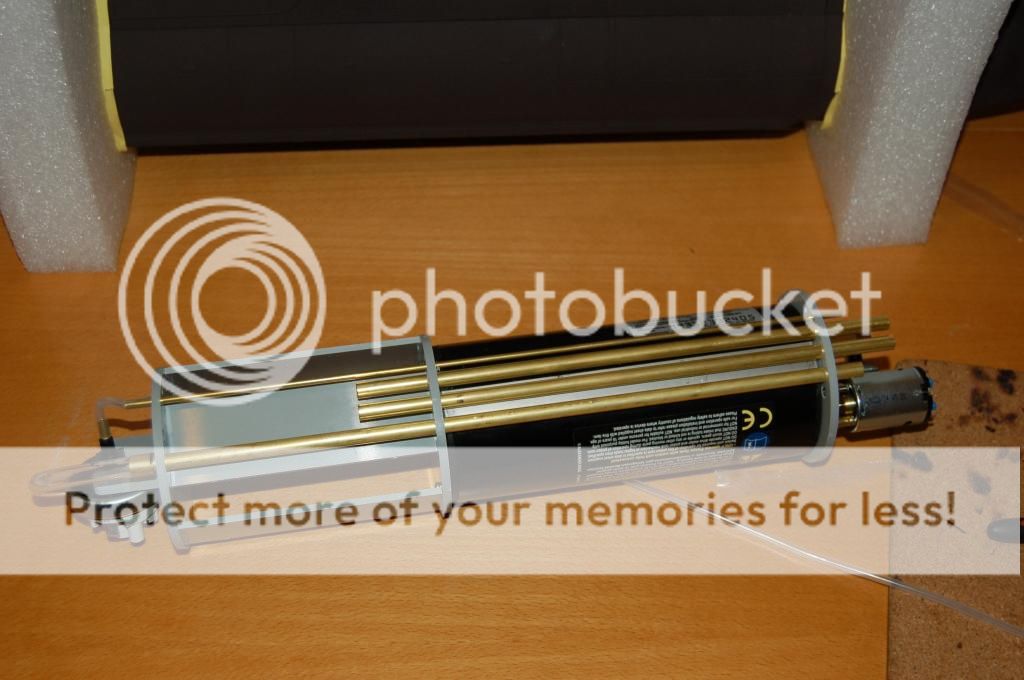
With various routings for air, water and power cabling installed.

Finally an image of the same unit as above but flipped so you can see the reverse. Maybe it was because I was tired, but I was initially stumped as where this water line should be routed going from the photo in the manual. I think it took reading the thing five times to finally realise it should go into the piston tank, which was clearly stated in writing.
I'll try to get a bit more done in the weekend proper.


 Author
Topic: Engel Type 212A Build Log (Read 33119 times)
Author
Topic: Engel Type 212A Build Log (Read 33119 times)