Model Boat Mayhem

Please login or register.

Login with username, password and session length.
Pages: 1 [2] 3   Go Down

Author Topic: USS Nautilus - final Edition  (Read 17074 times)

Dr.Schmidt

  • Full Mayhemer
  • *****
  • Offline Offline
  • Posts: 227
  • Model Boat Mayhem is Great!
  • Location: Nördlingen, Germany
Re: USS Nautilus - final Edition
« Reply #25 on: July 21, 2016, 08:32:33 pm »

  On the left and right side of the sail position lights are located. The position lights are cast of PU resin:


Finally a door is scribed on the port side of the sail using a 0, 5 mm thick styrene mask. To scribe the lines, I used a 0,5 mm diameter steel wire:


Now the sail is ready for the top coat:
 
Logged

Dr.Schmidt

  • Full Mayhemer
  • *****
  • Offline Offline
  • Posts: 227
  • Model Boat Mayhem is Great!
  • Location: Nördlingen, Germany
Re: USS Nautilus - final Edition
« Reply #26 on: July 22, 2016, 05:38:50 pm »

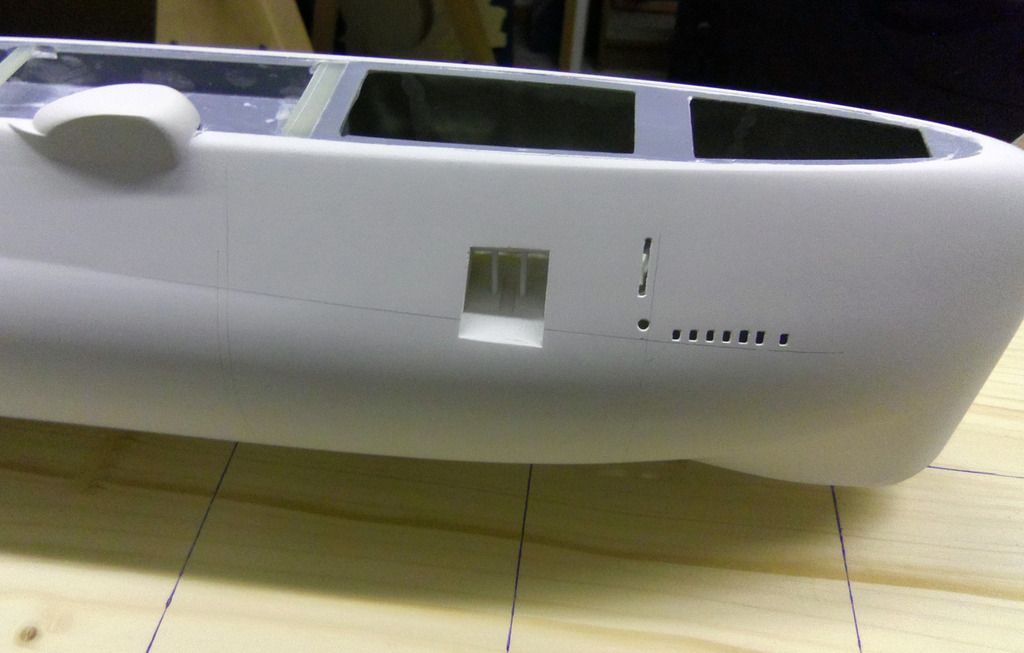
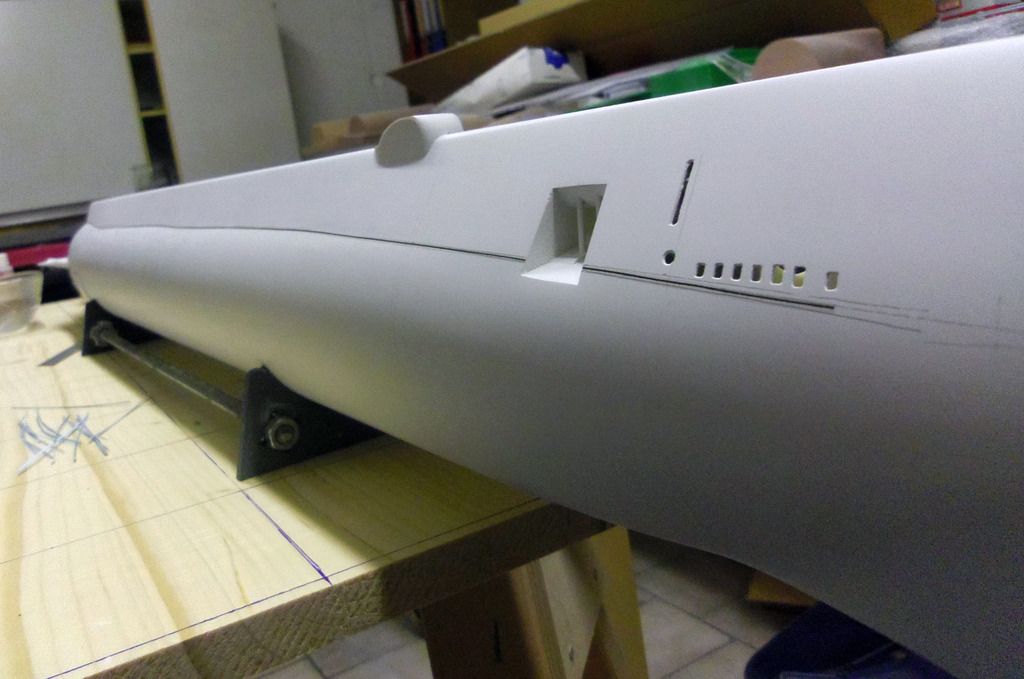
  Next are the surface details on the hull. Here it’s mainly about weld lines and rivets.
 
A few comments about those details: On many boats one sees weld lines and rivets, often very prominent, too often way too big. Here it is often useful to think a bit about the scale o the boat. My Nautilus is built 1:87 scale (H0). I apply weld lines of 0.3 mm width, which would make them 2.6 cm wide on the original. That’s already quite big. Many rivets I had on model submarines would be as big as soccer balls, weld lines as wide as 10 cm. Sometimes less is more.
 
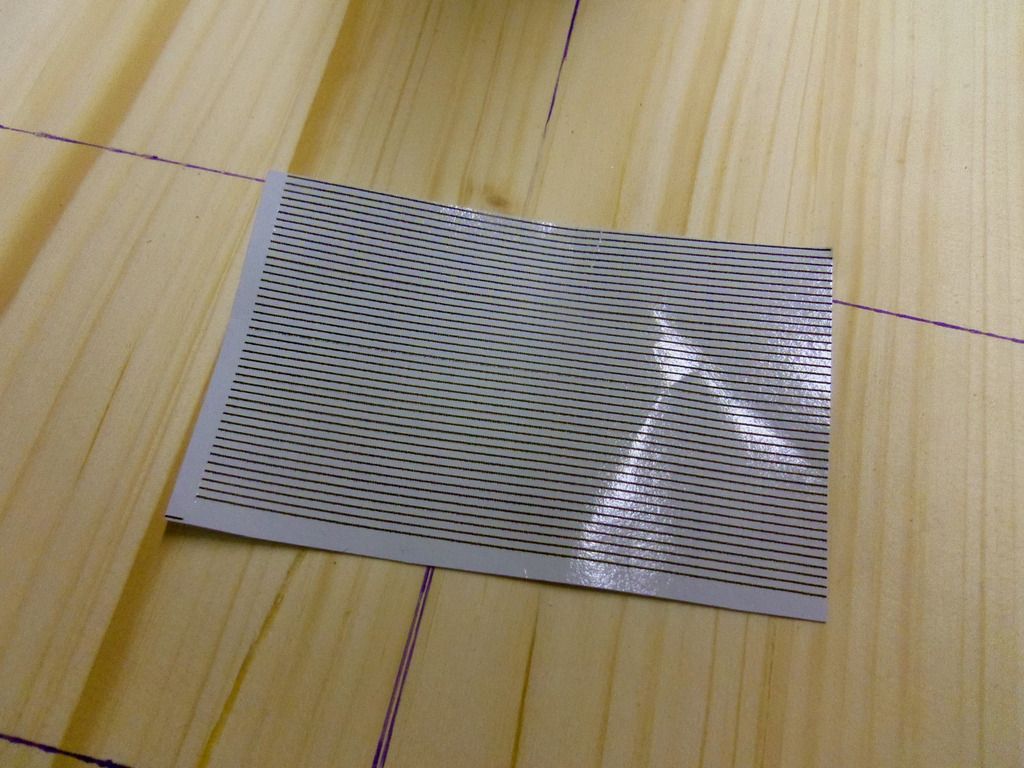
For the weld lines I use decals with resin relief, so called surface details from Archer Fine Transfers. What they are and how they are applied is demonstrated here:
 
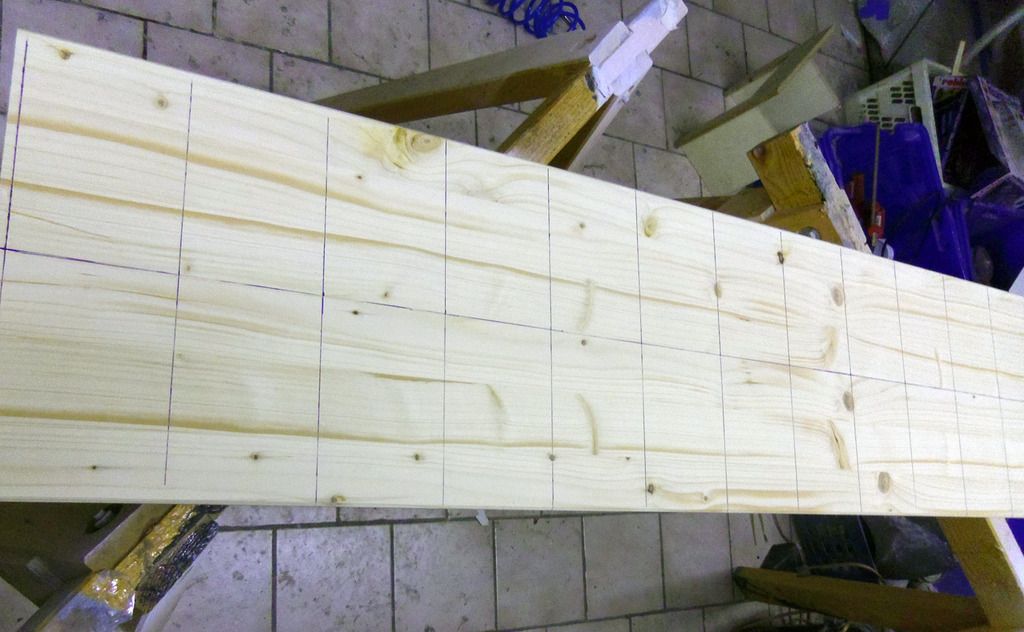
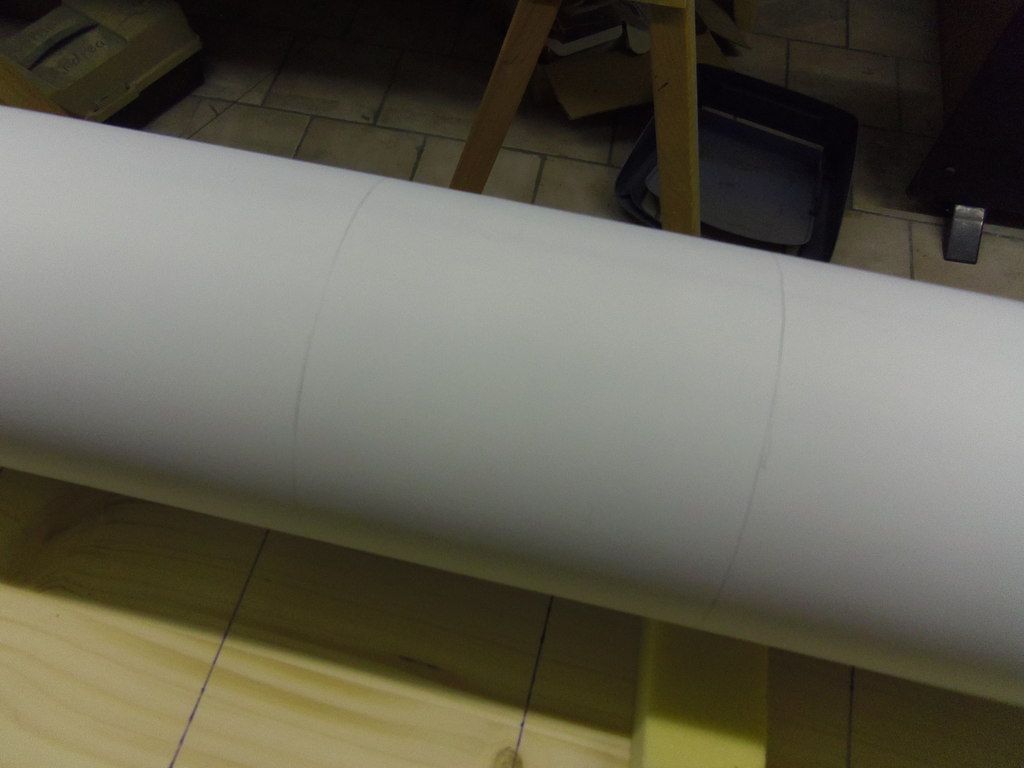
https://youtu.be/aptnvFeEqio
 
 
The markings for the weld lines are applied like as follows: The hull will get a segment weld every 10 cm. This grid is drawn on a straight board.


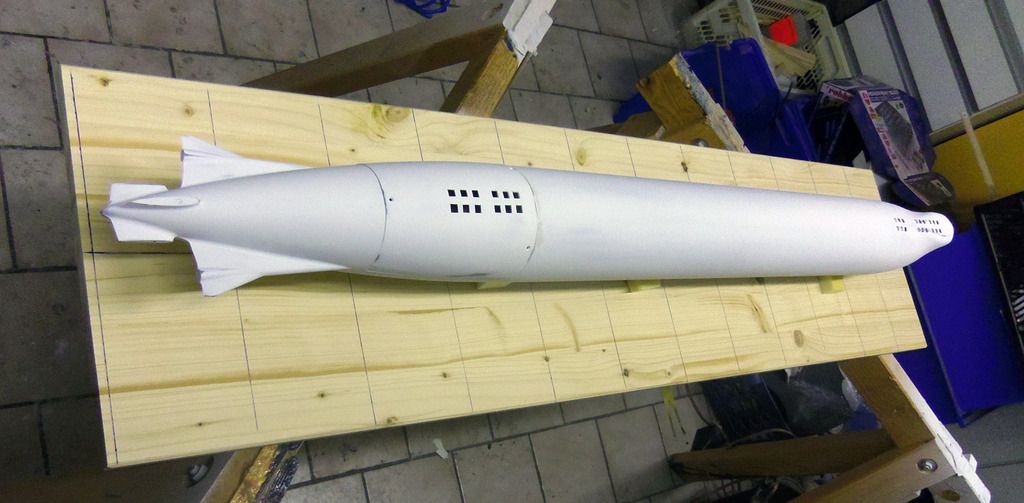
The boat is put upside down onto the board and centered along the symmetry line:


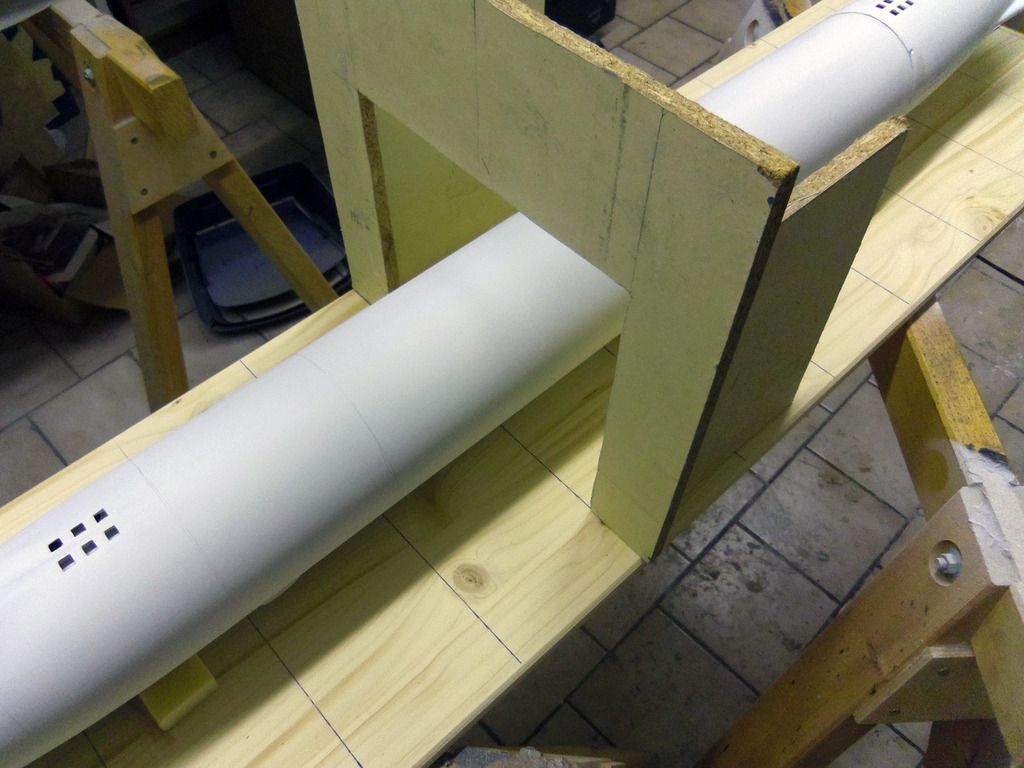
A vertical marking board is built from spare wood. The board is positioned on the segment markings:


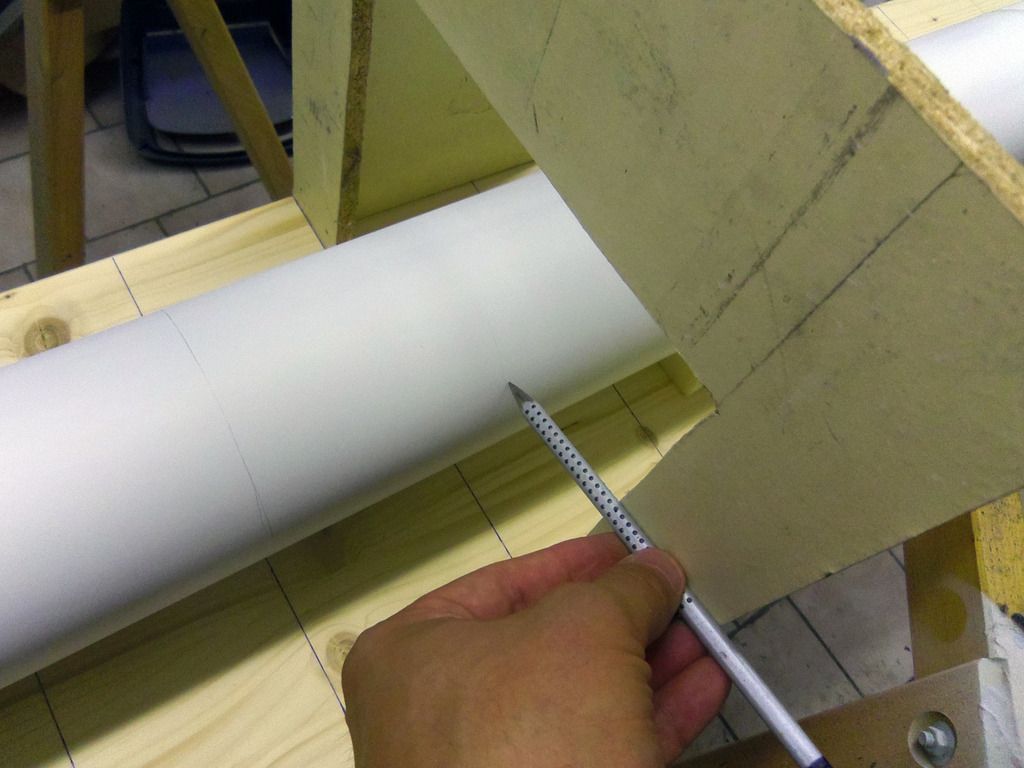
Now the weld line markings can be transferred onto the hull using a pencil:


Additional markings are laid down using masking tape and then transferred using a pencil:


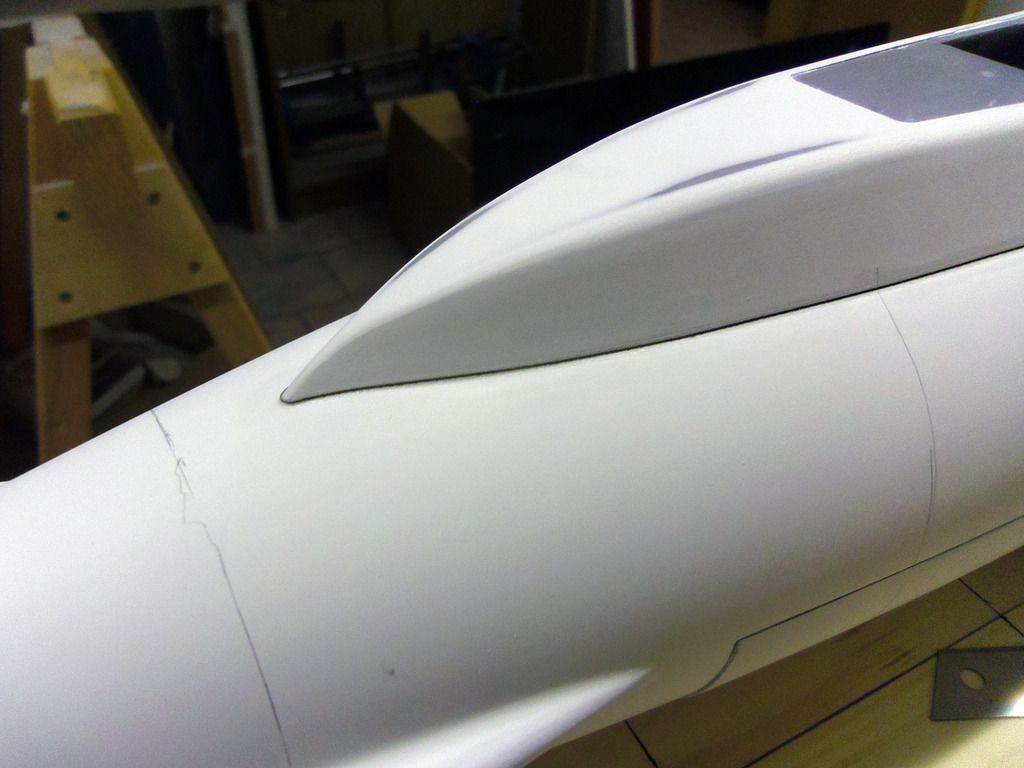
The weld lines are 0.3 mm wide Archer Fine Transfer surface details:


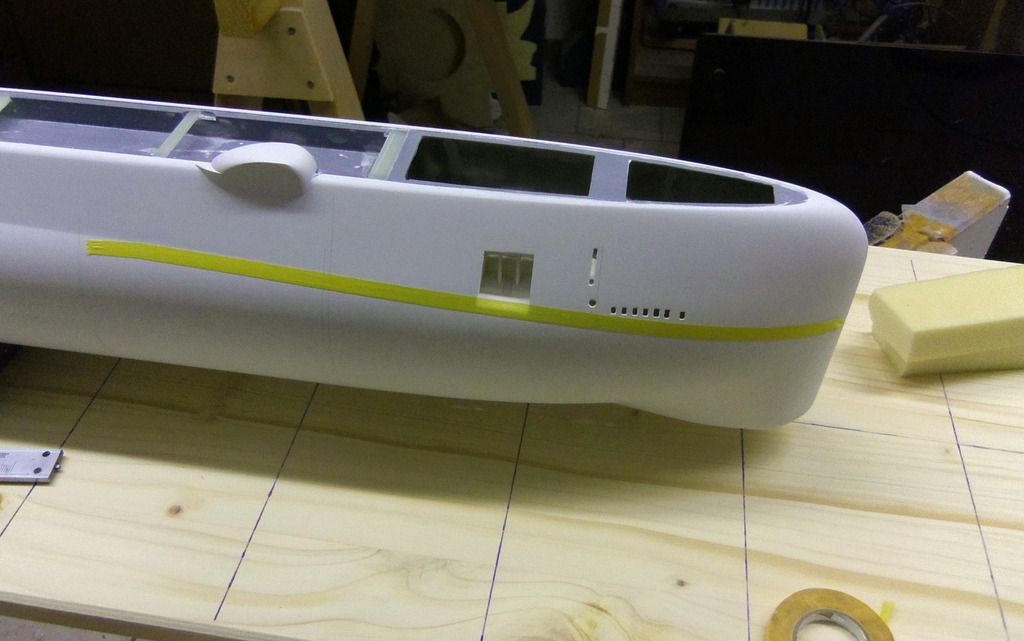
First, the edge of the deck superstructure is emphasized:


Logged

ballastanksian

  • Full Mayhemer
  • *****
  • Offline Offline
  • Posts: 6,447
  • Model Boat Mayhem inspires me!
  • Location: Crewkerne
Re: USS Nautilus - final Edition
« Reply #27 on: July 22, 2016, 10:37:43 pm »

Crikey Dr, your work always reminds me of a special gizmo being prepared in a Bond movie.

Lovely work and thanks for the in depth reporting.
Logged
Pond weed is your enemy

Dr.Schmidt

  • Full Mayhemer
  • *****
  • Offline Offline
  • Posts: 227
  • Model Boat Mayhem is Great!
  • Location: Nördlingen, Germany
Re: USS Nautilus - final Edition
« Reply #28 on: July 26, 2016, 10:19:26 pm »

The weld lines and rivets are applied. Next is the top coat:


Logged

Dr.Schmidt

  • Full Mayhemer
  • *****
  • Offline Offline
  • Posts: 227
  • Model Boat Mayhem is Great!
  • Location: Nördlingen, Germany
Re: USS Nautilus - final Edition
« Reply #29 on: July 30, 2016, 12:40:46 pm »

  The top coat: The boat is painted in the color scheme that the Nautilus carried during the crossing of the north pole; i.e. a two-tone scheme consisting of grey and black.


I chose RAL 7042 for the gray. The colors used are Südwest 2-component paints. The coats are high gloss, which will make the application for weathering filters and washes easier. The matt tone of the boat will finally be applied using a matt clear coat. 


Before the decks can be painted black as well, the hatches have to be assembled. The hatches are cast of pu-resin, the hand wheels are photo-etched parts.


Logged

ballastanksian

  • Full Mayhemer
  • *****
  • Offline Offline
  • Posts: 6,447
  • Model Boat Mayhem inspires me!
  • Location: Crewkerne
Re: USS Nautilus - final Edition
« Reply #30 on: July 30, 2016, 02:24:16 pm »

The contrast between the grey and black are much less prominant in the photo. She looks quite dashing.
Logged
Pond weed is your enemy

Dr.Schmidt

  • Full Mayhemer
  • *****
  • Offline Offline
  • Posts: 227
  • Model Boat Mayhem is Great!
  • Location: Nördlingen, Germany
Re: USS Nautilus - final Edition
« Reply #31 on: July 30, 2016, 05:33:18 pm »

The problem is, that the colors look different from every angel:


Logged

Dr.Schmidt

  • Full Mayhemer
  • *****
  • Offline Offline
  • Posts: 227
  • Model Boat Mayhem is Great!
  • Location: Nördlingen, Germany
Re: USS Nautilus - final Edition
« Reply #32 on: August 10, 2016, 09:19:34 pm »

  The decks are painted black after the hatches have been glued onto the decks. Then the base coat gets weathered. I started with the weathering of the surfaces beneath the waterline. Therefore I applied the method of my US colleague David Merriman:
 
1.) Mask the waterline using masking tape
2.) Tap on toothpaste with a round brush
3.) Lightly paint over the whole surface with white
4.) After the color has dried, remove the toothpaste with a damp cloth
5.) Tone down the effect using white and black
6.) The algae and dirt at the waterline is airbrushed on using white and green
7.) Remove masking tape 
 
I went for a moderate effect as I depict the boat in a young stage of its career,


Logged

ballastanksian

  • Full Mayhemer
  • *****
  • Offline Offline
  • Posts: 6,447
  • Model Boat Mayhem inspires me!
  • Location: Crewkerne
Re: USS Nautilus - final Edition
« Reply #33 on: August 10, 2016, 09:48:46 pm »

Cool weathering effects Doc! I will remember these for my builds.
Logged
Pond weed is your enemy

derekwarner

  • Full Mayhemer
  • *****
  • Offline Offline
  • Posts: 9,463
  • Location: Wollongong Australia
Re: USS Nautilus - final Edition
« Reply #34 on: August 10, 2016, 11:49:33 pm »

Doc..........you have certainly created the black paint line above the waterline faithfully to the images of the original vessel

The plate lines of the hull do not show any great angular displacement or variations, so can only assume the gentle wave level of the black line is following a welded plate seam?....however is strange to follow this line with paint as opposed to a straight painted line?

Technically a brilliant build....thanks for sharing...... Derek
Logged
Derek Warner

Honorary Secretary [Retired]
Illawarra Live Steamers Co-op
Australia
www.ils.org.au

Dr.Schmidt

  • Full Mayhemer
  • *****
  • Offline Offline
  • Posts: 227
  • Model Boat Mayhem is Great!
  • Location: Nördlingen, Germany
Re: USS Nautilus - final Edition
« Reply #35 on: August 11, 2016, 06:03:03 am »

The photo is misleading. Look at these ones:


The tricky thing is, that the hull, even if it does not look like it, has a rather complex shape. And the boat floats with the deck not being horizontal but tilted upwards to the nose. There hardly any photos that show a perfect side view. So I basically copied the paint scheme of the Blue Ridge Model of the Nautilus, which I think is the most accurate around:


Logged

NFMike

  • Full Mayhemer
  • *****
  • Offline Offline
  • Posts: 1,054
  • Location: Hythe, Hants, UK
    • Plague Marine Services
Re: USS Nautilus - final Edition
« Reply #36 on: August 11, 2016, 09:24:16 am »

Looks to me like it's not a painted line as such on the prototype. You can clearly see in the top picture of #35 that the lower, dark, section is the pressure hull (?), the upper, grey, is the 'superstructure', and the curvy black line between them is a shadow as the superstructure part does not touch the pressure hull most of the way - look at the edges of the anchor housing.

derekwarner

  • Full Mayhemer
  • *****
  • Offline Offline
  • Posts: 9,463
  • Location: Wollongong Australia
Re: USS Nautilus - final Edition
« Reply #37 on: August 11, 2016, 10:29:30 am »

mmmmmmmmmm. in this earlier image....the curved line does appear as the intersection between the water hull and the pressure hull....

But hey.....I did not ever work in submarines hulls] ...just some of the control systems.............%).............

Having said this.....I am still unsure of the actual point of the wavey line..............Derek
Logged
Derek Warner

Honorary Secretary [Retired]
Illawarra Live Steamers Co-op
Australia
www.ils.org.au

Dr.Schmidt

  • Full Mayhemer
  • *****
  • Offline Offline
  • Posts: 227
  • Model Boat Mayhem is Great!
  • Location: Nördlingen, Germany
Re: USS Nautilus - final Edition
« Reply #38 on: August 11, 2016, 02:03:51 pm »

The problem is: There are no accurate Nautils plans (at least I don't have any). There are 2-3 Plans around and all are wrong in certain aspects. So what I did is comparing plans with photos and my CAD design until everything was as close as possible for my eye. I added some features that make manufacturing easier and that's the result. So in terms of scale, that's as good as I got.....
Logged

NFMike

  • Full Mayhemer
  • *****
  • Offline Offline
  • Posts: 1,054
  • Location: Hythe, Hants, UK
    • Plague Marine Services
Re: USS Nautilus - final Edition
« Reply #39 on: August 11, 2016, 07:06:54 pm »

Having said this.....I am still unsure of the actual point of the wavey line..............Derek
I'd think it's just a gap for water to get in and out of the water hull easily. The odd curvature is because it follows the pressure hull which appears to not be a simple cylinder.

derekwarner

  • Full Mayhemer
  • *****
  • Offline Offline
  • Posts: 9,463
  • Location: Wollongong Australia
Re: USS Nautilus - final Edition
« Reply #40 on: August 11, 2016, 11:29:17 pm »

Yes Plague.....looking more at image 57654675...I would have to agree there may be a free flowing gap between the upper float tank and the lower pressure hull

However in the most sophisticated submarine of its day...having a free flowing ballast tank is hard understand

Derek
Logged
Derek Warner

Honorary Secretary [Retired]
Illawarra Live Steamers Co-op
Australia
www.ils.org.au

Sub driver

  • Full Mayhemer
  • *****
  • Offline Offline
  • Posts: 612
Re: USS Nautilus - final Edition
« Reply #41 on: August 11, 2016, 11:43:22 pm »

Hi.
Looking at the photo it is just where the cylindrical hull meets the free flood area of the upper caseing and deck thats all.It allows water to flow out from the free flood area (deck structure ) when surfacing a lot more quieter and effecient than lots of slots.
Regards
Sub.
Logged

BrianB6

  • Full Mayhemer
  • *****
  • Offline Offline
  • Posts: 1,191
  • I'm not sure if I can get up from here
  • Location: Melbourne
Re: USS Nautilus - final Edition
« Reply #42 on: August 12, 2016, 02:38:19 am »

Very nice model
Sorry I cannot add to the discussion about the lines.   The little boat we were in to meet her off Weymouth, after the North Pole trip was bobbing about to much to notice such things.   I do remember she just appeared out of nowhere.
Logged

Dr.Schmidt

  • Full Mayhemer
  • *****
  • Offline Offline
  • Posts: 227
  • Model Boat Mayhem is Great!
  • Location: Nördlingen, Germany
Re: USS Nautilus - final Edition
« Reply #43 on: August 12, 2016, 10:19:46 am »

Now I understand the question. I thought it was about the actual shape of the line, but it's about the origin. O.K., the folks who posted before me are perfectly right. The line is actually a gap between the deck superstructure and the circular lower hull. The superstructure is free flooding and the gap actually is there to farin the water. The original Nautilus had limber holes, additionlaa to the gap, but the limber holes were welded shut after the sea trials. Here's a better pciture:


My model does not replicate this gap, as it's not compatible with the dry hull setup I went for.
Logged

NFMike

  • Full Mayhemer
  • *****
  • Offline Offline
  • Posts: 1,054
  • Location: Hythe, Hants, UK
    • Plague Marine Services
Re: USS Nautilus - final Edition
« Reply #44 on: August 12, 2016, 10:36:03 am »

It appears that the position lights were changed/moved at some time after this - and probably a lot of other stuff too  :-)
Shows how building an accurate scale model of even something as smooth as a sub needs careful research.

Dr.Schmidt

  • Full Mayhemer
  • *****
  • Offline Offline
  • Posts: 227
  • Model Boat Mayhem is Great!
  • Location: Nördlingen, Germany
Re: USS Nautilus - final Edition
« Reply #45 on: August 12, 2016, 01:10:32 pm »

They moved and got smaller. The frontal light on the sail was removed too...
Logged

Dr.Schmidt

  • Full Mayhemer
  • *****
  • Offline Offline
  • Posts: 227
  • Model Boat Mayhem is Great!
  • Location: Nördlingen, Germany
Re: USS Nautilus - final Edition
« Reply #46 on: August 21, 2016, 01:15:46 pm »

  On it goes with the aging of the base coors. I mainly use filters and washes by the company M.I.G.. A slow process where one applies alternate coats of ultra-thinned colors. The curing times between the cotes takes quite some time, but it’s worth the effort.  In addition the ship numbers are airbrushed using the photo-etched stencil.


The bridge and the bow planes are painted as well:


Logged

Dr.Schmidt

  • Full Mayhemer
  • *****
  • Offline Offline
  • Posts: 227
  • Model Boat Mayhem is Great!
  • Location: Nördlingen, Germany
Re: USS Nautilus - final Edition
« Reply #47 on: August 21, 2016, 04:42:58 pm »

  Anchor: Painted, grey filter, black wash, and a little bit of rust….and then test mounted:


The bow planes in their places for the first time. One can nicely see the 60° tilt of the planes. Next they will be glued into place.


Logged

NFMike

  • Full Mayhemer
  • *****
  • Offline Offline
  • Posts: 1,054
  • Location: Hythe, Hants, UK
    • Plague Marine Services
Re: USS Nautilus - final Edition
« Reply #48 on: August 21, 2016, 06:35:54 pm »

Looking good now.
Do the planes have to be glued? They look vulnerable, thinking about transportation, so might it be worth seeing if they could be made removable.

Dr.Schmidt

  • Full Mayhemer
  • *****
  • Offline Offline
  • Posts: 227
  • Model Boat Mayhem is Great!
  • Location: Nördlingen, Germany
Re: USS Nautilus - final Edition
« Reply #49 on: August 21, 2016, 07:14:28 pm »

This is my second boat I built this way. The planes are quite stable and transportation is not an issue.....
Logged
Pages: 1 [2] 3   Go Up
 

Page created in 0.109 seconds with 22 queries.