| Steve Middlebrook's Yorkshireman Blog! |
|
Steve's other stuff ! |
|
|
|
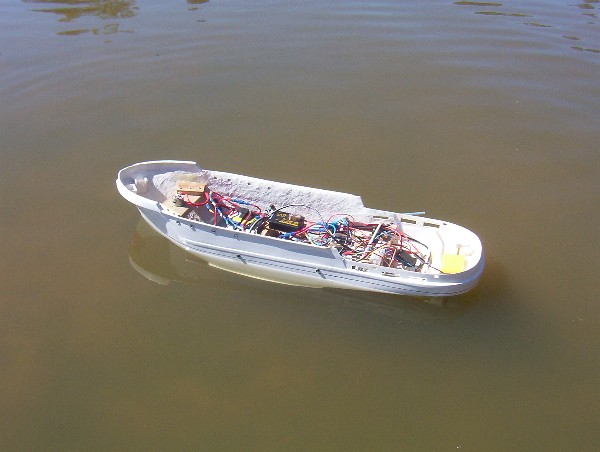
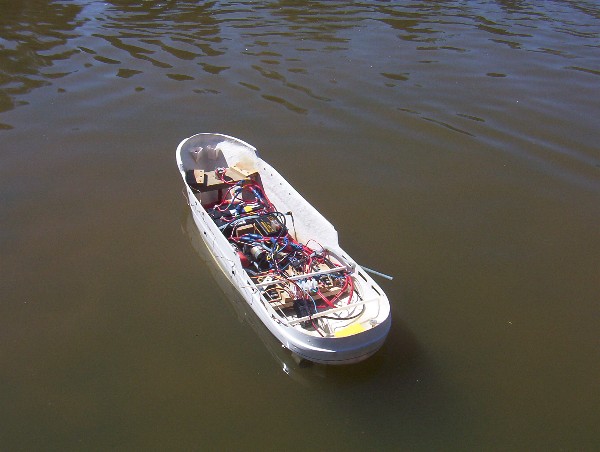
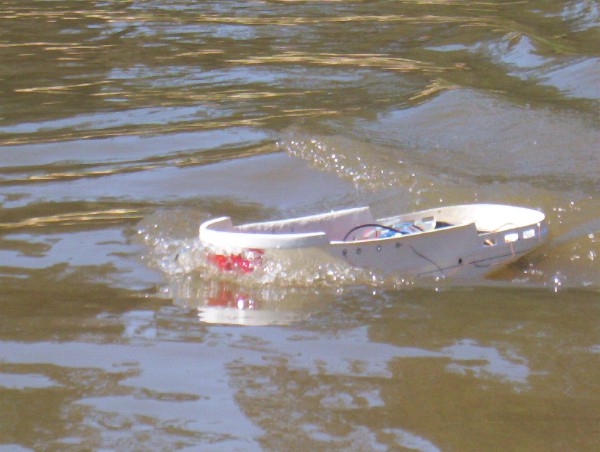
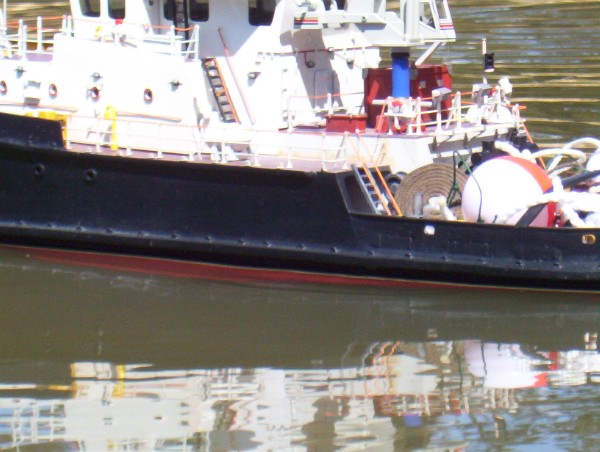
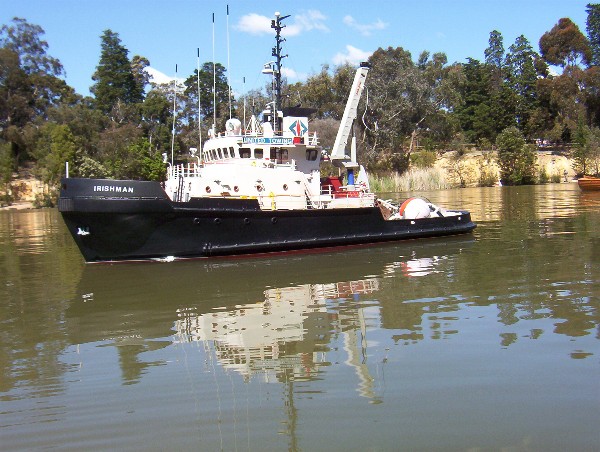
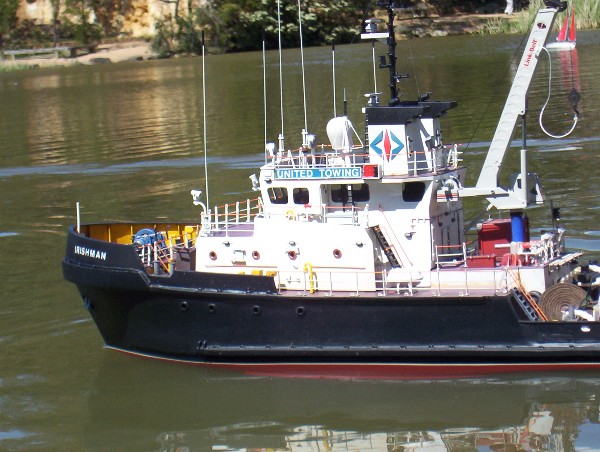
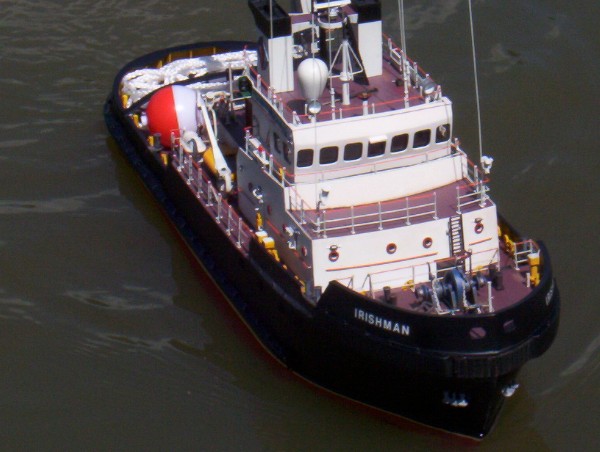
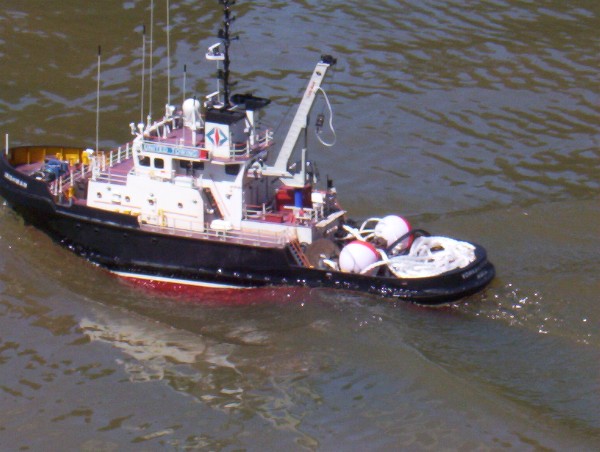
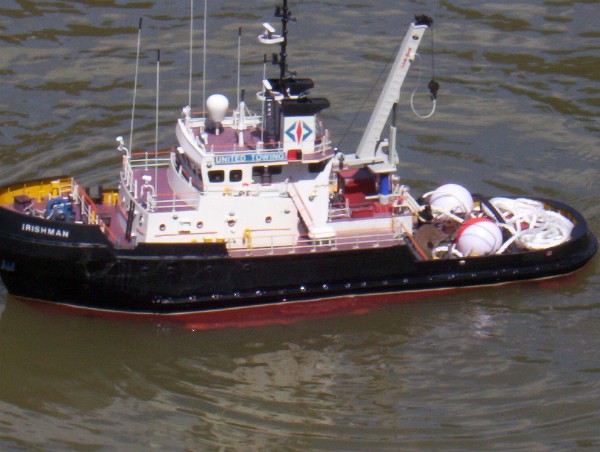
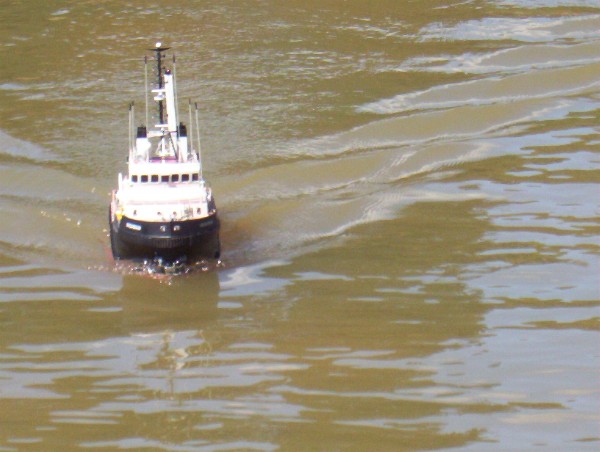
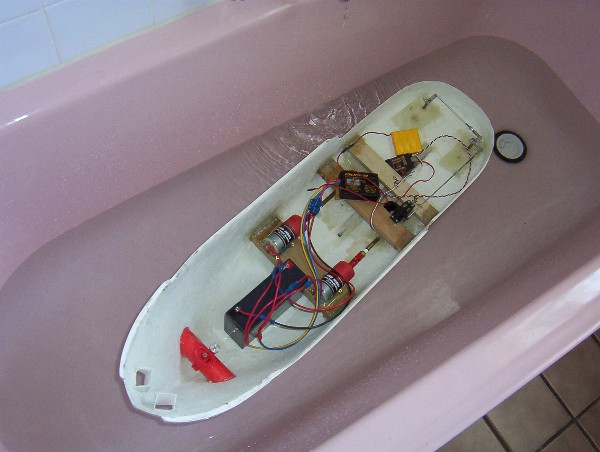
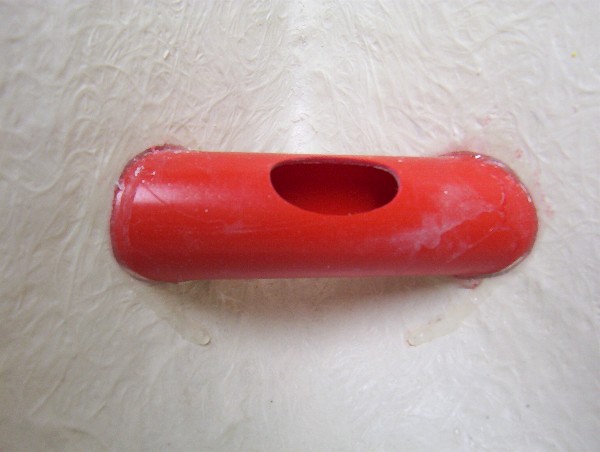
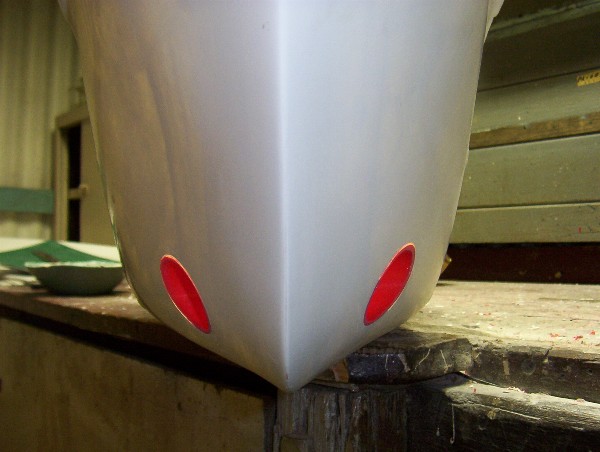
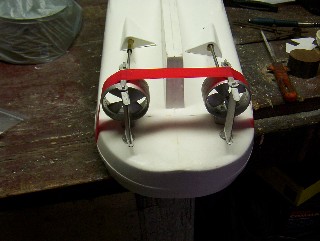
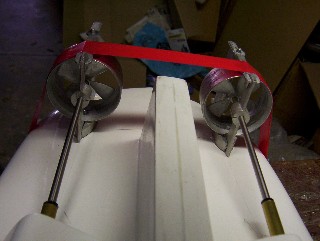
G’day Martin Hope things are starting to Thaw out. Another beautiful day here in paradise (any day that you don’t have to work and can go boating is that). A nice 32 degrees Celsius calm wind, good mates and getting to try out the new build for the first time. All went well and the hull performed better than I expected. The Bow Thruster is able to spin the boat either way with no problems. The main motors went absolutely fantastic, but at this time I encountered my first problem, they go to good and the bow wave pushes up the anchor wells and dropping water into the hull, but the bilge pump took care of that fairly quickly, as you can see from the pictures the easiest way to fix it at the time was just to tape over them. Turning was good doing a full turn within 2 to 3 hull lengths. The water cannon pump was great and went well. So a few problems as they stand at the moment 1; Seal the tops of the anchor wells, either that or slow the boat down, but I would rather keep it throttled back and keep the extra speed for any emergencies that might arise (like having to get out of another boats way in a hurry. 2; Fix the rubber in position, as the White metal clamps on the rudder post tops don’t have enough bite in them. 3; Find and fix the small water leak in the bottom of the hull, I think this is around the pick up for the water cannon pump, might have to inject some silicone in there somehow. 4; Get on with the rest of the build. One of the most pleasing things is that the hull floated just above the water line leaving enough room to ballast it down to the right mark and I could not believe the pulling power with the twin 50mm propellers in the Kort nozzles, I did have one small problem here though and that is that the starboard prop sucked in a bit of rubbish that was sitting on the bottom of the lake during the pull test. Have to keep an eye out on that one as there is on easy fix to that one. Look out anyone I find throwing rubbish around the lake Cheers Steve Ps; its bloody good to see some result after looking at the think in the shed for the last 12 months or so and it has given me a bit of a spur on to get the rest of it finished. ( Nothing like a bit of progress to get you spurred on! - Mayhem ) |
|
Part 9
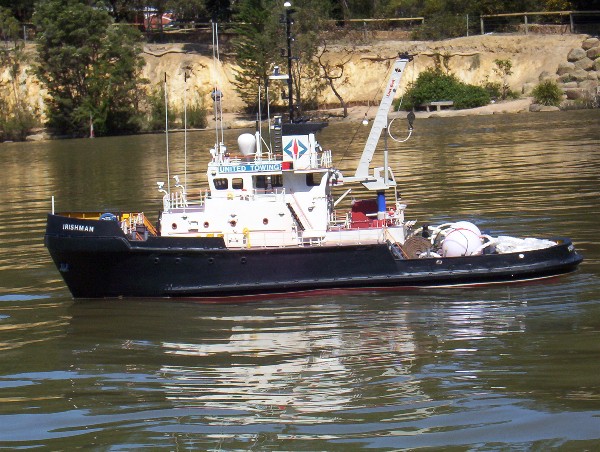
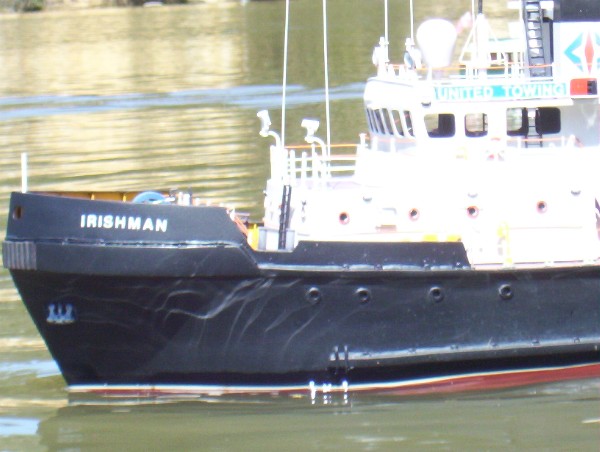
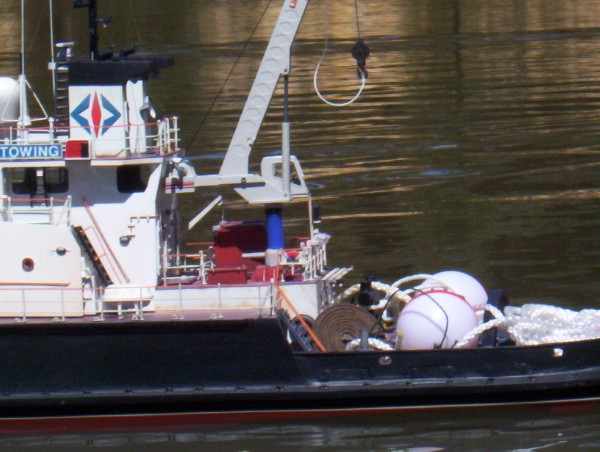
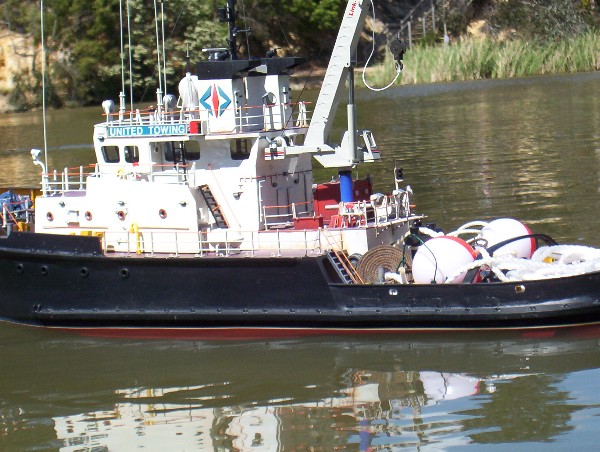
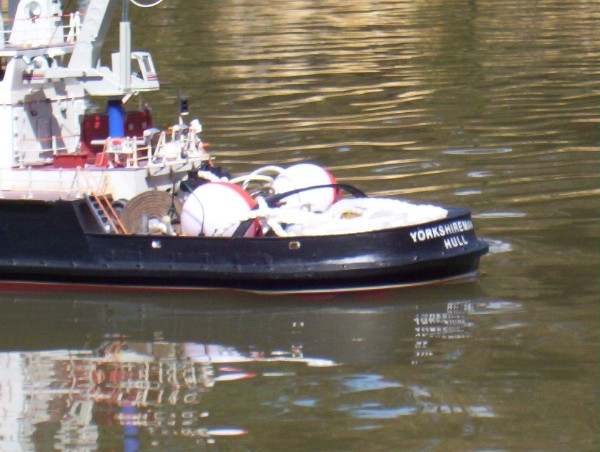
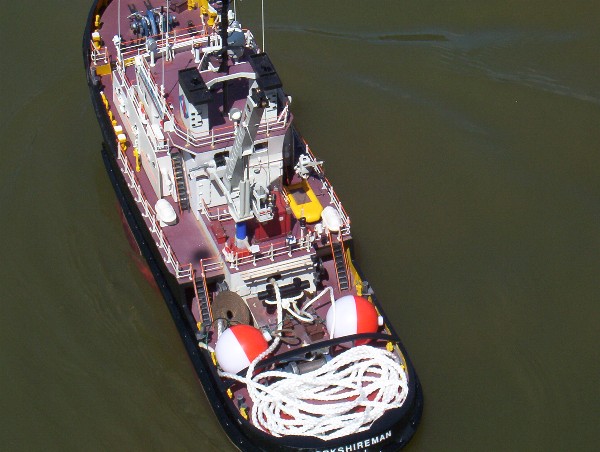
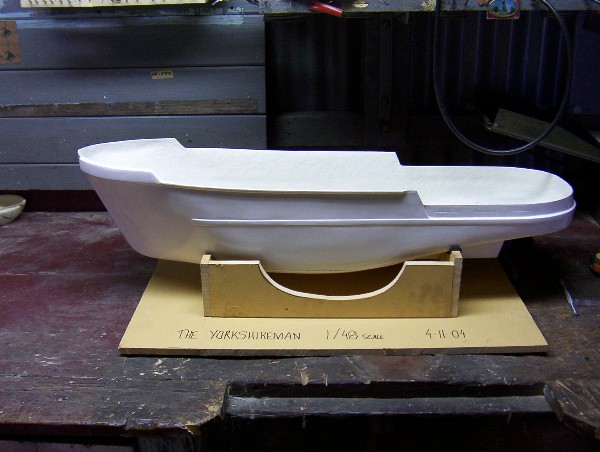
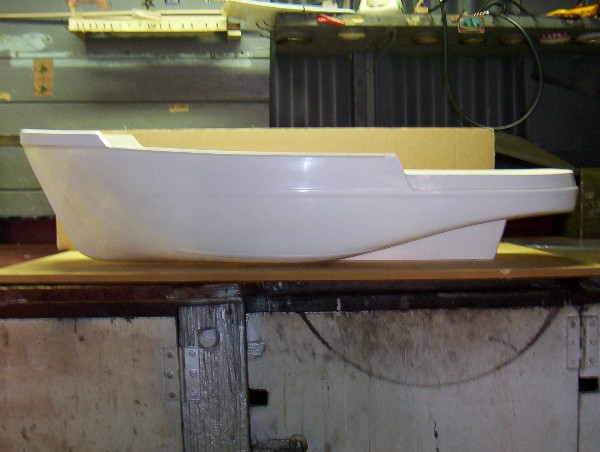
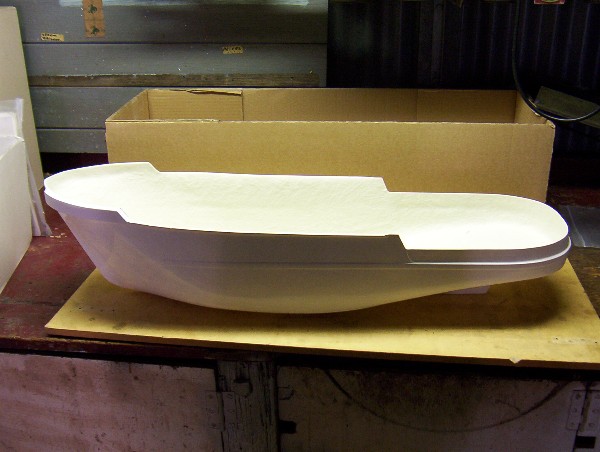
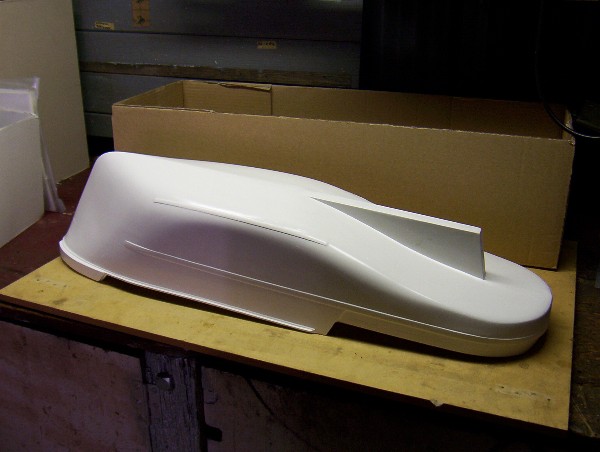
There is nothing to say about this model and I don’t care what anyone says it is at this time the yardstick that I will be using for my build of the same kit. It just goes to show what a well built kit this can be and is a credit to the people at Model Slipway for producing a great kit. Twin screws direct drive to 45mm four blade propellers in fixed Kort nozzles, a working bowthruster and sound system. Perfectly balanced and running like a dream. I have to admit as well that it did make me a bit depressed, looking at her and thinking back to the mess on my bench and shed, it so depressing I am going to have an anti-depressant (the on that comes in a can and when carefully poured into a glass has a beautiful head on it)
|
|
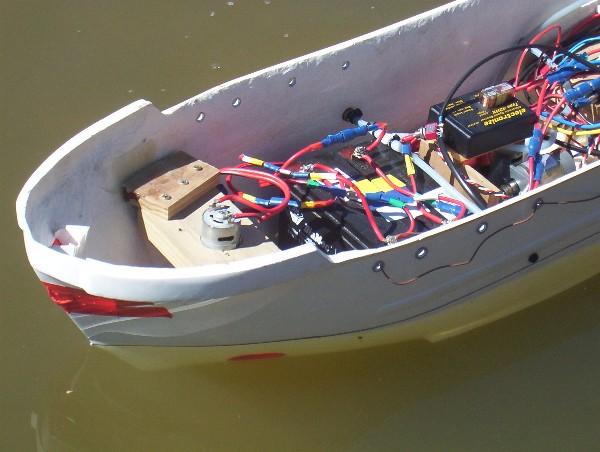
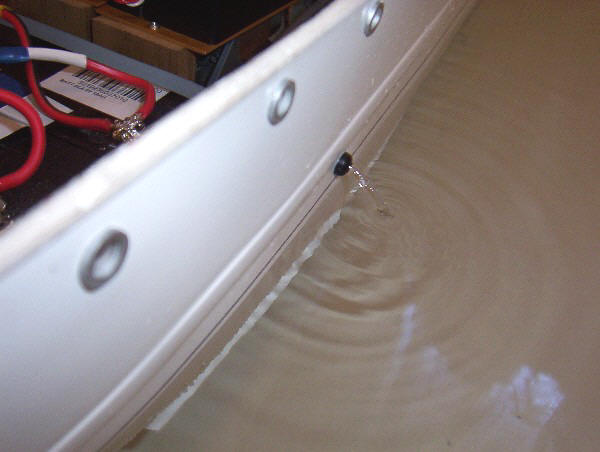
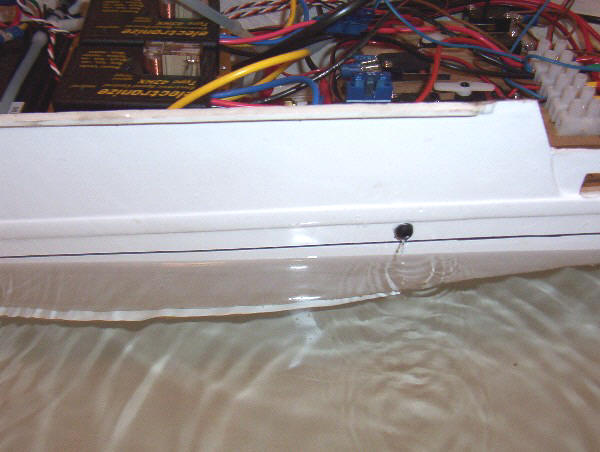
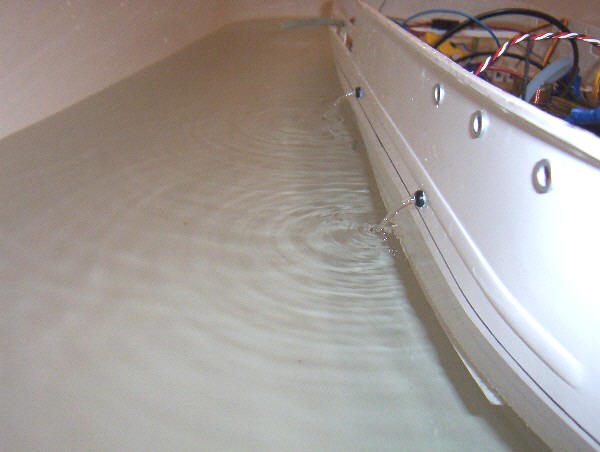
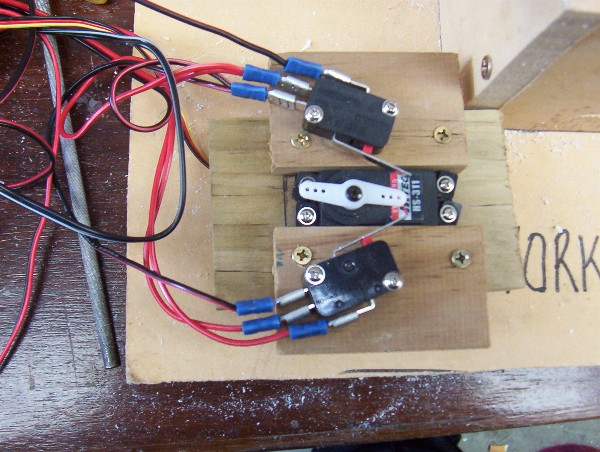
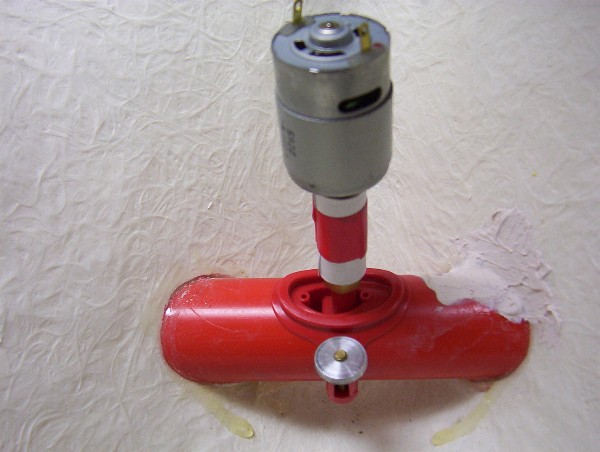
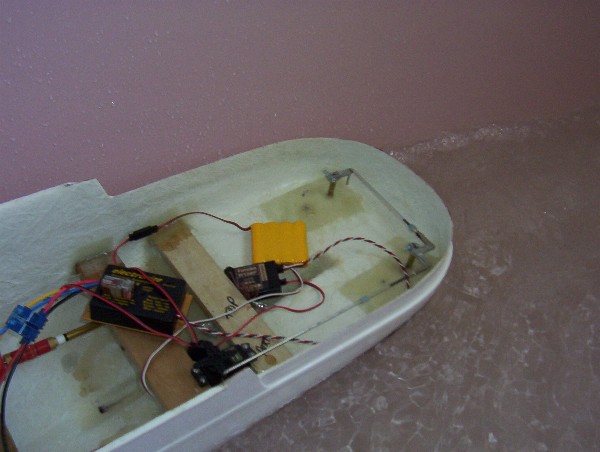
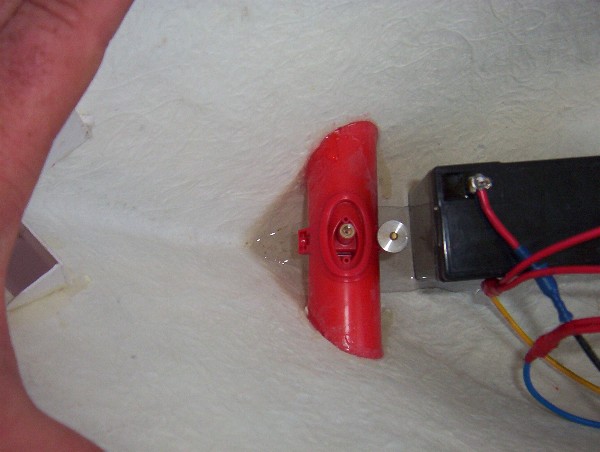
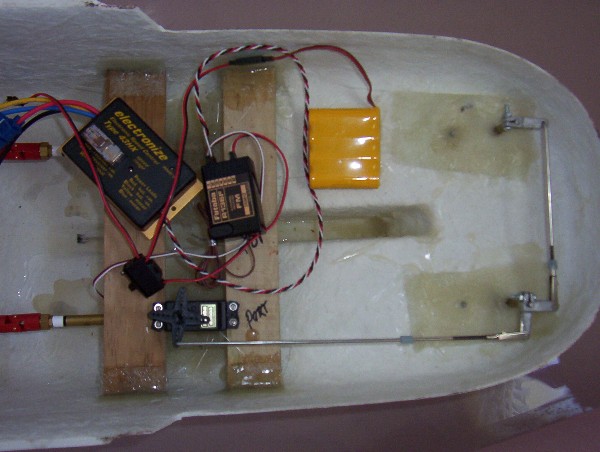
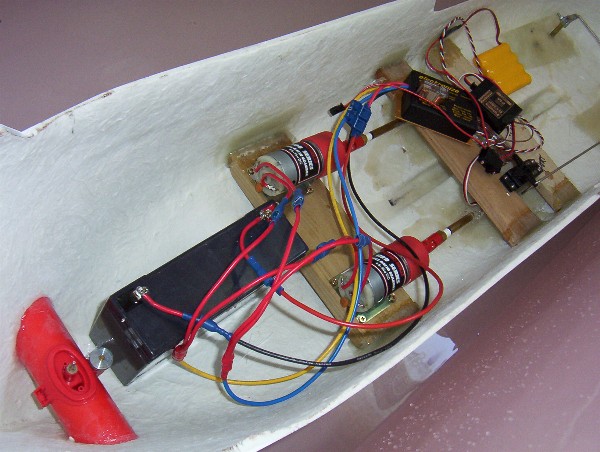
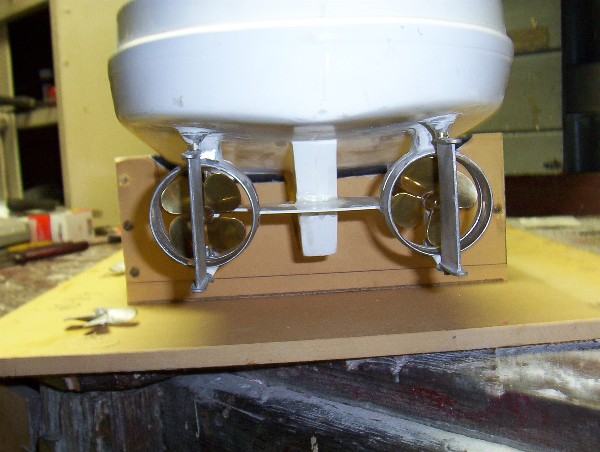
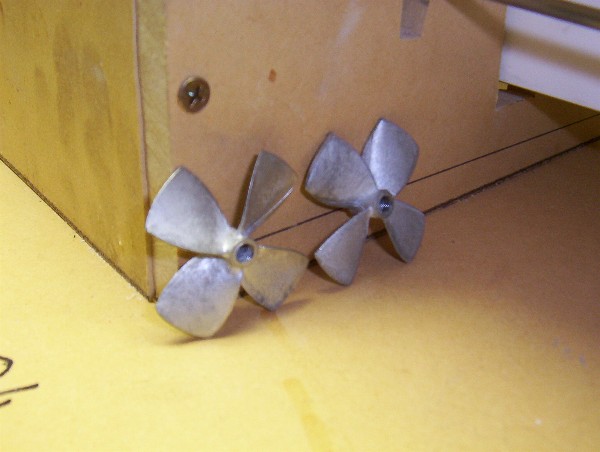
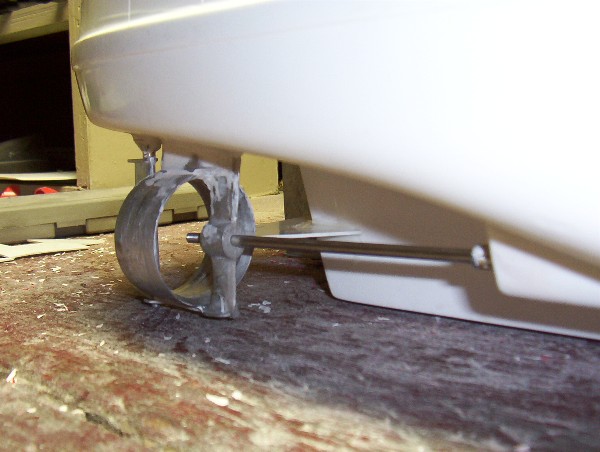
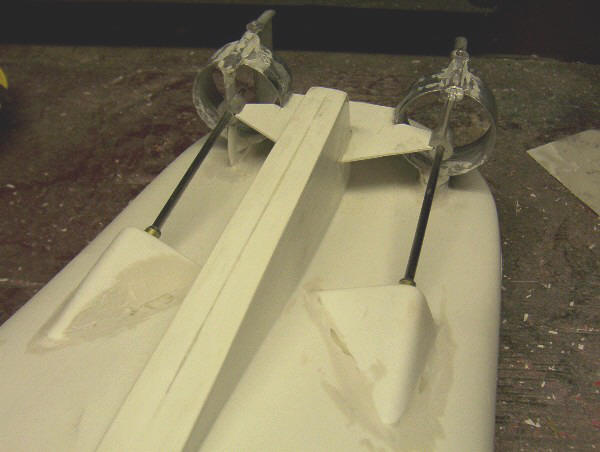
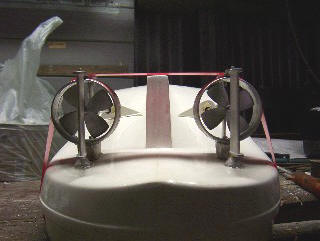
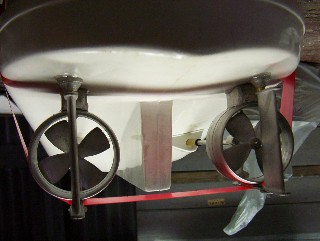
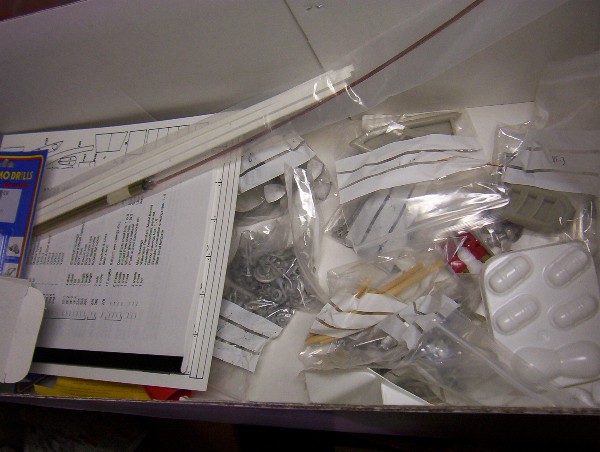
Part 8 Good news, got the week off (hooray) bad news, got to work this weekend (bugger). But trying to put the time of work to good use and get a bit more done on the Yorkshireman. All the electrics are fitted and working just needs to tidy up a bit of sloppy wiring and hopefully get to work on the deck. There are six (6) electric motors in the hull. Two main motors on a 2.5 to 1 reduction driving a left and right hand 50mm four bladed brass propellers in fixed Kort nozzles, each motor is running on 12 volts using its own Electronize speed controller off a Y lead from the radio receiver. One Bow Thruster running on 6 volts controlled by a single servo using the two limit switches that I spoke about on a previous update. One windscreen pump using 12 volts that is mounted straight through the hull on a rubber grommet, this pump is to be plumed up as the water cannon, and I think it’s going to work extremely well, at the present time it having no trouble shooting a sold stream of water out of a 3mm hose (I cant give an estimate of how far at this time without getting into all kinds of trouble, I think she who thinks she is boss might spit the dummy if I shoot the water across the bathroom) One 6 volt motor on a diaphragm pump that is to be used to clear any water that might find its way into the bilge. That goes out an outlet just above the waterline. Both of these pumps are controlled by a single servo, using a similar method to the Bow Thruster. The last motor is a gear pump on 12 volts which gives the effect of cooling water coming out above the water line on three outlets, the hardest bit of this system was trying to balance the flow out of each outlet, but using a couple of cable ties on the tubes to the first two outlets quickly solved the problem. Also if required this pump can also be plumbed up around the two main motors for cooling if necessary.
I’ve attached a couple of
pictures of the outlets with the boat sitting in the bath (just hope she
doesn’t see them) and all the other systems work well, cant wait to get it
out to the lake and see how it goes, if the bath trials are anything to go
by its going to get up and charge through the water like a Tug Boat
should. |
|
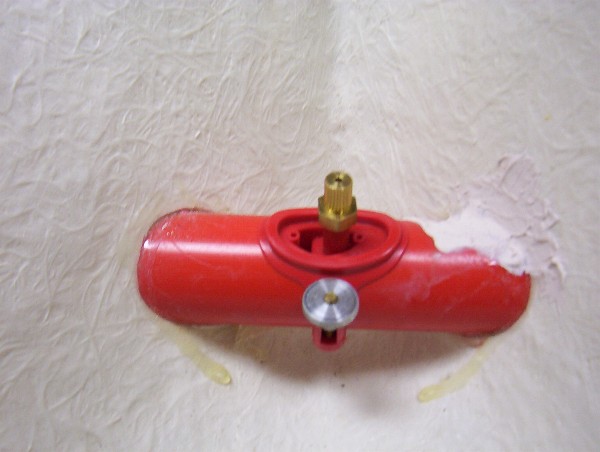
Part 7 One of the problems I wanted to solve was how to run the Bow Thruster with out the need for a speed controller, I couldn’t see a need or slow revolutions flat out one way or the other seamed the go, so after searching the links on the above mentioned web site I found a way of running it of a single servo on Alan’s Boatyard: http://website.lineone.net/~alanann/revswtch.htm and it works a treat (see I could always use the servos that are being given away as a prize on a web site). So the switch was set up and I am happy with the result. Been thinking of making another in the same manner to run the fire pump and I bilge pump of the one channel (there goes another servo).- Hey! You just won two off Mayhem!! ;-) Martin
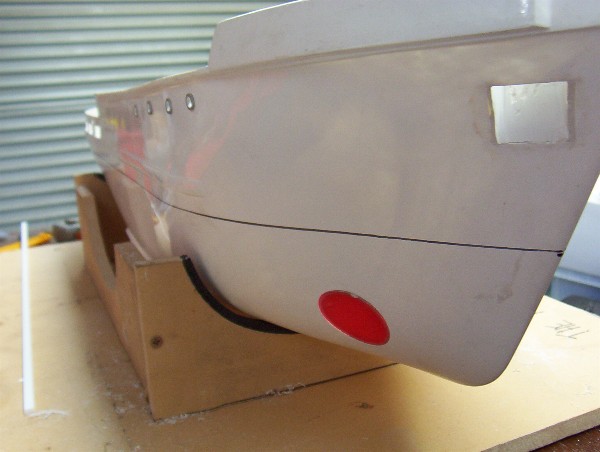
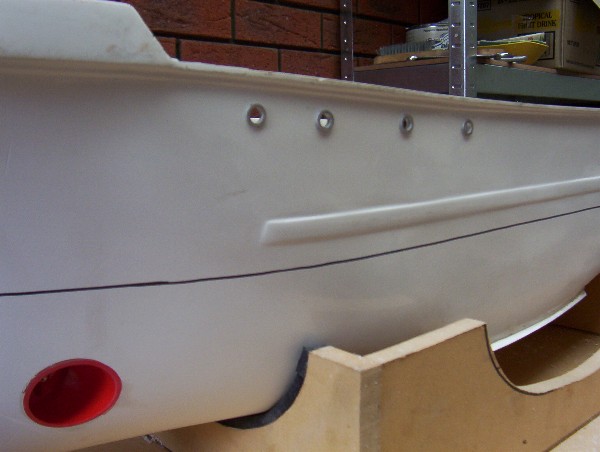
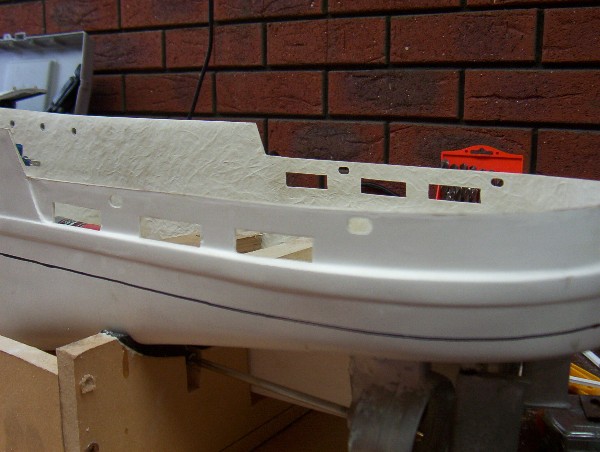
Have cut the freeing
ports and other holes around the Stern, fitted the portholes down both
sides of the hull. The weather is a bit on the crappy side today, cold
with a forecast of heavy rain so the water line was marked up as well.
With a bit of luck and a bit more work I am hoping to get the deck on in
the next couple of weeks and then plan on taking her to the lake to see
how she is going to perform. |
|
Part 6
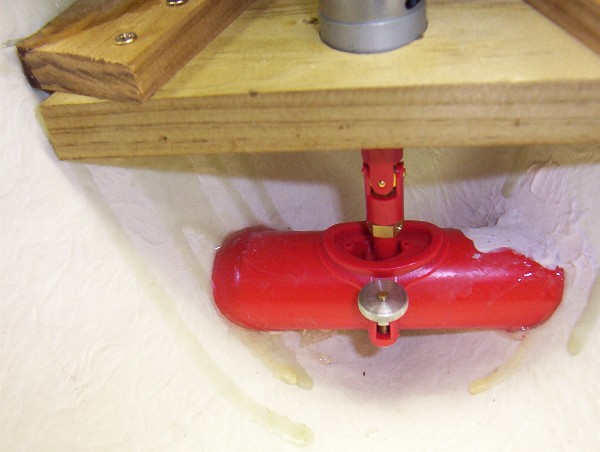
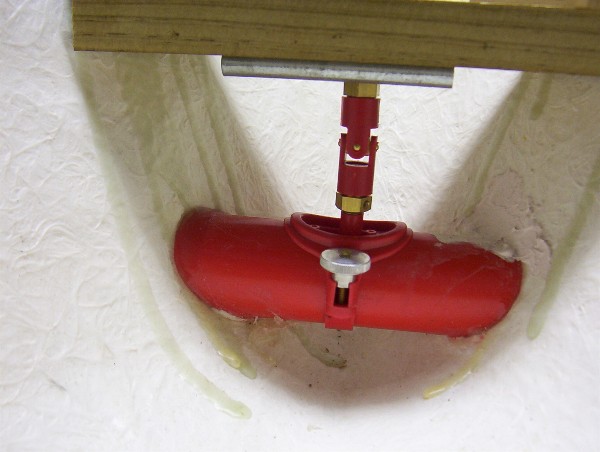
I’m pleased to say tat a little bit more progress has been made on the Tug. After looking at a lot of different bow thrusters and how the motor is connected I decided to do away with the idea of mounting the motor directly on the thruster tube, so as you can guess by now this required a bit of thinking time (more Beer) and the decision was made to mount the motor to the hull, so this is the result. Two blocks of wood are glassed onto the inside allowing another block to be fixed to these two mounting blocks, this also allowed me to get the correct alignment of the motor with a universal joint allowing for any minor discrepancies. All in all I am happy with how it turned out. I think the next problem is how to tackle the water cooling pumps, so it might be time to go to the motor car wreckers and get a couple of water pumps and see how to get the solution to the problem (I think its just an excuse to drink more Beer), after this stage it might be time to get working on the deck and superstructure. Looks like we are going to have to move house soon, bugger this will put the breaks on the build for a while, at least until I can get a new workshop set up. |
|
|
|
Part 5 Got some work done on Tug, and took the big step of the first launch of the hull in the bath. All went as well as I could expect and I was more than happy to find only one single water leak around the bow thruster tube, not to bad well at least it’s only in one spot. The motor performance was better than I expected and it looks like she is going to need a fair bit of ballast up at the bow (maybe see how many batteries I can fit up there, might as well put the weight to some use) The rudders seam to be working fine, not that I can really tell in such a confined bit of water. So as I sit back and congratulate myself with another Beer, or 6, maybe 12, I bask in the glory of my first endeavor as a master ship builder and skipper, all be it for a short time and look at the rest of the plans and try to decide what to do next, keep working on the hull. I want to get a fire monitor pump and a water pump to get a trickle out each side, or do I take the next major step and put the deck on as to start on the superstructure.
Life’s
great mysteries, what to do next, think I will have another Beer. |
|
|
|
Part
4
|
|
Part
3
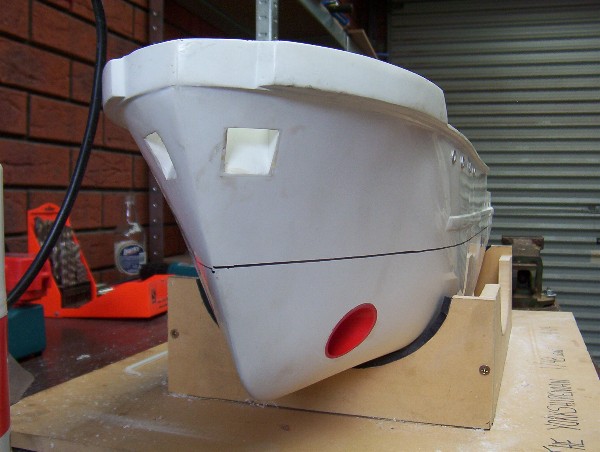
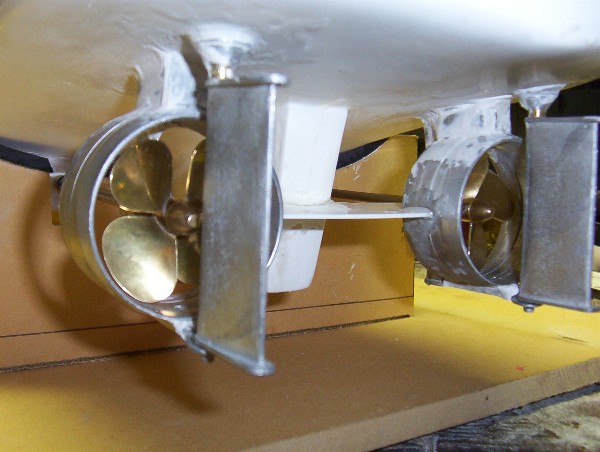
As promised here are the pictures of the project. I am happy with the way it is going at the moment and have all ready had a couple of minor problems, the first was cleaning up the filler around the white metal castings, the weather has been that hot causing the filler to start to go off before I can get it how I want, which left a fair amount to clean up after it had set properly, the second was after cutting out the section to go between the two Kort nozzles and the keel that it was to small, luck was on my side though and there was enough sheeting to cut a new section for a good fit. Putting the Bow Thruster in was a bit daunting but after the first cut (with the usual sweating) everything went to plan and I am more than happy with the result. But the holes look bloody big before the tube goes in place. Off to see a mate on the weekend for a few dozen beers, it’s not that far from home only about 350 kms each way so won’t be getting on the water Sunday. |
|
|
|
Part 2
G’day Martin - Here is the latest progress on the build, after a lot of thinking and a beer or two it was time to glue in the under water driving gear. As you can see I haven’t as yet fixed the shafts in place, I thought that it might be best to fix them in after the other bits have set so as to get the tubes at the same length. This job was a little bit fiddly but after it sets I will give the whole area a clean up and then use bog to smooth up after the shaft tubes and covers are in position. Its properly not the way to go about it but in my wisdom (or stupidity) I though it would be for the better. |
|
|
|
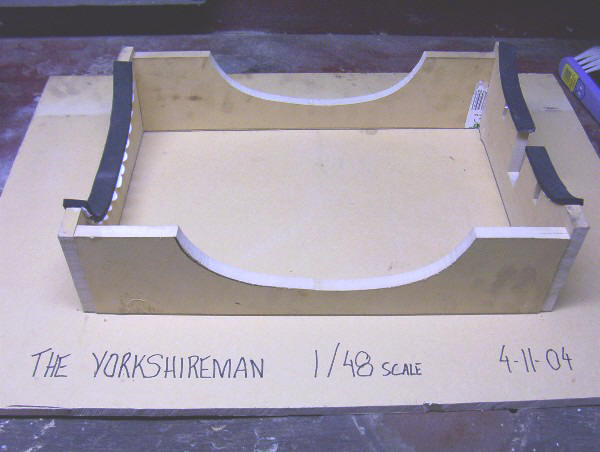
Well at last progress is underway. After reading the instructions twice
(and still not having a clue) I finally got of my arse and made the stand
of the model and as you can see it still needs a bit of finishing, but
then again Rome Wasn’t Built in a Day, or something like that (that’s what
my Pop says). I want to take my time on this job as what's the point in
rushing (and I want to go for Quality) so after a few beers and a few more
it was worth doing the job right the first time, not to mention that Model
Slipway have put some hard work into the model and I don’t want to let
them or myself down. |