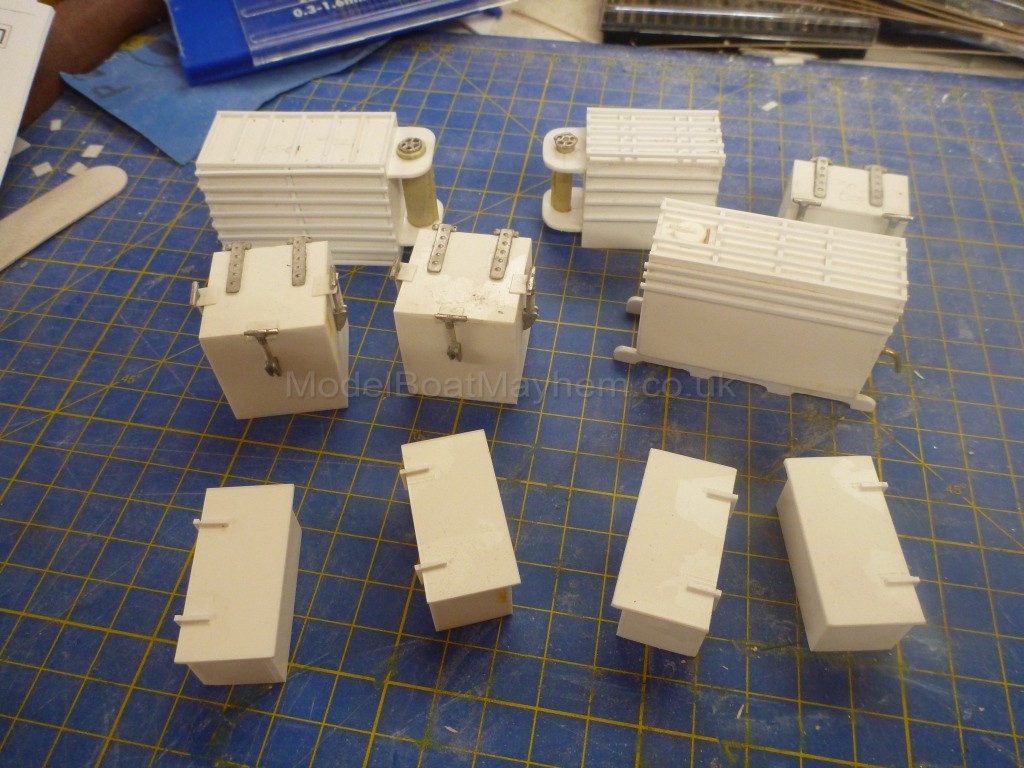
The production line for all the deck lockers is complete. I did find it very useful when putting the pieces together to use small 90 degree braces to keep everything square. The plastic sheets in the kit provide a plentiful supply of 90 degree corners that can be snipped off and added to the inside.

And here are all the boxes completed.

Another little oddity with the laser cut pieces – the water tank sits on two bearers, but something has gone awry with the design of the pieces supplied – I had to cut new ones. The picture shows the kit piece (top) and my replacement. Easy to see what happened there!

I moved on to some metal work. Firstly, the various handrails around the superstructure. The supports for these are supplied as white metal castings and needed very little fettling to be used. The brass rod for the rails isn’t supplied, but 1mm rod is easy to come by. All held in place with CA glue.

Then on to the mast with its radar arrays. The lower part of the mast is a supplied wood dowel that needs tapering. I popped it into the chuck of my drill and held a piece of abrasive paper around it until I had a suitable size/taper. The whole mast with the upper part and radar arrays looks very, very fragile so I intend to remove it and keep it in a separate container for transport. I put a socket from brass tube into the deck just behind the bridge, held in place with Araldite and with the lower half (below deck level) plugged with a piece of wood. The lower mast is a snug fit in this tube (or it will be once I have fine-tuned the diameter of the base – it’s a bit sloppy at the moment).

The upper part of the mast is a 2mm brass rod, which fits snugly in the two supports supplied. There are two parts to the radar array, one at the very top of the mast, the second slightly lower down. The main struts of these are 1mm rod. Fixing these to the 2mm rod was my next job. I considered both soft and silver soldering, but decided in the end to try drilling 1mm holes through the 2mm rod. I had spare 2mm for when this went horribly wrong, but actually it turned out to be fairly easy. I filed a small flat on the rod where the holes were to be, used a spring loaded centre punch to mark the spot and drilled through. Just like that.

Creating the arrays themselves wasn’t quite as straightforward. I did a test piece with the array elements from 0.5mm wire soft soldered in place, and another one with an element CA glued in place. I tried pulling each off, and both just bent rather than coming loose. (Yes, I know the soldering is a bit messy, but it was just a trial run

)

I decided in the end to solder the 1mm rod parts and to add the 0.5mm elements with CA. The completed arrays were then CA glued into the mast holes. To get the soldered parts square, I used a piece of marked out masking tape on a fireproof brick with the parts held in place by weights.

Then the frame was taped over a marked out piece of paper to add the elements.

The complete upper mast was added to the lower and here is the finished article.

I’ve now got to put it away somewhere I won’t keep knocking pieces off!
On the more general construction front, the superstructure is now glued to the removable deck panel. I had kept it separate until I had added the mast mounting tube mentioned above, so I could glue from the inside. No more work needed inside the superstructure so now it’s in place.

I think I am nearing the end of the various bits and bobs, at least the fittings trays are nearly empty now. The Lewis gun mounts are the only obvious bits left, should get those done this week. Summer activities have slowed me down a bit recently and I have another week away coming soon, but I think all construction should be finished by the end of August. There, I’ve set myself a deadline!
Happy modelling folks
Greg
 Author
Topic: Deans Marine Motor Gun Boat 1/24 scale (Read 26645 times)


