|
Schnellboot -
My Build of Jack's Robbe S130. |
|
|
Click photos to
enlarge . 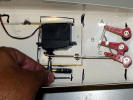 |
First of all, many thanks
to Chris "from the dark woods in Sweden" that spotted a
discrepancy
from last week's build, I quote.. |
 |
I bought some 18swg (about 1mm) steel rod to remake the linkages this week. The end needs annealing before bending. as it's so small, a fag lighter will do. as I said last week, this is a real fiddly job but worth while spending the time on now, as later getting into this compartment will require the skills of a contortionist! |
|
|
|
 |
As I want to get the major sub assemblies completed before painting anything time to go back to the dreaded deck join.
|
|
|
The instructions call for the main deck to be completed then glued down .... |
|
|
... the cockpit completed and glued down to the deck .... |
 |
... and then the forecastle fixed to the front of the boat and butt jointed to the cockpit..... simple! |
|
|
Lastly the hatch are fixed in place. Add paint and water....simple. |
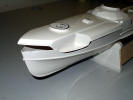 |
The trouble with this is the whole of the most important part of the boat, the bow, is a butt jointed. No reinforcing around the torpedo hatches, no reinforcing to the bows of the boat and very little on the cockpit. Ok so the hull is actually quite strong but sooner or later a fast boat will meet an immovable object... my money will be on the immoveable object! |
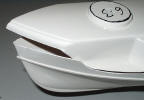 |
After a lot of "Ummming" & "Arrrrrring" and looking at the bows from every angle possible I decided that no matter what I do I'm going to have to do some filling and making good of all the joints... all I now had now to do was minimise the filling as much as possible. The less filler I could get away with the better the overall shape will turn out. |
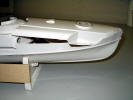 |
Just to compound the problems, the hull is quite thick ABS, but the forecastle moulding and not quite as thick and the two mouldings do fit together very well as you can see. Whatever I do the two pieces will have to be held together somehow during the gluing process to keep the whole thing in shape. |
|
|
The instructing inform you that a half round "stop-strip" is to be glued outside the forecastle and the hull rests on the outside of this strip??????!?? How the hell is this meant to make things any better? The hull is already out of shape! |
 |
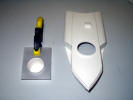
I decided that the hull was the most important
part here and so did as much of the cutting, shaping and sanding to the
forecastle as possible - if the 'worst came to the worst', at this point
I'm quite prepared to scratch build a completely new forecastle from
wood - that's how frustrated I was! "Right, that's enough for one day I'm getting annoyed now, so I'm going home to shout at the kids and blame the wife for something she didn't do!" |
 |
Next day, after a good nights rest..... it's not looking any better! Over a cuppa, I had a chat with my work
college 'Bradders'.... who basically said 'Rather you than me." and laughed! - fat
lot of encouragement he was! I've reread the Marine Modeller
magazine review and even Steve says he had a lot of trouble with this
part. Hmmmmm! Anyway, access into the bows during gluing up was going to be the key to this conundrum. I cut out the front gunners well. And what do you know, another "design feature"..... |
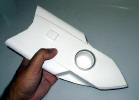 |
... the gunner's well doesn't fit the
stupid hole!??!!!!! Ah well! It can't get worse......! |
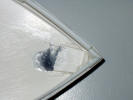 |
Starting at the bow I glue the strip on the other way round and use it as a proper lap joint. I glued two pieces into the bows and found I then had to trim the back about 1.5mm to allow for the curvature and thickness of the hull. The two smaller pieces in the nose are glued in the other way round ie. curved side out, this was much better. ( Incidentally one of the small bits "pinged" out while I was fitting it... I found it 5 minuets later stuck to my neck! ) The other piece of reinforcing is for the front Jack staff. |
 |
A previous model I had build, a submarine, SEAWOLF ( strangely enough a Robbe kit! ) I had also encountered this problem. To overcome this problem a series of tabs were made and glued along the joining edge to form an alligator's mouth - I would have to do the same sort of thing here. |
|
|
|
 |
To reinforce the joint around the torpedo launcher / well / outlet / bow cap... whatever I made this pretty Christmas decoration that would fit inside the hull and follow the curves. |
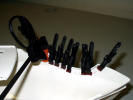 |
This was super-glued on. Hopefully the foredeck torpedo well will sit neatly on the 'shelf' and provide support and something to glue to. |
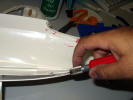 |
This is me hacking of the starboard side 'shelf' as this side shifted while gluing and 'took' before I could reset it!!! "Oh Bother again!" |
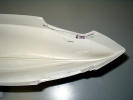 |
Eventually I got the bows into some sort of shape and I started to feel a little better about the whole thing. |
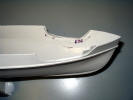 |
The reinforced, un-reinforced, re-reinforced starboard torpedo well. |
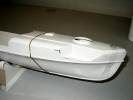 |
After much sanding, cutting and numerous trail fittings the forecastle fits the hull.... nearly. |
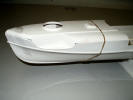 |
More of a case of "It fits where it touches!" |
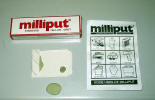 |
This week I also started to experiment with fillers. I know that ABS is a funny old plastic, Acrylonitrile-Butadiene-Styrene (ABS for short), e.g.. only certain glue with stick it together so choosing a filler might be a bit tricky. I first opted for Milliput. |
 |
I found Milliput hard to mix, wouldn't stick to the ABS and difficult to 'work' |
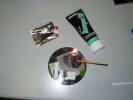 |
I looked up 'ABS filler' on
the internet the other night when I couldn't sleep and found that plastic
car bumper are usually made of ABS and you can buy 'repair filler in car
accessory shops. I turned off the light of and tried to go to sleep but at
the back of my mind this seemed very familiar! |
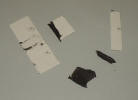 |
I don't know if the filler was old or the surfaces were not prepared well or I handed let it set fully but although it was quite sticky and easy to work, it didn't take and peeled off too easily. |
 |
I sent an email to
Steve Beasley
to ask if he had the same problems that I'm
having "Yes." The rest of the email is unprintable ! ;-) |
|
|
|
|
|
|

